How to Upgrade Door Knobs with Spray Paint, The Tried and Tested Method


The Tried and Tested Method to Upgrade Door Knobs with Spray Paint
by Sawdust 2 Stitches
This post contains affiliate links for your convenience. Learn more here.
Supplies Used:
- Foam Sanding Block
- Wash Cloth
- Craft Foam (or a cardboard box will work)
- Spray Primer (like this black primer, if you’re painting your knobs a dark color)
- “Very Fine” Steel Wool (grade #00, like this or this)
- Oil Rubbed Bronze Spray Paint (like this or this)
Tools Suggested:
- Screw Driver
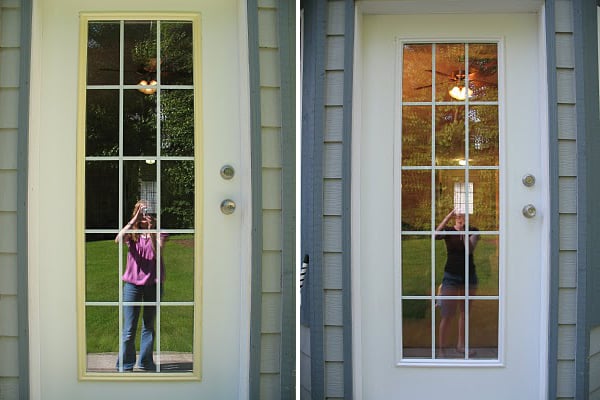
Step 1. Remove Hardware
Just DO IT! I know that some sites might tell you to go ahead and tape it off. “It’ll be fine!” they say. EXACTLY , we don’t want “fine”, we want stellar. I want to know that I won’t be fixing these things a few months down the road. So just take them off, take the time to prep these properly, and you cannot do that when they are attached to your door. Okay? Okay.
Standard door knobs only have two long screws. You do not need to remove them, just loosen and then turn (the base of the knob) it should pop right off.
Step 2. Sand/Scuff
Basic painting 101, if you want a really good adhesion of paint to a surface it will adhere much better to a dull surface, not a shiny one. I realize lots of spray paint/primers claim “no sanding required”. Well, it may not be required, but I highly suggest it. Now when I say “sand” it is not a long. labor intensive task, it is relatively quick and painless. I use a foam sanding block. It helps get in all the curves.
When “sanding” you are NOT taking off the finish, you are just scuffing up the surface enough that it becomes dull. 
Step 3. Wipe Down
After you scuff them up, you are going to need to wipe them down. You just need to remove the dust from sanding, and any leftover oils or dirt on the surface.
We are now ready to paint! Obviously, it is a whole heck of a lot easier to paint a stationary item. I choose to use craft foam. I holds the knobs steady and there are no runaway screws! You can also use a cardboard box, it is all personal opinion.

Step 4. Prime
I know what you are thinking, “but Corey, the spray paint I am using says ‘paint and primer in one'”. Well, I am just saying, I have done it both ways, and YES just the spray paint will work, it will hold up nicely for quite a long time… but I don’t want “quite a long time”, I want the doorknob finish to outlast the house! I never want to remove these stinking knobs ever again!
When priming I opted for black primer, because I will be using Oil Rubbed Bronze, and it will cover the black really nicely. Like with any spray paint, multiple, LIGHT coats is key! Don’t try and cover the whole piece all at one time. It will take forever to dry/cure and you will have drip marks.

Step 5. In-between Coat Sand
This step is quick and painless. After the primer has dried I quickly once over the knobs/hinges with “very fine” steel wool. It will make sure that your surface is perfectly smooth before you apply your final coat. After you have gone over the knobs/hinges with steel wool, wipe down with a damp cloth to remove excess dust.

Step 6. Paint Those Suckers!
You made it! You are ready to paint. (It’s true what they say, painting IS mostly prep work.) Again, when painting use MULTIPLE, LIGHT coats. Make sure you reference the application instructions on the can to see suggested dry times. Believe me, those guys know what they are talking about. Listen to them! I know being patient is the worst, but it will pay off! (I used this oil rubbed bronze paint.)
Step 7. Re-Install
Once they have had ample time to dry then re-install! There you have it, a quick and easy update for door knobs! If you are wanting to spray paint your door hinges no problem! Follow the same above steps, works like a charm!
Now that you’ve spray painted your door knobs… see what else you can spray paint!
A couple coats of spray paint can make a world of difference and turn something dated into something fresh, like:

lamps and decor

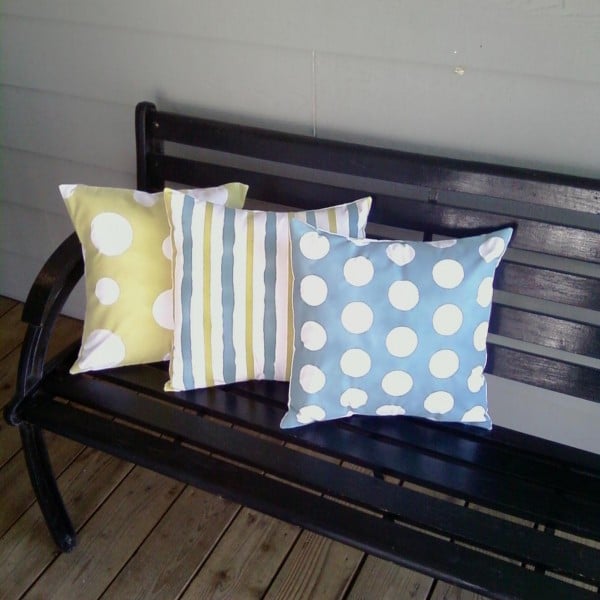
pillows (yes, you can spray paint fabric!)
countertops — yes, that’s spray paint!

Corey is the voice and grunt labor behind Sawdust 2 Stitches, she freely professes, that she has a problem... She CANNOT leave well enough alone.
She can typically be found hunched over a sewing machine and/or covered in sawdust. All in the effort to create a perfect balance of aesthetics and practicality in her home.


I love seeing stuff like this and I go right out and buy what I need. Saw the painting of the knobs a couple of years ago and yes, the spray paint is still sitting there waiting for me to get to the job! Great job.
I have done the same thing, often! To the point that I have supplies I can’t remember what project I bought them for 😉 Sounds like we are kindred DIYers, Pam! Thanks for the comment.
okay now i know i am not alone with the supplies and forgetting what they were for…….but i actually did paint my door knobs and they did not hold up to well. i thought i did a good job with prep but maybe its because they are levered handles………
Wow! Thanks for this. You solved my doorknob dilemma! Shelley
Can you paint entrance door knobs that have keys? I’m thinking not, but thought I’d ask anyway.
I was reminded of my bathroom door knobs I painted years ago. I did not do right by them and they look horrid! Now that I’m older and wiser (?) I should take care of them 😀 Thanks!
I didn’t believe it until I tried it, sanding the door knobs before the initial spray makes such a difference. We painted one with and one without sanded, the finish on the sanded door knob is soo much better!!
Doing a remodel and while waiting on contractors this will be my Project! Thank you
I am wondering how they are holding up? We need to make a decision soon to paint or replace.
How have the doorknobs held up one year later?
I am in the middle of this project. So far so good, with two exceptions. I did not think I would have to prime/paint BOTH sides of the hinges, but when you hang them, you can see the gold come through. DUH. So if you are doing this, please do both sides. Also, I bought very fine steel wool and when I use it on the knobs, etc., it leaves a horrible light “hairy” mess. Did anyone else have this issue? Am I doing something wrong? Thanks for this tutorial!
Just did this two ways. I referred to another tutorial that said to spray the knobs with acrylic. That actually caused bubbles and an uneven surface so second time around I skipped the acrylic. I also didn’t want to remove the hinges so I painted them the same color as the door with a regular paint brush and the door looks amazing.
love your idea to paint the hinges Mary, thank you for sharing. This will save me alot of time.
How do they look now?
Hi! I have some door knobs that have a little lock you turn in the middle of the knob. Is that ok to spray paint those? I worry it might get the lock jammed. Thanks!
Great question, Aimee. I would think that unless you’re really intentionally getting a lot of paint in the moving parts of the lock, it wouldn’t be an issue. I’d test one first to be sure, though. I’d love to have you report back if you try it!