Winter Decorations: Snowman Wreath

Celebrate the chilly season with this easy winter decoration! Our easy, no-sew no-glue snowman wreath can be made in one afternoon.
For more winter decoration ideas, check out snowman door decorating kit, a fun collection of DIY outdoor winter decor, and 25+ Best Winter Wreaths.
I saw this cute duct tape wreath by Jones Design Co while I was looking for inspiration, and I thought, “That would look cool in felt…” and the rest is history.
Winter Decorations: Snowman Wreath Tutorial
This post contains affiliate links. Learn more and read our full disclosure policy here.
Supplies needed to make a Snowman Wreath for winter decoration:
- 1.5 yards 60″ wide white glitter felt (for a plain wreath with no snowman face, any color felt would work)
- 16″ Foam Wreath Form
- 500 to 750 dress maker (straight) pins
- Tiny bit of black fabric
- 1 sheet of 12x 12 cardstock paper, orange
- 1 sheet of 12 x 12 cardstock paper, black
- wired ribbon (optional)
- Tape
- Paper stapler and staples
Instructions for making a Snowman Wreath winter decoration:
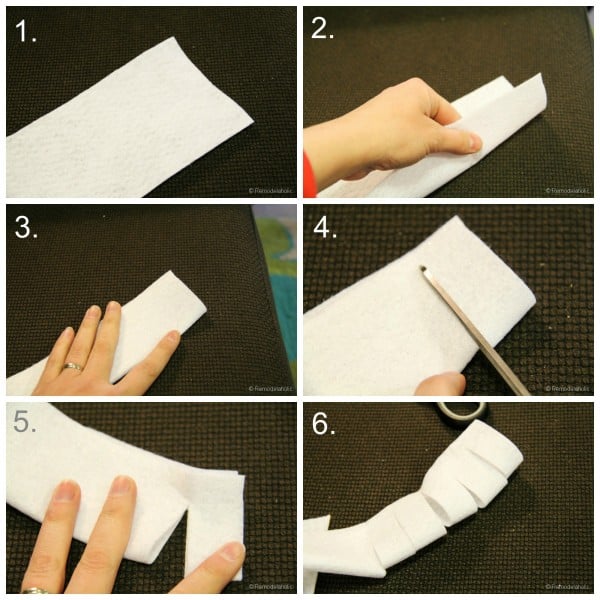
1. Cut your felt.
7 – 5″ wide strips, 60″ long
4 – 4″ wide strips, 60″ long
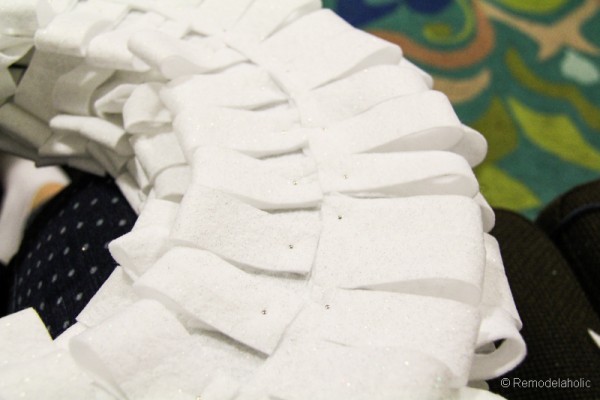
Fold each strip in half the long way, so they are either 2″ or 2.5″ inches wide and 60″ inches long. Cut perpendicular to the fold toward the two cut edges, leave about 1/4″ of an inch attached. See images below. These are the tab strips.
2. Pin strips to the back of the form.
Begin pinning the 5″ wide strips to the back of the wreath form.
With the back side of the wreath facing up, pin the felt into the back of the wreath form all around the outer edge and the inner edge of the wreath form. I used one pin for each “tab” of felt.
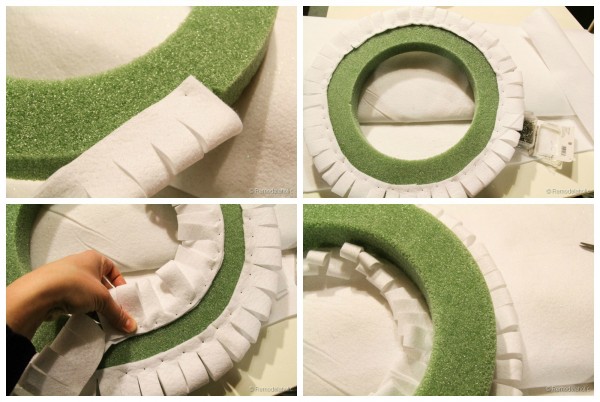
3. Pin strips to the inner and outer edges
Continuing with the 5″ strips, add 2 strips to the inner edge and 2 to the outer edge of the wreath form.
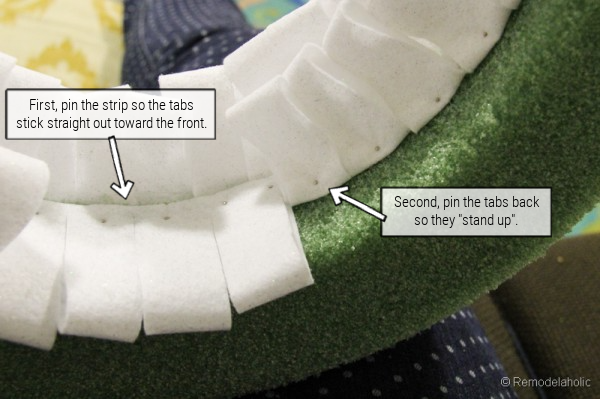
Work with the wreath face-up. At the inner edge, pin the first strip so that the tabs stick straight out to the front as seen in the left side of the picture below, then fold it back to make the tab “stand up” as seen in the right side of the picture below. Pin the tabs at the base to keep them “standing up”. Repeat with a second row on the inner edge.
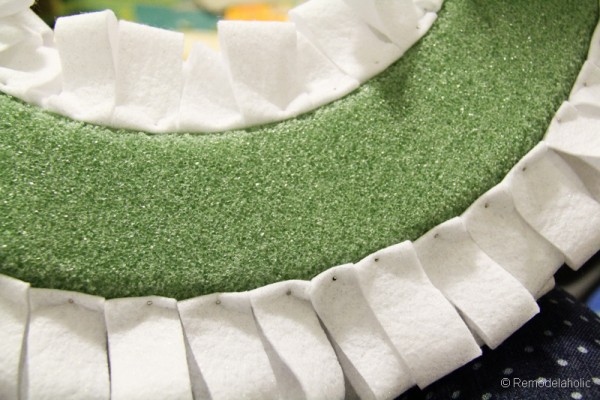
Next, add two rows to the outer edge, making them “stand up” in the same way.
After two rows have been added to the center and two rows added to the outer edge, the felt is now level with the front of the wreath.
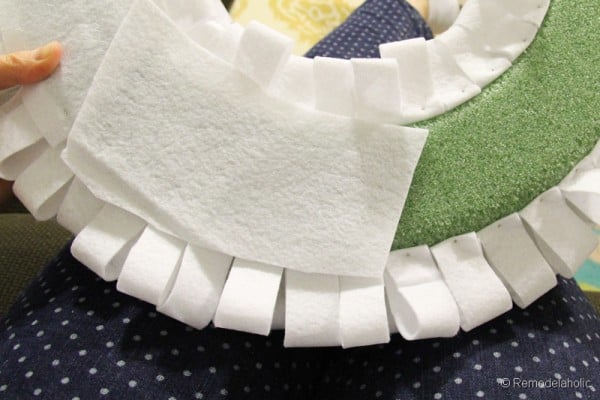
4. Cover the form
Once your felt is level with the front you need to cover the form with some of the excess felt so that the green doesn’t show through.
5. Add 2 more strips of tabs on the front
Attach 2 strips of tabs to the front of the wreath form, one pointing to the outer edge, one to the inner.
Using the last 5″ strip of tabs, pin it pointing toward outer edge of the front, bringing it in toward the middle 1/4 to 1/2 inch so that the layers behind can be seen.
For the next layer of tabs use a 4″ strip and point the tabs toward the inner edge. I liked the look better when I cut each tab off the strip and then attached them each individually to lay flat on the inner front. Attach the tabs so that the layers behind can be seen, similar to the outer edge tabs.
6. Add 3 loop layers.
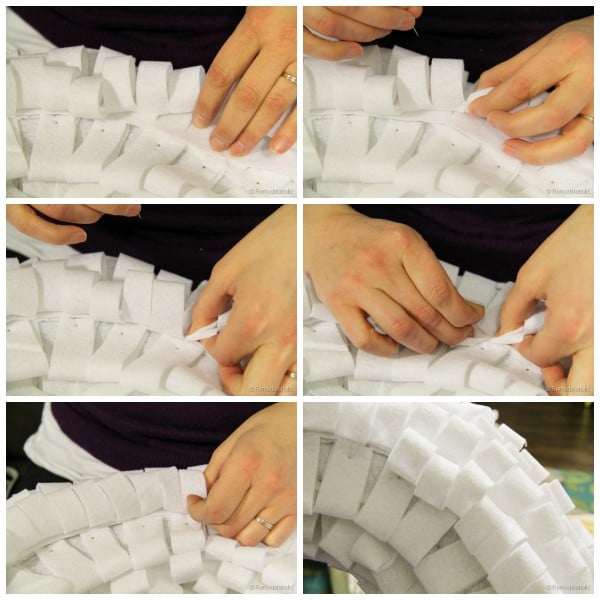
Too keep the pins hidden, we are going to “loop” the next 3 or 4 strips of 4″ felt.
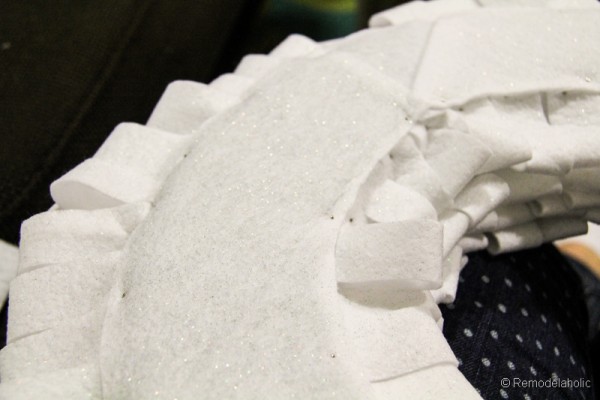
Unfold one strip of tabs and, starting near the last layer added to the outside edge, pin one of the corners to the wreath form with the right side of the fabric down. Now, “loop” the fabric into a tunnel with the right side of the fabric facing out. Overlap the edges inside the tunnel, against the wreath form. Going through both layers, place pins between the loops created by the tunnel.
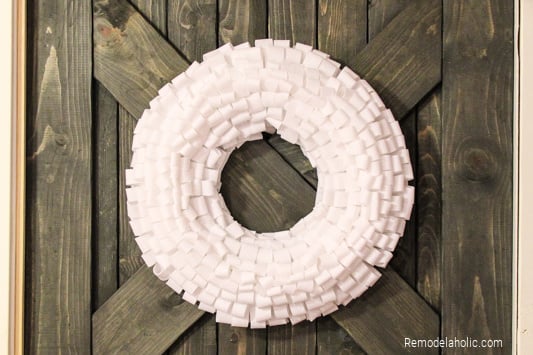
When the first line of loops is done, push the loops toward the outer edge and add another strip. After you have added 3, you can determine if you want to add another for more fulness or if it looks nice and full with just 3.
(Technically, if you just want a white wreath for your winter decorations, you can be done now.)
If you want the snowman wreath, then you will need to make some accessories.
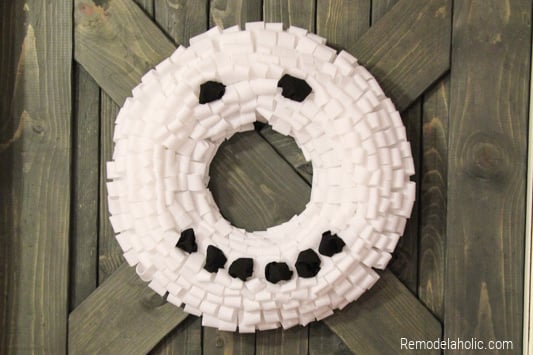
7. Make coal pieces for the eyes and mouth of snowman wreath winter decoration
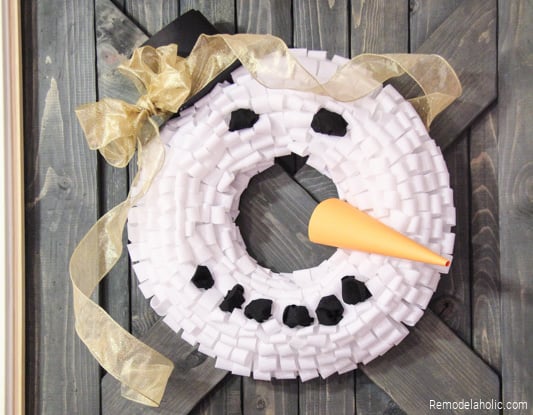
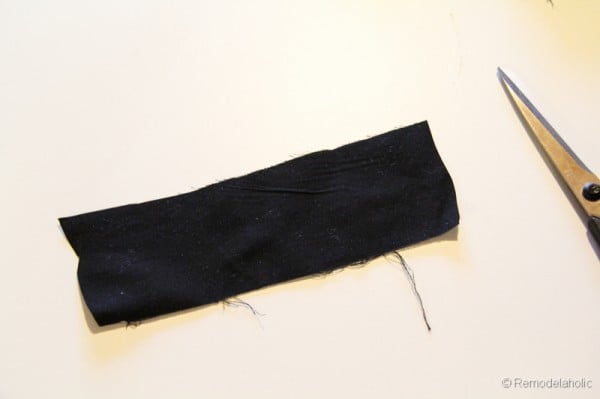
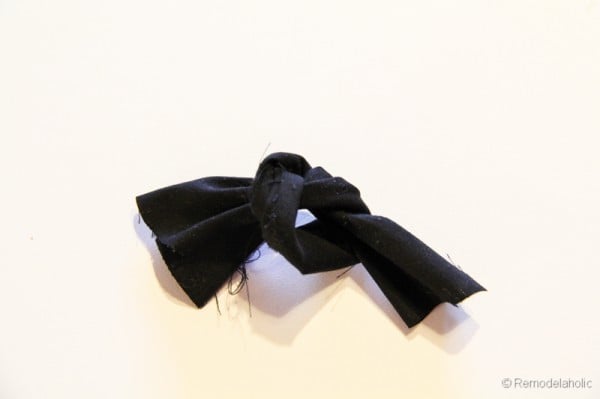
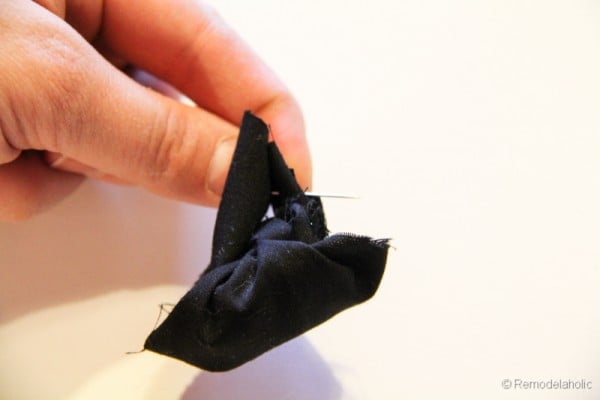
With some scraps of black fabric, create 2 coal eyes and a mouth. I liked a 6-piece mouth. Take a 2″ x 6″ strip of fabric and create a loose knot. Take the two ends, run the pin through them, shape the fabric and pin into place on the wreath, reshaping if needed.
 |
 |
8. Make the nose
Create a funnel with orange paper. Tape or staple to hold its shape and pin it onto the wreath. (Forgot pictures! Sorry!)
9. Make the top hat for the snowman wreath
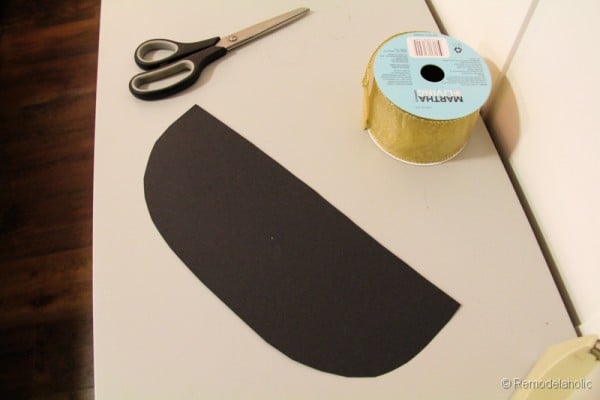
Next, create a half of a top hat using the black paper.
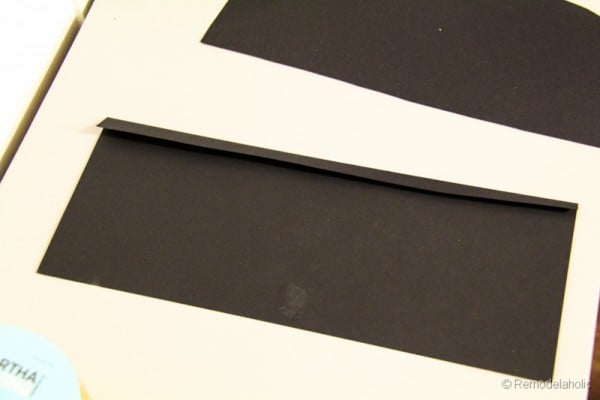
Create the brim by cutting a half ellipse on 1/3 of the black paper. (Err on the big side: mine is about 4″ by 12″. You can cut it down to fit your wreath when you get it in place.)
For the barrel of the hat, cut a 5″ x 12″ rectangle. Fold a long edge 1/2″ down and notch the fold so that you can curve the barrel and attach it to the brim.
This picture is to show the notches. To make the hat, bend the notched paper the opposite direction so the notches are inside the hat, overlapping each other a bit. 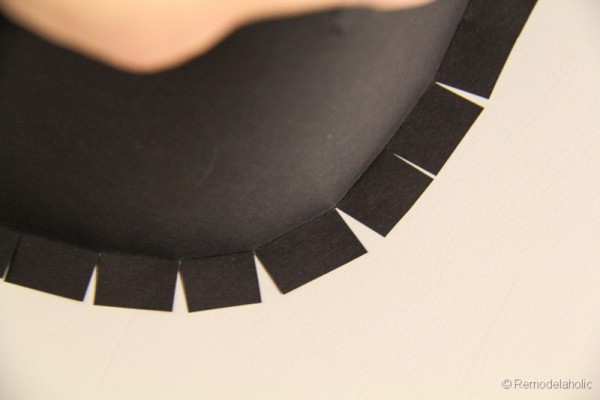
Do a rough fit of the hat to your snowman wreath and adjust the brim or barrel of the hat so it looks good. Glue or tape the barrel to the brim. Add a ribbon. I simply stapled mine to the back of the hat.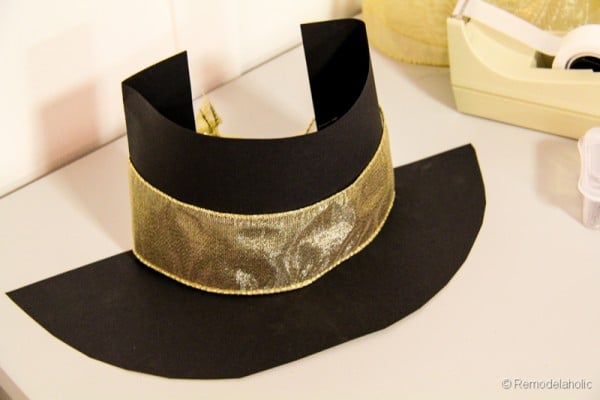
Pin the hat to the snowman wreath and add more ribbon, if desired.
Hang it up and …… DONE!
Isn’t this snowman wreath so cute and festive?
If you make one for your winter decorations, we’d love to see it! Submit your your photo here.
Find Remodelaholic on Pinterest, Instagram, Facebook and for sure check out our Youtube channel for many more tutorials!
And take a look at some other great Christmas DIY Projects:
- How to make a Pinecone Wreath
- Pipe Cleaner Ornaments, Kid Friendly Craft
- Sugar Free Pumpkin Steamers
- Fudge Brownie S’mores Pie
- Joy String Art Tutorial
And these great ones from the other participating bloggers!

|

|

|
 |
 |
 |
Please pin to save and share! 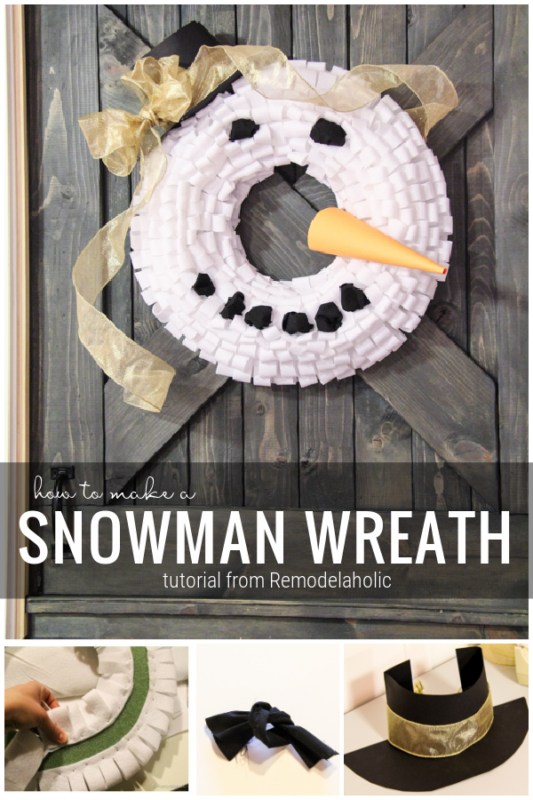
Originally published 12.06.2013 // Updated 11.18.2020
Cassity Kmetzsch started Remodelaholic after graduating from Utah State University with a degree in Interior Design. Remodelaholic is the place to share her love for knocking out walls, and building everything back up again to not only add function but beauty to her home. Together with her husband Justin, they have remodeled 6 homes and are working on a seventh. She is a mother of four amazing girls. Making a house a home is her favorite hobby.


Cute idea, and you did a great job! As I read through your tutorial I wondered if it wouldn’t be easier and much quicker to machine stitch the two raw edges together, and then cut from the folded edge, close to the stitch line. It might be possible to pin every other tab, or even use a low-melt glue gun to attach the strips to the foam ring….or, a combination of pins and glue. Just a thought!
Sharon… great ideas.
I actually cut the tabs as I went, I worked in about 10 -20 inch sections, but you could definitely stitch the raw edge, but I think that would just ultimatley add extra work.
A low melt glue sounds like a good idea, I haven’t ever worked with it, so as long as id doesn’t melt the wreath form, it would be great!!!
And lastly, as I got further and further into the project, I did use fewer pins, so for the most part, I think that would be fine!!!
I love how puffy it looks! Love that you went with felt, it’s perfect for snow! And ultimately your snowman. You nailed it! 🙂
I love your wreath and snowman. I don’t have that much felt, but I wonder how it would look with other scraps of white fabric-just mix it up. Burlap might look cool mixed in with this too, or using it to make a bow. Maybe all the different textures would be too much, but I like to see different textures with pines, so it may work. I don’t think it would look as nice as yours does if I would use the snowman parts though.
Pam it’s worth a try, we are glad you liked it.
Super cute!! I love snowmen. This wreath is so adorable!! Love it!!
That is so cute! I love snowmen!
Love the wreath. Can I just buy yours? Hee hee.