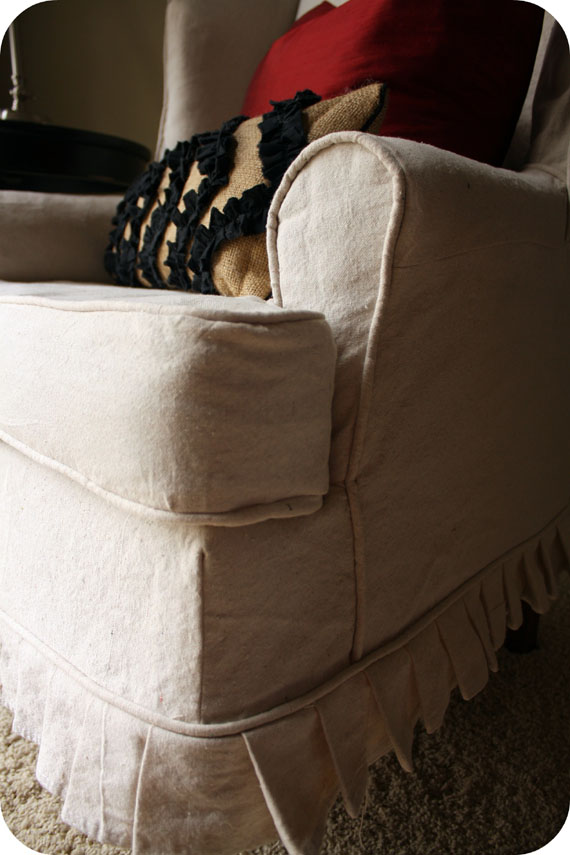
Slipcovered Wingback Chair..(that I want!)
Slipcovered Wingback Chair..(that I want!) by Shelley
Hi. My name is Shelley. And… I’m a Remodelaholic.
When Cassity contacted me to do a post on my slipcover I was so thrilled that my computer chair dancing turned into full blown out of the chair dancing 😀 So, thank you, thank you Cassity for having me over to your AMAZING blog!
As I mentioned, my name is Shelley. I am a stay-at-home mom who finds sanity through creating. My blog Crazy Wonderful is my happy place where I can post about my favorite Izzy adventures and the creating that happens when she sleeps. By the way, I’m not yet prepared for what happens when they no longer nap. Any tips are welcomed! Hahaha!
Now, on to what’s important!

How I Slipcovered My Wingback
I used Miss Mustard Seed’s tutorial. It was such a great tutorial, I highly recommend looking at it even if you’re doing something other than a wingback. Making a slipcover really wasn’t that difficult to do, and this one only took a few days of working during Izzy’s nap times to complete.
If you decide to make a slipcover (which I hope you do) here are some very helpful tips:
1. You CAN do this. It seems intimidating, but remember, you eat an elephant one bite at a time.
2. Wash and dry your fabric first! Not only does it prevent your finished slipcover from shrinking the first time it needs to be washed, but it also softens up the fabric making it easier to work with.
3. Go ahead and put forth the extra effort to make and/or use piping. It will make your slipcover look much more polished.
3. Go ahead and put forth the extra effort to make and/or use piping. It will make your slipcover look much more polished.

If you don’t already have a sewing attachment for piping, borrow or purchase one. This is what I used.


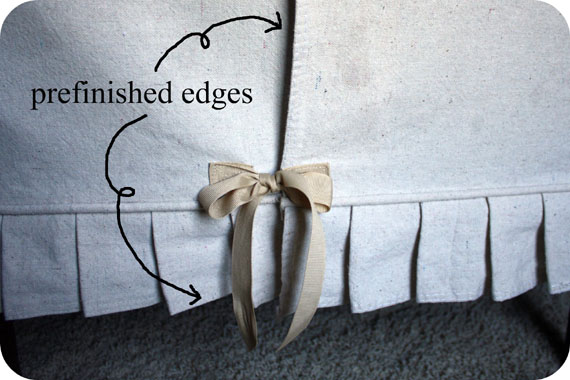
4. If your using painter’s drop cloths, use the prefinished edges to your benefit. They come in handy for the skirt of the chair, and also for any closures in the back of the chair.

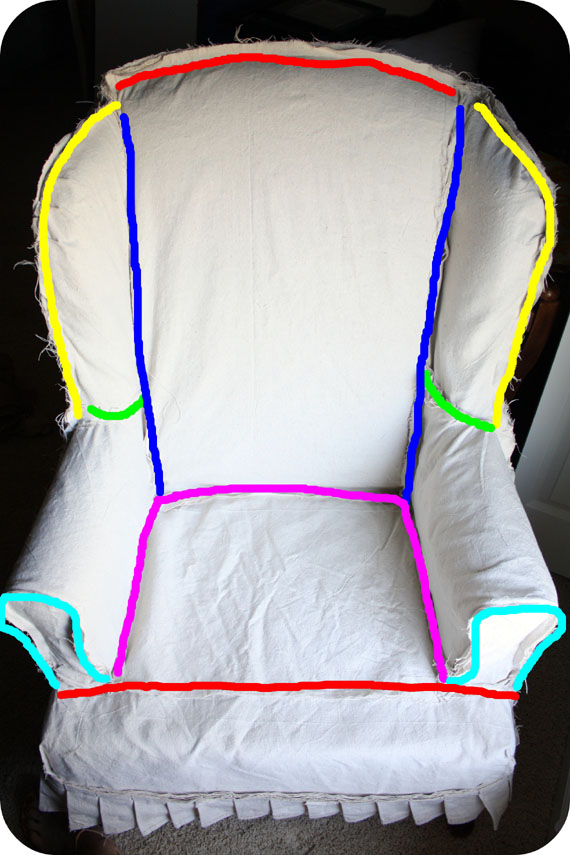
5. Back to eating the elephant one bite at a time. Work in small sections, starting with the largest pieces first. Pin one major seam together, and then take it right over to the sewing machine to sew together. Try the sewn seam on your chair to check for fit before pining the next seam. Here’s an example of sections you can work in.

6. When sewing a seam that has piping, make sure your foot is pressed tightly against the piping so that the needle stitches just to the side of the piping. It will give you a much cleaner look and prevent floppy looking piping.

7. If you get to a section that’s giving you problems and you start freaking out, WALK AWAY. It’s not worth ripping the entire thing apart in frustration and giving up. Not that I ever thought of doing that 😉 Go do something else for a few minutes (or a few days) and come back to it later. You’ll have a clear head and will be better able to figure out the solution.
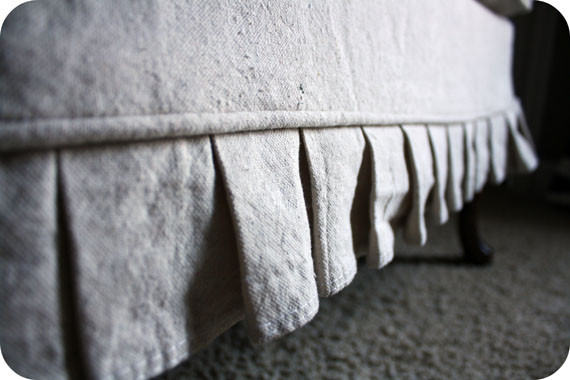
8. This one’s more of a design decision. When I made the pleats for the skirt, I knew I wanted a very crisp, flat pleat. I measured out my pleats, pining in place as I went, and then gave them a really good press and shot of steam with the iron before running them through the sewing machine. I know that when the time comes to wash the slipcover, I’ll need to iron them down again. But, for now they lay great!
9. Don’t drive yourself crazy trying to obtain perfection!!! It’s a slipCOVER. It’s not meant to look like a tight upholstered piece.
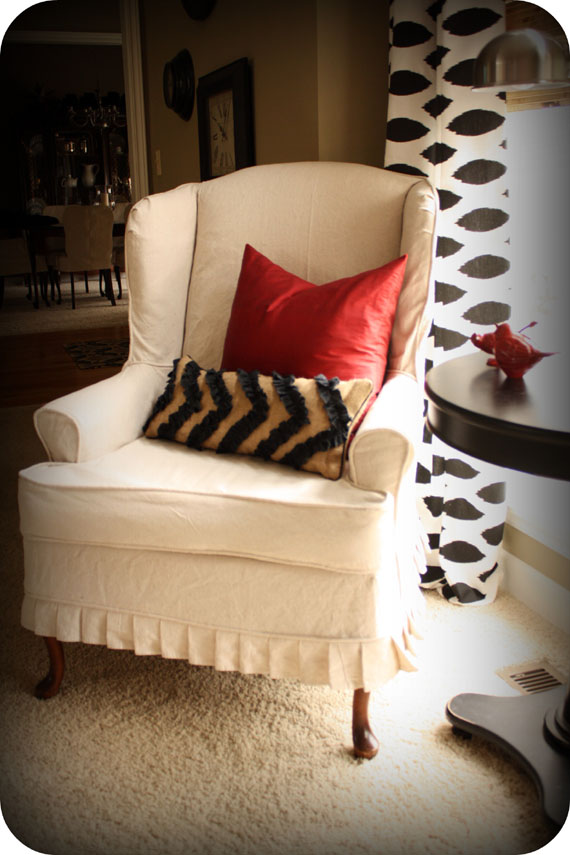
10. Relax, you’ll be thrilled with the results 😀

Cost Breakdown:
9×12 painter’s drop cloth (8oz) – $20.00
cording to make piping – $8.00
chair – FREE!
$28.00!!!
Now go cover up that ugly chair!
Cassity Kmetzsch started Remodelaholic after graduating from Utah State University with a degree in Interior Design. Remodelaholic is the place to share her love for knocking out walls, and building everything back up again to not only add function but beauty to her home. Together with her husband Justin, they have remodeled 6 homes and are working on a seventh. She is a mother of four amazing girls. Making a house a home is her favorite hobby.


Love your instructions!! I have 2 wing chairs that I need to make slipcovers for ( and 2 small children to help use them!! LOL) and after looking at the price of fabric I am going to go with the “drop cloth” idea, when I look at the pictures of the slipcovers that I have seen, they look white, but when I go to the store, they are more brown. Did you wash your’s with bleach? or is it the oatmeal color but looks white in the picture? I would LOVE to find a more white colored drop cloth instead of the “oatmeal” color I keep finding.
Thanks for your input!!
Thank you very much!!! You have just made my life a whole lot easier!!! Love it!!
Nice! Glad to help!
Thank you soooo much for this post! I have a “grandmother’s” wingback chair which is wider than a traditional wingback and I can’t find any premaid slipcovers anywhere. The photo you posted as #5 will be a HUGE help when I attempt to make the slipcover myself. I really wanted to have the chair professionaly reupholstered, but the cost is just too much for me right now. Have you ever gotten an idea in your head, but just need a little more clarification to gel it together? That’s what you’ve been able to do for me – gel it together! Your diagrams are wonderful and now I totally understand what I need to do. Thank you again!
So glad we were able to help, Sharon! We’d love to see pictures when you make your slipcover!
how big was the canvas drop cloth you used? I’m about to do two wing backs and don’t know what size drop cloth to be looking for!
I see this was posted quite awhile ago but was hoping you had a picture of how to attach the piping/cording to the pieces of fabric
Hi Lisa,
This is a guest post from several years ago, so I don’t have pictures but if you click over to the original author’s blog (linked toward the top of the post), she might be able to help you.
OMG!!!!! You just saved me a TON of money!! I am buying the drop cloths as we speak!! You made my day!!!
We are so glad to help!!!
You didn’t say anything about a pattern. Did you lay the fabric or maybe just paper over the chair sections and cut. It’s as if you began your instructions mid-project.