A New Look for and Old Chair: Painted Upholstery
Cassity asked me to guest blog and I was so excited. What a great blog to get to guest blog on! This was my FIRST time to be asked to guest blog. I’m new to blogging. I haven’t been blogging for a full month yet! So, thank you, Cassity; Too kind.
My current ongoing project is my master bedroom. I have documented the process on my blog from the conception of ideas to making it happen. I’m in the final stages now – just waiting to make some art and get the final table. Then, I’ll be ready to reveal! As part of the process, I painted the upholstery on a chair! Crazy, I know… but I do think this risk was worthwhile. Follow me as I explain the process below!
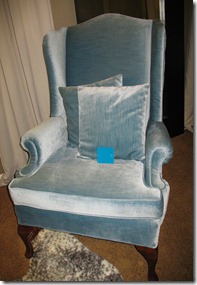
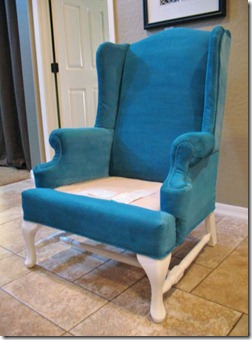
I recently painted an upholstered chair that I purchased. Below are before and after photos. Walk with me as I explain why I did this and how it was done.
Why would I do this? Well, after I learned that recovering a wing back chair for my master bedroom would cost $500-700 total, I decided that just wasn’t in my budget. So, how could I do this cheaper?
I REALLY wanted a chair like in my inspiration photo. Not exactly like it, but the general
color and shape.
The wing back and the vibrant teal color were important elements of my master bedroom story board.
Then, I had an epiphany. I remembered seeing a painted chair a while back. So, I began to do a little research on painting upholstery. After all, I could surely afford to buy a used chair and paint!
After a day or two of getting my ducks in a row as far as a plan was concerned, I purchased this chair on
Craigslist.
It was in perfect condition. Well built. Great lines.
I began the painting process. First on a pillow, but I’ll skip that part, as it went
well, and instead I’ll start with painting the actual chair.
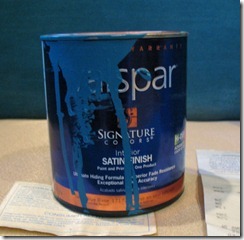
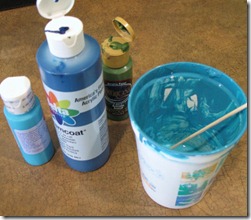
Materials needed: 1 Quart of latex satin paint in the color of your choice
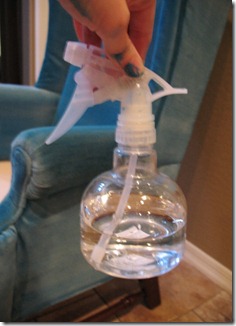
1 Spray bottle full of water
1 2 inch or smaller paint brush
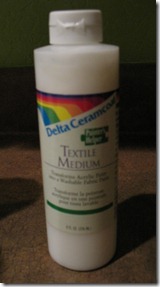
Fabric medium (equal to the amount of paint that you use)
Acrylic craft paint in the color of your choice (should match the color of the Latex paint)
Sand paper in around a 180 grit
Tutorial:
1. Make sure the chair is wiped free of dust and debris.
2. Mix 1:1 parts of latex paint and fabric medium.
I used Ocean Soul by Valspar.
Fabric medium keeps the fabric from getting too hard.
I wouldn’t use much paint – maybe 1/8 of the quart. I mixed mine in an old cup. A little
goes a long way in this phase. This will be your base coat.
3. Water that down with 1/2 the amount of water as paint. Stir.
4. Remove all seat cushions that are not attached from the chair.
5. Spritz (fine mist) the part of the chair you will start with first with water. I started on
the seat cushion first. Don’t be shy, you want the fabric damp.
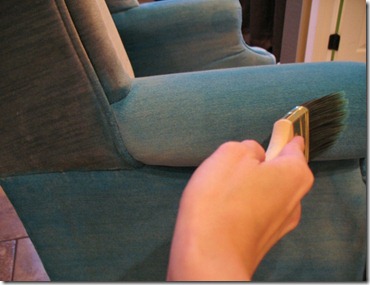
6. Brush on the paint slowly blending the best you can. Finish the area going with the
grain so the fabric lays in the right direction as it dries.
7. This should give you light coverage, almost like a stain. It will also act as a primer.
8. Do two coats this way. Let the first one dry fully before beginning the second.
9. Don’t worry, your arm won’t fall off.
10. Sand any particularly rough parts.
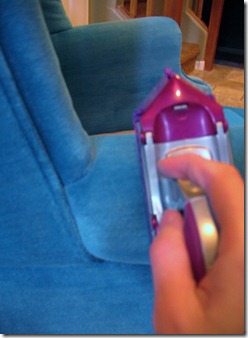
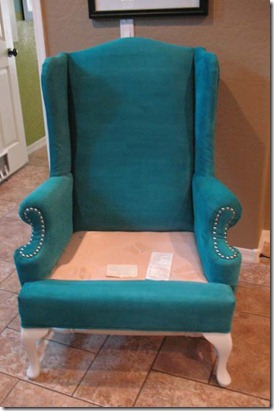
11. Once the chair was dry, I spray painted the legs in a glossy white.
Before:
After:
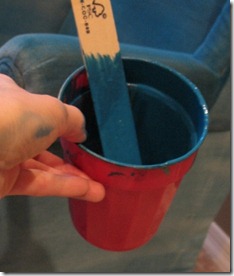
11. Now, it’s time for a final coat using the acrylic paint. Mix it 1:1 with the fabric medium,
like you did with the latex paint. I mixed this in a cup as well. But, this time, be more
generous. I’d do a full cup this size. (See below.)
Add just a few thimbles of water to dilute it a little.
I had to mix my own color since the acrylic paints didn’t come in the color I wanted.
Paint this layer much more generously. This will be the layer that will cover the chair more
completely. Don’t glop it on, but be generous. It should provide full coverage unlike the base
coats.
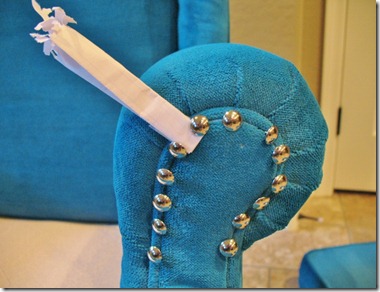
12. It needed a little bling, so I added some nail head trim on the arms. I got the spacing
right but folding a piece of paper and taping it so as to laminate it.
Then, I simply hammered them in! Nothing to it.
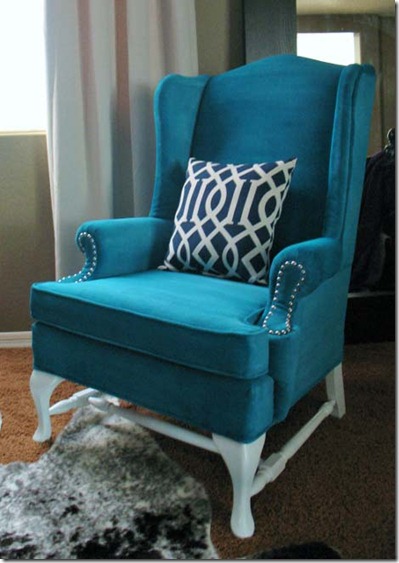
13. Congrats, you have a new chair!
And, here is a sneak peek of it in my master bedroom!
Is it crunchy or stiff?
It started out as a velvet fabric. It is not soft like velvet, but it is also not hard or sand papery. It’s like a stiffer rougher fabric.
Does the paint come off on clothing?
Not at all. I tested it out and even wet it and sat on it. No problem.
Tips?
– A smoother fabric is likely easier to work with.
– The final acrylic paint layer is very important.
– Sand down any particularly rough spots.
– For a more leather-like finish, you could try a glossy paint or a wax finish.
Hope you enjoyed this step by step look into the process! Hope it wasn’t too bad for my second
tutorial.
Please let me know if you try this – I’d love to see photos!
Cassity Kmetzsch started Remodelaholic after graduating from Utah State University with a degree in Interior Design. Remodelaholic is the place to share her love for knocking out walls, and building everything back up again to not only add function but beauty to her home. Together with her husband Justin, they have remodeled 6 homes and are working on a seventh. She is a mother of four amazing girls. Making a house a home is her favorite hobby.








Love this. It is so similar to my living room chairs that I bought in 1993 and I have been wanting to recover them but can’t afford it yet. It’s really funny though because mine are already a teal color but they have a pattern in them and look dated. I may just paint the legs and put some nail heads on and see if it helps. I have seen the chalk paint and wax on a small chair but figured it would feel kind of weird. You have totally inspired me. I paint the fabric too. I think your tutorial was great!
Thanks for your comment Peggy! Good luck with your painting project.
Quick question, do you wet the chair before each application of paint? or just the first coating?
You do need to wet the fabric with each new coat of paint. Good luck!
Thanks Kristy for letting us know!
What an amazing project Kristy! And congratulations on your first guest post!
That is amazing! Love it!
Does this technique work if the original fabric looks nothing like your target color? For instance, I have 3 chairs that need updating – one is beige plaid, another is denim blue with tiny white flowers, and the 3rd is bright variagated orange. Since they are all very different styles, I’m not yet sure what I want them to look like when finished, or even if they’ll all stay in the same room (the plaid chair may relocate to our master bedroom), but I’m pretty sure whatever I choose will look nothing like it does now. I’d hate to start this process only to have the plaid show through the paint, or have the bright orange affect whatever color I put on top of it…
Great article, will keep this in the back of my mind next time I am at a yard sale or thrift store. I am disappointed that the Toys R Us banner ad is across the first paragraph with no way to get rid of it. Every time I tried it opened a bigger ad or went to the site.
Sorry about the ad. We have been having some glitches with that. Thanks for the feedback.
How will this technique work on antique fabrics? I have an old fainting couch and it has a burnt orange color that is just ugly . Would this work on this fabric?
Hi Cassidy,
I dyed an upholstered chair and it turned out great! It began as an ugly orange color (that 70’s look!) and I dyed it a chocolate brown. You can go from light to dark but not the reverse, from dark to light. I used a spray bottle and a hand brush to work the dye in. I am in interior decorator and love to try new projects such as this! I love to repurpose furniture too!
Katy! That is genius! Have you had any problems with color transferring?
Your chair turned out amazing! I’ve been wanting to recover two flower-print chairs that were given to me but it’s not in my budget. I hope to get up the courage to try and paint them. (That sounds much easier than recovering them myself.) Thanks so much for sharing this!
I have painted two chairs, well actually reprinted one of them as I painted it about twelve yrs ago when I first bought it at a junk store. I love them both but I did not use fabric medium or wet the chair but did make my own chalk paint and used it. They both turned out great. The one with the smooth upholstery fabric turned out best and feels like soft leather. I did sand and wax though. Mine are done in blue also not quite as teal as yours. I would love to send a picture but its not giving me the option. Maybe next time I will try the fabric conditioner and wetting the fabric but can’t imagine it would turn out any better. Your chair is beautiful!
Thanks for sharing your experience, Jackie! If you’d like to send a picture, you can message us over on Facebook: https://www.facebook.com/Remodelaholic. Thanks!
Has anyone sent in pics of successfully painting a patterned piece? I’d love to see before and after pics before I attempt. Thank you! I love your finished piece!
Heather, I don’t know of any right offhand, but I’m sure there is someone who has tried it… Try Pinterest! 🙂
If the fabric seams to stiff, mix your favorite laundry fabric softener with equal parts distilled water into your spray bottle. I use a lint brush after spraying to really freshen up the fabric.
Thanks for the tip, Jeanette!
Do you think you could do this will a couch that is a blue/gray with big white flowers on it?
Hi Kirsten! This was a guest post, so I don’t have first-hand experience with this, but I imagine (from this and others that I’ve read) that it would work, although you’d probably still be able to see the pattern a little bit through the paint. You can click on the author’s blog (linked up at the top) and ask there, or Tamara from Provident Home Design painted her couch and she might be able to give you some info, too!
I have a question. After doing this are you still able to shampoo your chair or whatever you do this to and it not bring the paint up? I have kids and a dog and I’m scared to do this and well i have to clean it and there are spots from where I cleaned it. And do you know if the cushion covers would be safe in the wash?
Hi Krystle, This post is from a guest, so I’m not sure about shampooing after painting upholstery — but you can click over to their site (linked toward the top of the post) and ask there. Thanks!
I just started to paint an old chair I have. I found this stuff called FAB…which works like the medium…but this is totally MADE for fabric painting! I’m using chalk paint for the painting part. I had someone tell me it is important to sand in between coats of paint to make a softer texture on the chair. I’ll probably finish it off with some wax…OR the FAB stuff also had a top sealer as well. Anyhow…just more DIY info. 🙂
Thanks for the info, Meg!
I absolutely LOVE the project idea using regular paint. Love love love the color and finished look. Definitely inspired to try this on my ugly wing chair TODAY. Thanks for sharing
Just wondering why the final acrylic coat is needed… can you just scotch-brite instead of the acrylic coat? I am wanting to paint a chair I inherited from my grandmother and I’m seeing so many options that my brain hurts!!
Why the acrylic paint as the final step?
Your chair is stunning!! I want to paint my couch 🙂 This is the first tutorial that I see that recommends a last coat with acrylic paint. Could you tell me why is that? or maybe why we cannot use acrylic for the entire project? Thanks so much for sharing your experience with us!
Dear Kristy,
Thank you so much for sharing this project. I recently purchased a tufted desk chair — the color isn’t what I wanted, but the color I wanted didn’t have the base I preferred… blah, blah, blah, picky, picky, picky… So, I’ve decided to paint the fabric the color I desire. I found your post via a Pinterest post and I’m so glad I did. Your project post is tremendously helpful and informative, especially for someone like me that has never attempted painting fabric before. You did your chair beautifully! Its absolutely lovely! Again, thank you so much for sharing.