Nursery Chair Reupholster
This beautiful chair reupholster is just amazing! I love the new colors it has!
Submitted By: Unexpected Elegance
Hi, I’m Angela and I blog over at Unexpected Elegance. I’m a wife and a mom of two energetic girls that keep me on my toes! I love creating things and re-purposing, so when I’m not chasing my girls I’m working on “projects.” {My husband jokes that the tools don’t belong to him, they are all mine.} A few of my popular posts include: mommies nights, DIY paver patio and fire pit, and wax paper transfer tutorial.
So, here is one of my many projects that dove into head first! 🙂
********************************************************
This the chair I started with…Keep in mind, I had never done this before and figured it out as I went!

I began by taking it apart. Making sure to pay CAREFUL attention to HOW I was taking apart.

Lots of staples and clean frame later, I had this…

I sanded and painted the frame, then started putting the chair back together. I used a cheap drop cloth to recover the piece. There were two tricky areas on this makeover. The first was the front bar. I stapled the fabric down and then flipped the fabric over the staples to hide them. The rest of the staples were hidden on the inside under the cushion. (If you have a design on your fabric, staple it with the back side of the fabric showing.)

I didn’t take any pictures of the back but each chair will be designed differently. I added padding to the back and carefully stapled the fabric over it.
To finish it off, I made cording to hide all the remaining staples and covered the seat cushion. I disassembled the cushion and used the old fabric as a pattern. (You can also use a decorative trim instead of cording.)

4 Things I Learned
1. Take notes or pictures as you take the piece apart.
2. Try to get the staplies as close outside of the fabric as possible and STRAIGHT! 🙂 This will help when you are adding trim or cording.
3. Get a good nail gun! I used an electric nail gun and it made the job easier.
4. Take your time…undoing staples is a waste of time and FRUSTRATING! 🙂
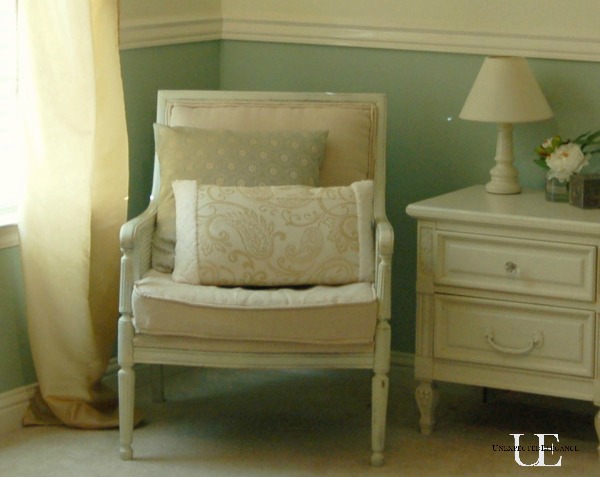
The chair lived my office for a while and now is in my friends little girl’s nursery.

It’s not perfect, but I think it came out great. Hopefully I have inspired to try something new! 🙂
Check out these other amazing chair reupholster projects!


Cassity Kmetzsch started Remodelaholic after graduating from Utah State University with a degree in Interior Design. Remodelaholic is the place to share her love for knocking out walls, and building everything back up again to not only add function but beauty to her home. Together with her husband Justin, they have remodeled 6 homes and are working on a seventh. She is a mother of four amazing girls. Making a house a home is her favorite hobby.


The chair came out great – what a great transformation!
Now this is definitely one the most amazing projects I’ve come across today!