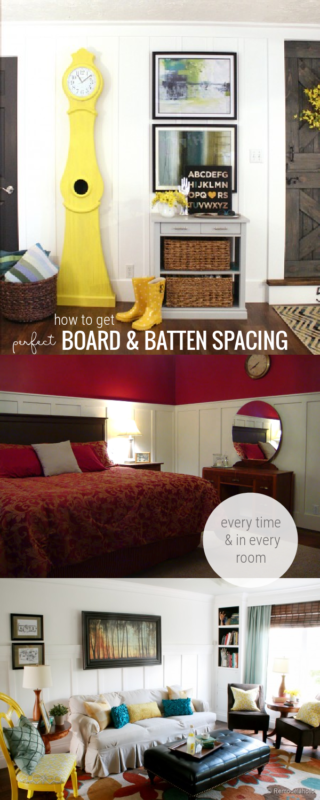
Board and Batten Spacing Tutorial

Learn how to calculate perfect board and batten spacing, even around doors, windows, and corners.
Then see how to install traditional board and batten and full-height floor to ceiling board and batten.

Figuring Out Board and Batten Spacing
I was in the middle of writing a tutorial of how we did our living walls from our National Painting week project.
And I realized that I had a tutorial within a tutorial and one that needed to be addressed for board and batten style walls on it’s very own, so here I am.
One of the biggest signs that you are just learning how to DIY your board and batten is problems with your spacing. You do not, and I repeat, you DO NOT want to have uneven spacing between the battens throughout and particularly on the opposite ends of the wall. That is a sign that you are a beginner, and that you might have a bit more to learn!
To explain what I mean about uneven spacing lets start a hypothetical project.
Let’s say you start the wall by installing one batten, and then just measure 24″ from the first molding and keep installing that way till you get to the other side.
But, at the end of the wall you are left with just 7 inches. That means one side is spaced and “24 inches and the other side is 7”, that looks uneven and not ideal
(By the way, this happens with tile too, I am super picky about this, check out my tiling tips here).
Instead you want the spacing to be even throughout the length of the wall, but one of the hardest parts is figuring out the spacing.
So let me give you two step by step ways to figure out how to accomplish the perfect board and batten spacing!

Perfect Board and Batten Spacing Tutorial
Measure As You Install Version
(If you want to measure the spacing as you install each individual batten, follow these instructions)
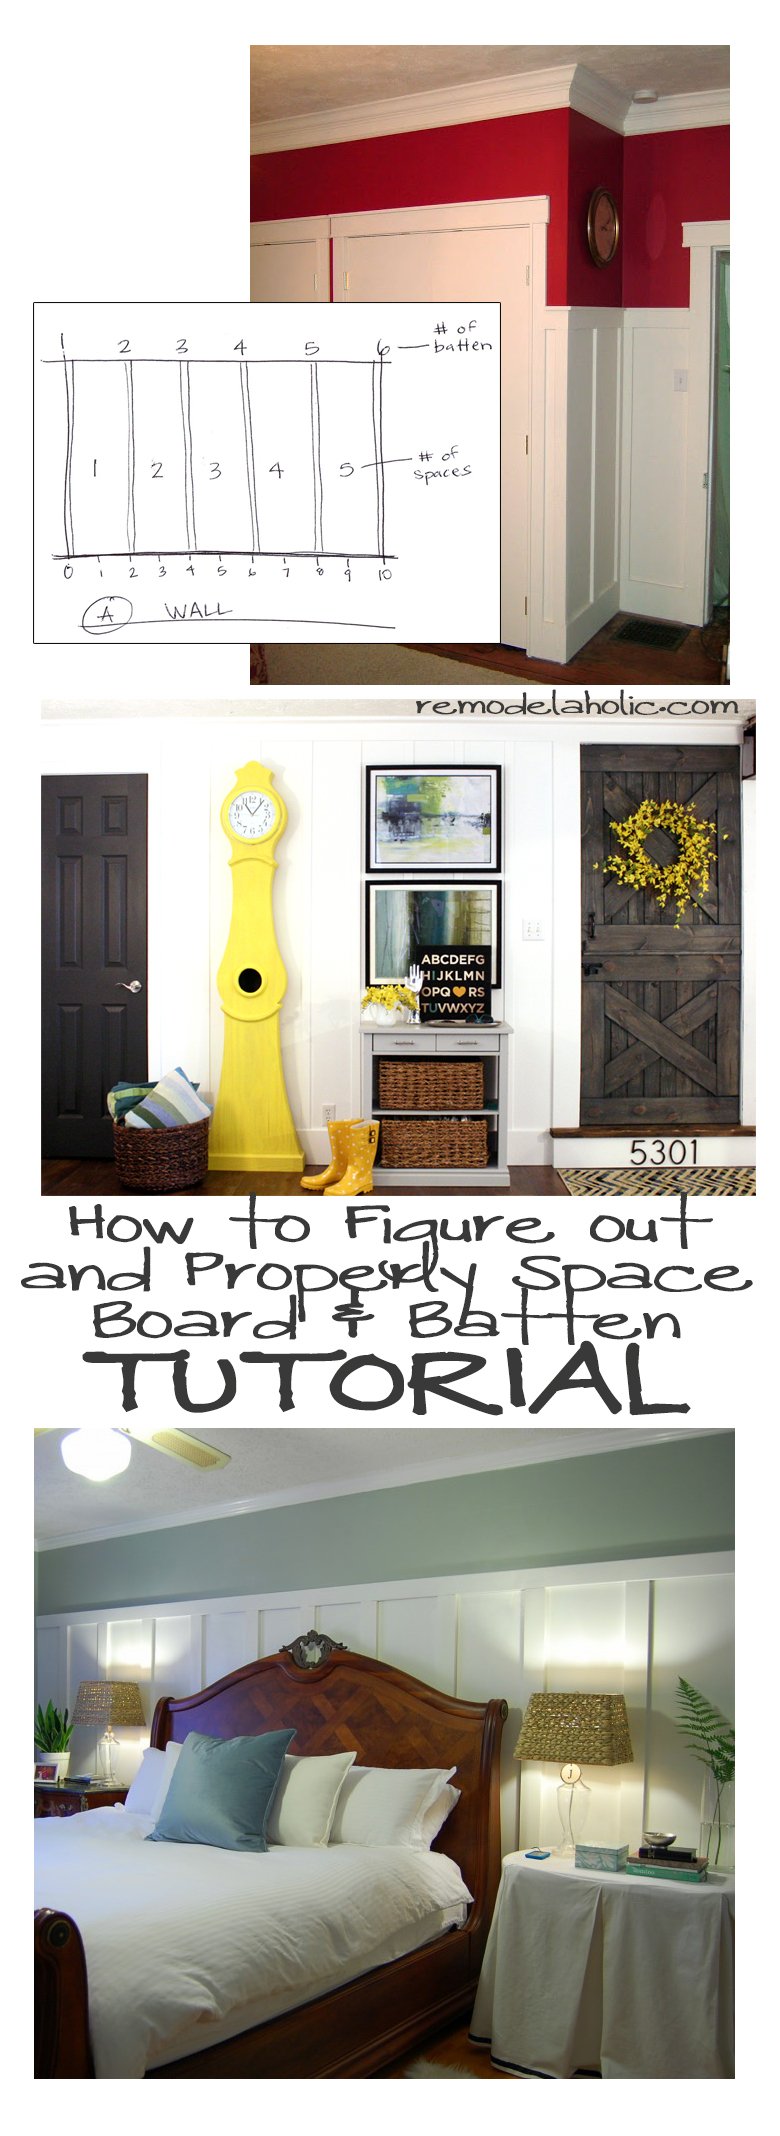
A. Measure the length of the wall.
B. Decide how many battens you would like on that wall (this is the general spacing do you want them every 2 feet, every foot). Now divide the length of the wall by the general spacing. If you have a 10 foot wall and would like the battens about every 2 feet that equals 5 spaces.
C. Now in order to have 5 spaces you will need 6 battens, so 5 spaces + 1 equals the number of battens you will need. (*You cannot forget the origin point or the “0” if you will, see the diagram below)
D. You cannot forget the thickness of your batten’s themselves. Let’s say they are 3″ so multiply the number of battens (6) by the width of the battens (3″) which is 18″.
E. Subtract the width of the battens (18″) from the length of the wall (10′) which leave 8.5′.
F. Divide 8.5 (the length of the wall minus the width of the battens by the amount of spaces you would like (5). Which leaves you with a spacing of 20.4″ (so just under 20 1/2″ between each batten) This is the exact spacing between each batten.
G. Attach your first batten to the end of the wall. Now measure from the edge of the batten 20.4″ and mark that will be the beginning edge of your next batten. Install the second batten and measure from the edge and repeat installation. Continue your way down the wall.

Pre-Measured, Then Install Option
(If you want to measure out and mark the spacing on the wall of all battens before beginning, follow these instructions)
A. Measure the length of the wall.
B. Decide how many battens you would like on that wall (this is the general spacing do you want them every 2 feet, every foot). Now divide the length of the wall by the general spacing. If you have a 10 foot wall and would like the battens about every 2 feet that equals 5 spaces.
C. Now in order to have 5 spaces you will need 6 battens, so 5 spaces + 1 equals the number of battens you will need. (*You cannot forget the origin point or the “0” if you will, see the diagram above)
D. Subtract the 3″ for the “origin batten” from the length of the wall. (10′ – 3″)
E. Now divide the remaining length by 5 (the amount of spaces you would like).Which leaves 23.4″ or just under 23 and 1/2 inches
F. To begin, measure from the starting corner 23.4″ and mark the wall. This mark will be the start of your second batten. Measure from the first mark another 23.4″ inches, repeat this step all the way down to the end of the wall. You will be left with a 3″ space for the last and final batten. The marks will be the leading edge of your batten board (see below for instructions)

That is basically the tutorial. I know it works and it makes all the difference in the final look of your board and batten wall to have everything spaced out nicely!
Now you’re ready for:
How to Install DIY Board and Batten
Board and Batten Spacing Examples
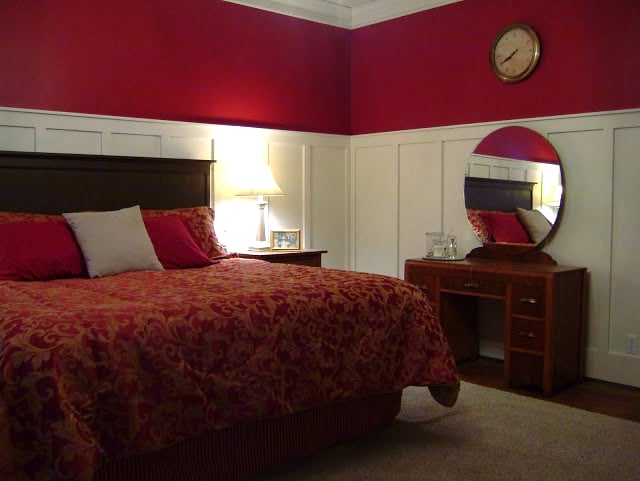
Image from our first ever board and batten project 11 years ago, when we were in our first house during college. Notice how nice the spacing in all the way into the corner!
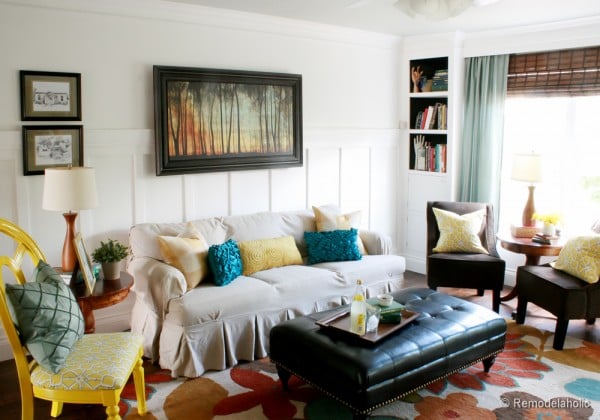
and from our Park House living room — the board and batten looked amazing with the DIY interior columns (on the opposite walls) and built-in bookcases!
This is our most recent board and batten wall — this is a really thin board, installed floor to ceiling and we love it!
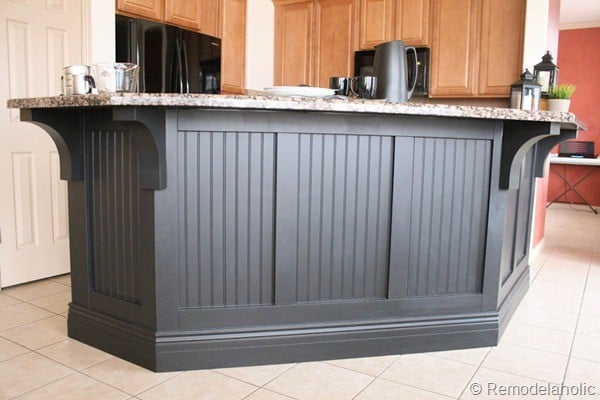
You can also use this same spacing calculation to put board on batten on a kitchen island (with beadboard or just on the original island like this).
Board and Batten Spacing FAQs
Can the spacing be different on walls in the same room?
Yes! It is okay if the spacing of the battens is slightly different on adjoining walls especially if you keep the spacing equal throughout the individual wall.
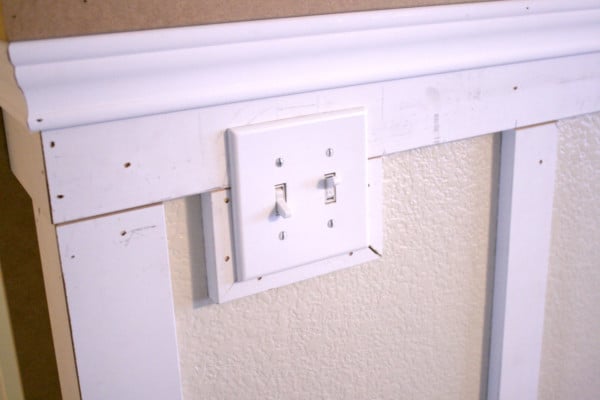
What do I do if a light switch or outlet is in the way of my board and batten?
If there’s an outlet or light switch in the way of your vertical battens, you can often adjust the spacing a little bit one way or the other for an easy fix.
OR, you can do like we did in our Park House living room when the light switches were RIGHT at the height of our top horizontal board. We notched the board and framed out the light switch.
(This does require a little extra electrical work, so be sure to consult a professional if you’re unsure about that part.)
Do I skip the corner or put a vertical batten in the corner?
This is probably just preference here — but we always start and end the wall with a batten. It gives the wall a really nice finished look on both inside and outside corners.
And on the outside corners, it’s also a nice way to dress them up and protect them from the inevitable dings and dents of everyday life (and kids).
If you look at our Park House living room, you can see how it looks with battens in the corners and around the corners.
Don’t miss the step by step tutorial!
How to Install DIY Board and Batten
More board and batten ideas:
- Board and Batten with a Built-in Entry Table
- Farmhouse Entry with Floor-to-Ceiling Board and Batten
- Bathroom Board and Batten How-To
- Board and Batten Wall with 3D Wall Panels
- 40 Decorative Wall Panel Ideas
- plus 25+ More DIY Wainscoting Ideas
Cassity Kmetzsch started Remodelaholic after graduating from Utah State University with a degree in Interior Design. Remodelaholic is the place to share her love for knocking out walls, and building everything back up again to not only add function but beauty to her home. Together with her husband Justin, they have remodeled 6 homes and are working on a seventh. She is a mother of four amazing girls. Making a house a home is her favorite hobby.


I have a question about the spacing most of my walls the spacing works at around 14 1/4 inches however one of the walls works only at 13 1/4 inches because of all the windows will you notice the difference of 1 inch?
I don’t think you will notice the difference. Try taping a small corner with a few battens at the different widths and see if you notice a difference.
I have one whole side of the wall that I want to do. But there’s a door and a stairscase in between. So I get three walls with different sizes. How do I measure the spacing for that?
I suck at math , can someone help me create a grid for our master bedroom wall. Lol
Do you have a formula if you don’t start with a batten at the end of the wall?
Hi Matt,
Use the same idea, just in your sketch, skip that first batten. No matter if you start with a batten or not, you want to add up the batten widths, then divide the remaining wall space evenly for the spaces between. The sketch helps visualize how many spaces you’ll have.
Thanks for this. What do you suggest for walls with windows or doors? Do you measure and divide the entire length of the wall or measure from one obstruction to another? (do you want the battens to bud up next to each window and door?)
I did a wall for my parents and it had a window that was off centered. I first taped off the battens to get a quick visual.
I would tape it off in just little strips to get an idea of the spacing then make any adjustments to the spacing if needed. Small differences won’t be noticable.
Try the wall as a whole and see where it all lays out with the window and door then decide from there. Hope that helps.
Assuming your are doing more than 1 wall, and each wall is a different length meeting at a corner, how do you determine spacing so that both walls have same spacing between vertical boards.
Hi,
I have a wall that is 185” or a little over 15’. There is also a fireplace in the middle but I plan to do the batten above where the fireplace starts. When I do the math I keep ending up with an odd number of inches between the last two battens. Any tips on how to fix this? I can provide all the dimensions, if needed.
Can you provide all the dimensions and a straight on photo in a facebook message? Then I can better look at it.
How do you handle the corner of two walls you are applying B and B on?
I would end each corner with a batten. So you would have two battens next to each other.