Alphabet Block Chalkboard Play Table + Storage Stools
My girls are the light of my life, and it’s so nice to take a break from the big house projects and just build something fun for them. (Although, I don’t suppose their bunkbed playhouse really qualifies as a small project… #cantstop) And even if it’s not what might be seen in the latest trendy magazine, kid furniture that is kid-friendly makes every kid smile! Our guest today has a really fun chalkboard table to share with you — it’s a play table plus storage stools (or ottomans) built to look like alphabet blocks!

Read below for all the details of Timisha’s great play table + seats, and check out these other kid’s play tables and play furniture:

an industrial pipe built-in desk plus shelves above

a cottage play kitchen (built nearly entirely from scraps and salvaged pieces!)


How to Build an Alphabet Block Chalkboard Play Table + Storage Stools
by Timisha of Toolbox Divas
Hey Remodelaholics! Timisha here from Toolbox Divas, where I share home improvement tips and do-it-herself tutorials showing women (and their husbands and boyfriends) DIY can be fun, simple and even sexy. A Toolbox Diva knows how to get the job done, and that means sometimes you have to get a little dirty.
With that in mind, Remodelaholics, let’s get dirty!
Required Tools:
- Miter Saw
- Drill
- Pocket Hole Jig
- Sander
- Circular saw/table saw
Materials:
- 2 – 4×8 3/4” sheets of plywood
- 10 – 1x2x8
- 1 – 2x3x8 for the base support
- 2 -1x3x8
- Mini L corner braces
- 2 – 12″ continuous hinges (Piano hinges)
- Felt Bars
- Pocket Hole Screws
- Wood filler
- Wood Glue
- Sandpaper
- Paint, stickers and stencils for decoration
- Optional: 4 – Soft-Down Lid Supports
Cut List:
Table
- Table top: Cut Plywood 24”x 36”
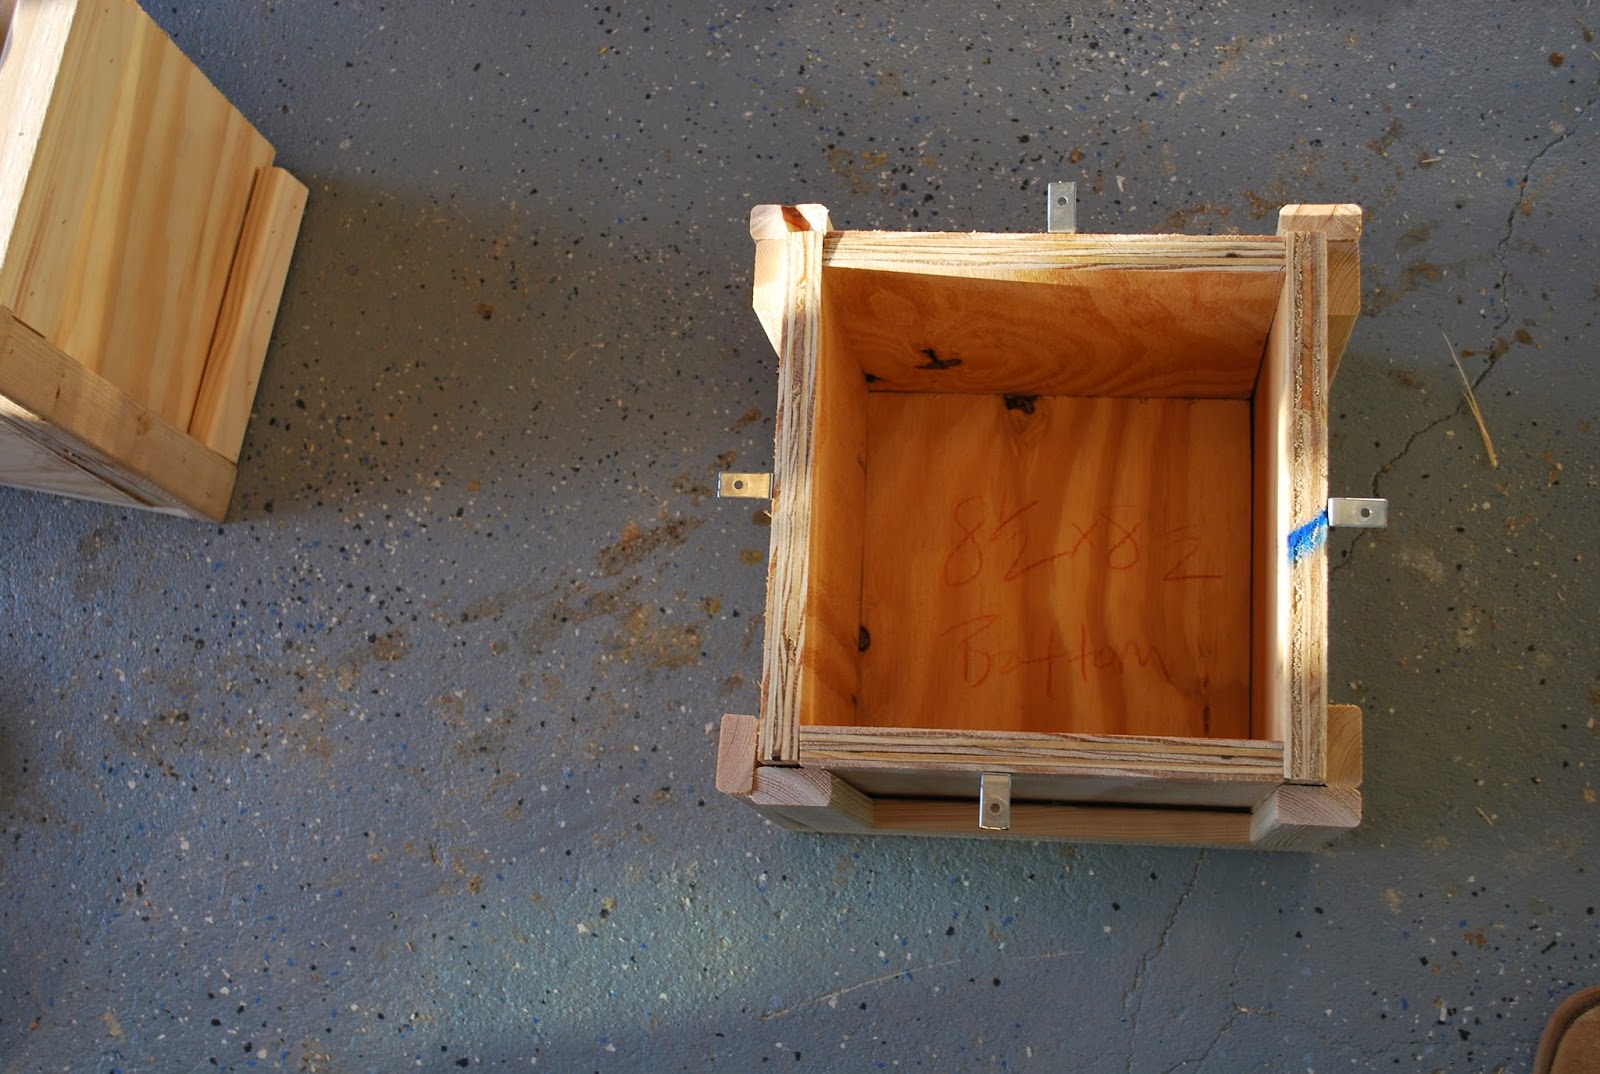
- Table Boxes for the Legs (4) of ¾” plywood: Bottom: 8 ½” x 8 ½”
- Top: 10”x 10”
- Side A (2): 9 ¼” x 8 ½”
- Side B (2): 10” x 9 ¼” Table Box “Leg” Trim from 1”x2”
- Side 1: 2 – 7″ & 2 – 10″
- Sides 2 & 3: 2 – 7″ & 2 – 10 3/4″
- Side 4: 2 – 7″ & 2 – 11 ½”
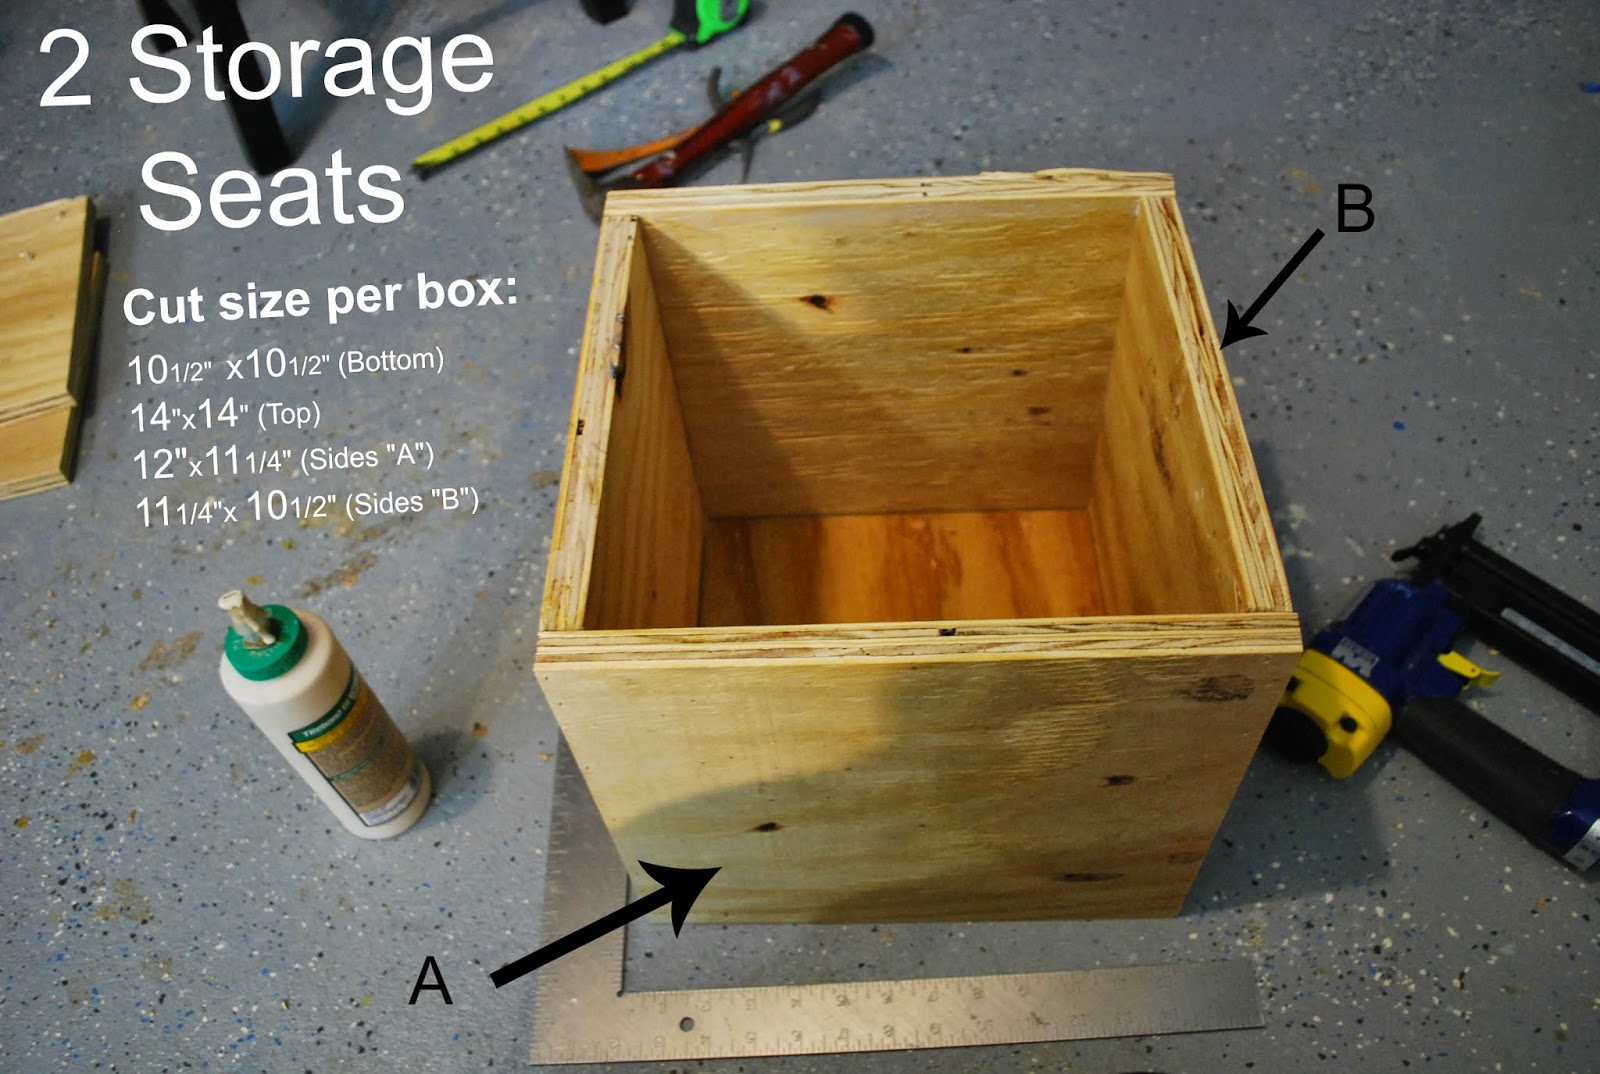
*Each* Storage Ottoman/Seat (cut from 3/4″ plywood)
- Bottom: 10 ½” x 10 ½”
- Top: 14”x 14”
- Side A (2): 12” x 11 ¼”
- Side B (2): 11 ¼” x 10 ½” Ottoman Trim cuts from 1”x2”
- Side 1: 2 – 8 ¼” & 2 – 12″ cuts
- Sides 2 & 3: 2 – 8 ¼” & 2 – 13 10/16″ cuts
- Side 4: 2 – 8 ¼”& 2 – 13 ½”


Building the Chalkboard Play Table
First let’s start with the table. Cut the 3/4” plywood to 24”x36.” Another option is using reclaimed wood to form the diameter of the tabletop. If reclaimed woodsuch as pallet wood is used please ensure that the wood is not for exterior use or contain any harmful chemicals. Use an orbital sander for light sanding and smooth out the wood for the tabletop. (Note: With reclaimed wood it’s important to smooth out the imperfections of the wood to eliminate the chance of splinters.)
Next trim the tabletop with the 1×3 boards. Support the top by placing a 1×3 board down the middle of the tabletop. Attach using pocket screws.


Once it’s attached, flip over.

Cut the pieces for the 4 boxes that will make up the legs for the table.

Starting with the bottom 8 ½” x 8 ½” piece, attach the sides of the boxes in accordance to the cut diagram for the 4 boxes. This projects moves faster with a nail gun. However, it can be completed with a hammer and nails.


Ensure the boxes are all square from all angles by using a Carpenter’s square. Once the 4 boxes are assembled each box should be trimmed using 1x2s in the order of “first” (what ever side you pick up first), second, third, & forth. Attach the trim using a brad nailer or hammer and nails.
Side 1 (“first”): 2 – 7″ & 2 – 10″
Sides 2 & 3: 2 – 7″ & 2 – 10 3/4″
Side 4: 2 – 7″ & 2 – 11 ½”


The two boxes at the top of the legs didn’t have a horizontal top trim. It wasn’t necessary given the table top would cover that portion of the boxes.


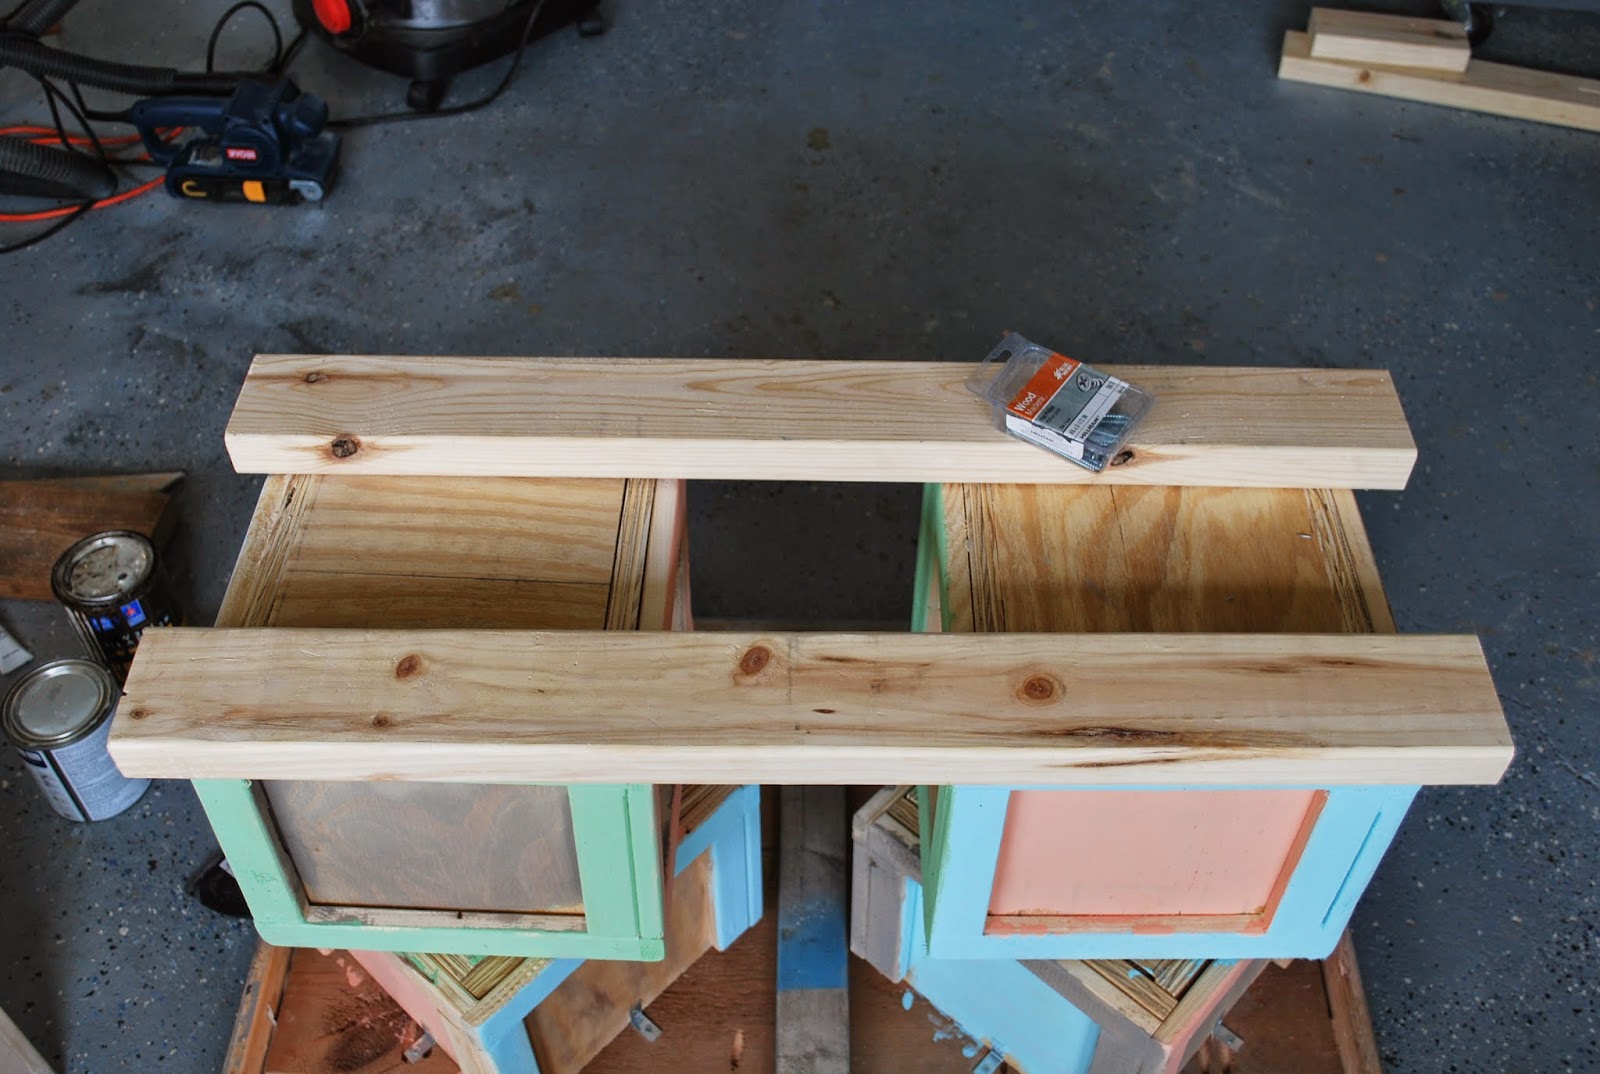
Now that the boxes are assembled and trimmed it can now be stacked 2 by 2 to form the legs of the table. Attach mini L support corner braces on the 4 sides of the 2 boxes that will make up the top of the legs. This will be used to attach the “legs” to the tabletop.


Turn the two top boxes at an angle. Using wood screws join 2 boxes together creating the legs of the table.


Attach the two legs to the tabletop placing each leg evenly spaced between the center support beam and sides of the table. Use 3/4” screws to attach the corner braces to the tabletop.

To provide support for the table, and to prevent it from tipping over should a little one decide to sit on top of the table, place two 2”x3” wood beams at the base connecting the two legs. Make sure the 2×3 boards hang 1″ out from the bottom of the bottom boxes on both sides. Attach using corner braces and wood screws. Then using pocket screws add two 8″ 2x3s to the sides of those boards to add additional support in the other direction.


Now flip over and fill the holes and imperfections with wood filler. Once the wood filler is set proceed with sanding down the rough areas paying close attention to the edges. Round the edges using coarse or medium grade sanding paper. Remember to wear protective gear while sanding.


With the structure of the table complete its time to focus on the seating. With kids there can never be enough storage. These seats offer double duty.
Alphabet Block Storage Stools/Seats
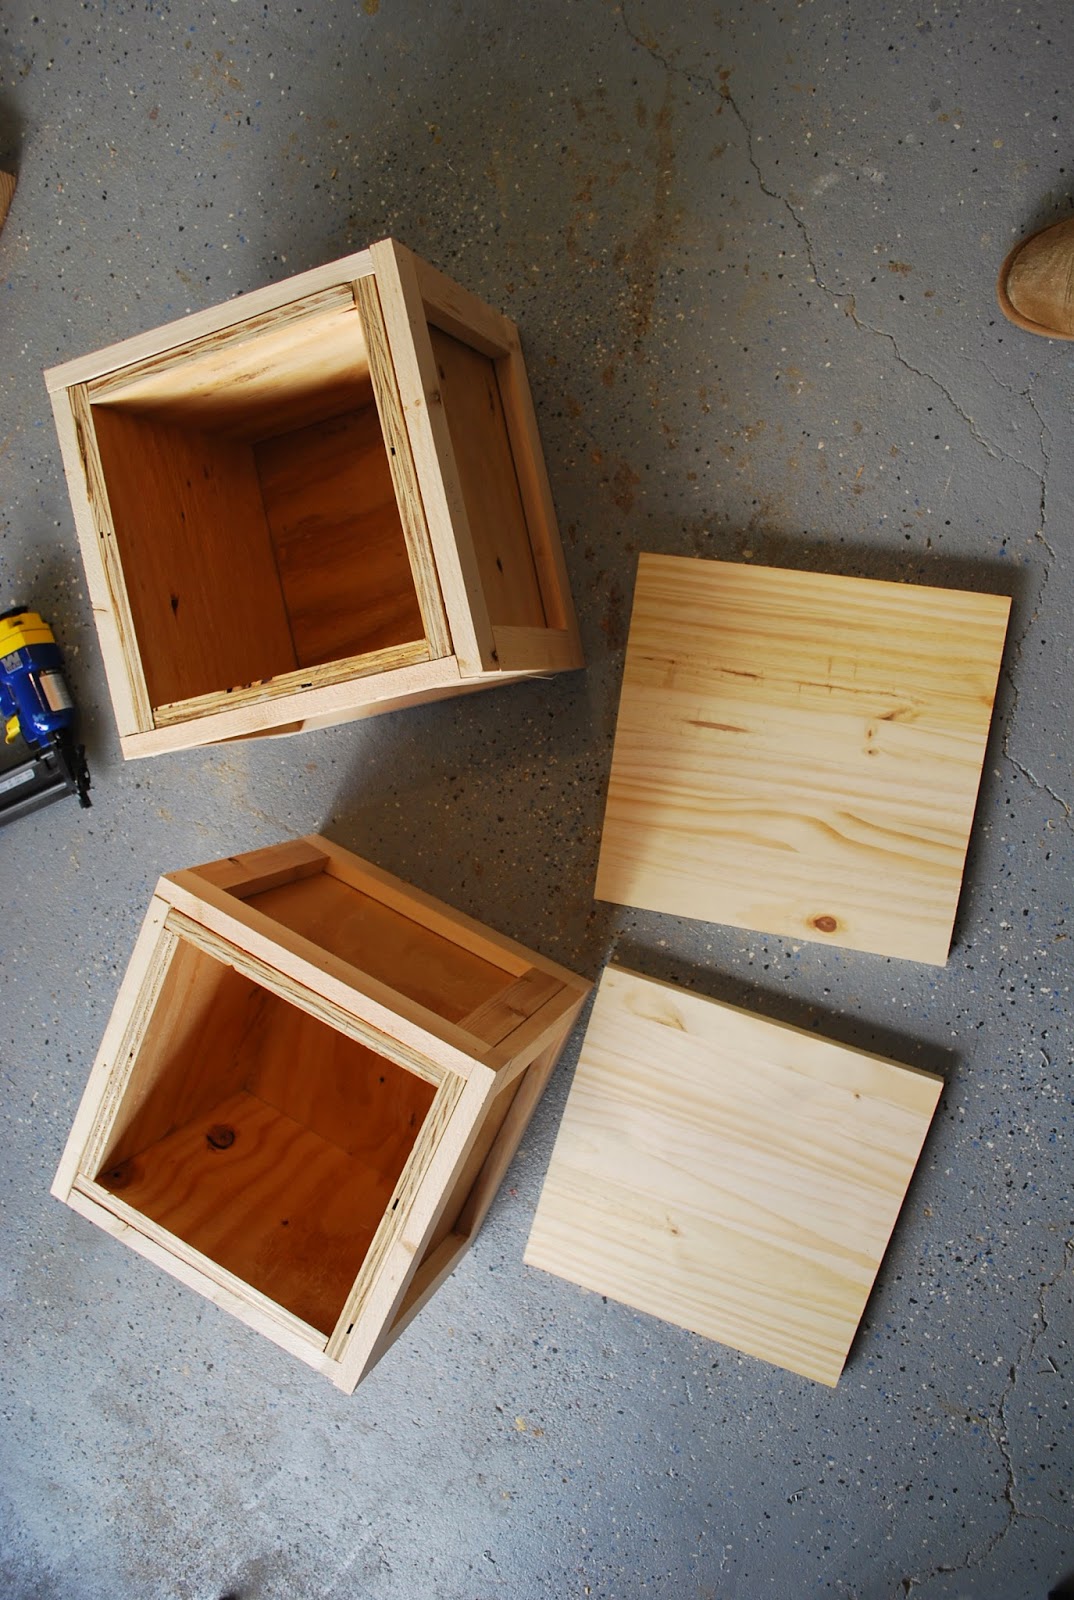
Cut the 3/4” Plywood down to size as depicted in the cut Diagram.
This will make 2 seats.

Starting with the bottom 10 ½” x 10 ½” piece start attaching the sides of the boxes in accordance to the cut diagram for the 2 ottomans. This projects moves faster with a nail gun, however, it can be completed with a hammer and nails and wood glue.


Apply wood glue to each side to add support. Remember to check that the box is square by using a Carpenter’s Square.


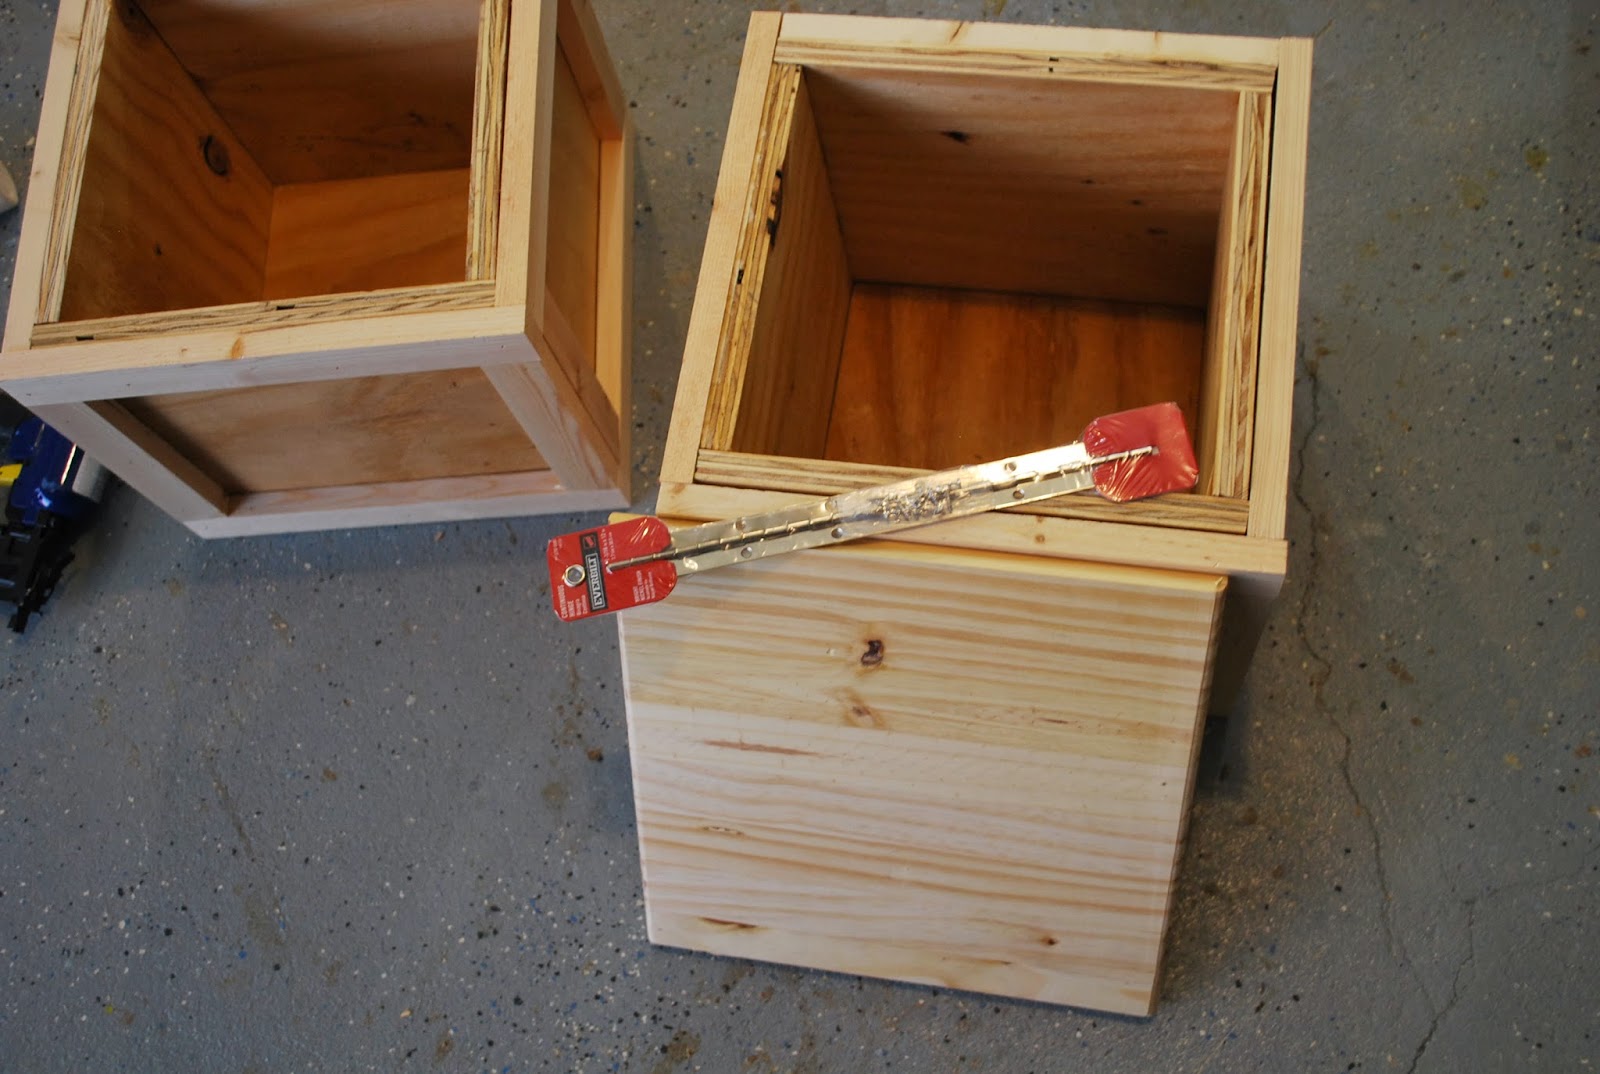
Once the two boxes for the seats are assembled its time to trim it using 1×2 boards. Starting with the first side moving in order to the fourth side cut the pieces as follows:
Now attach the 14″x14″ top panel, which will be the lid for the seating. Feel free to finish the edges of the top panel using a router before attaching it to the seat.


Attach the top panel to the seats using 12” piano (continuous) hinges. Apply felt bars where the lid closes on each seat. An additional option is to add a soft close hinges to either sides of the lid.


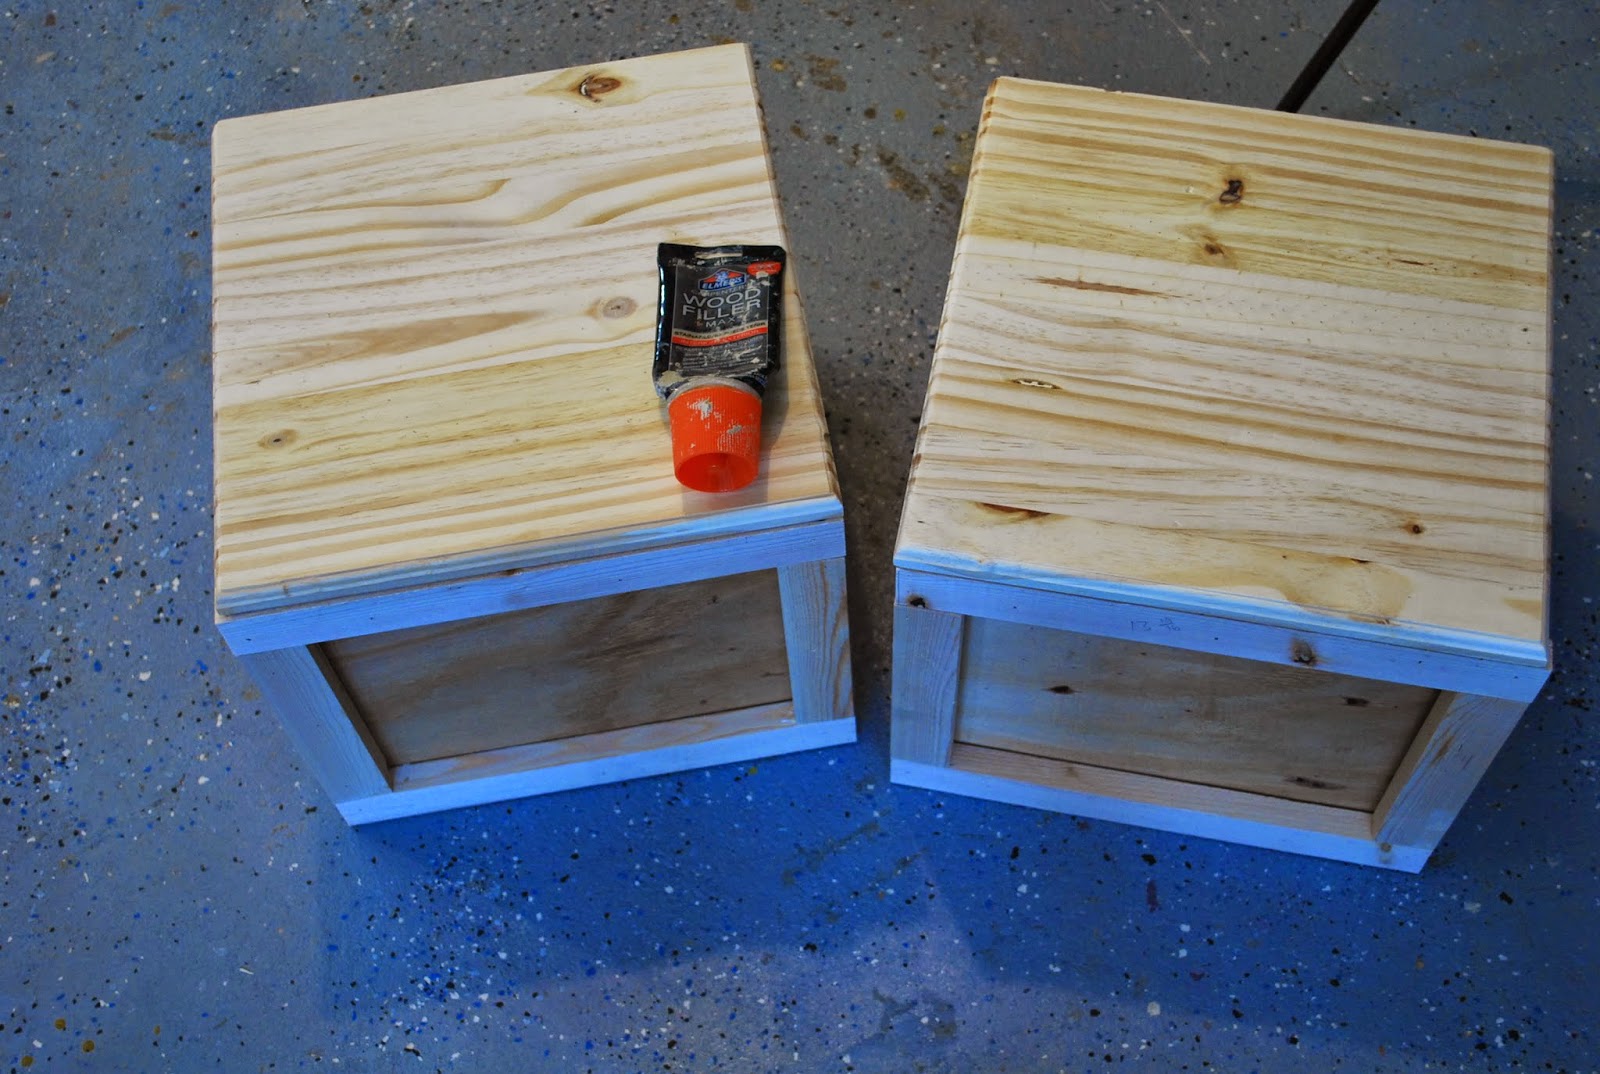
Finally fill the nail holes and imperfections using wood filler. Once its set, sand and prep for painting and decorating.


Painting and decorating the table and seats.
Now let your creative juices flow and decorate your table and ottomans.


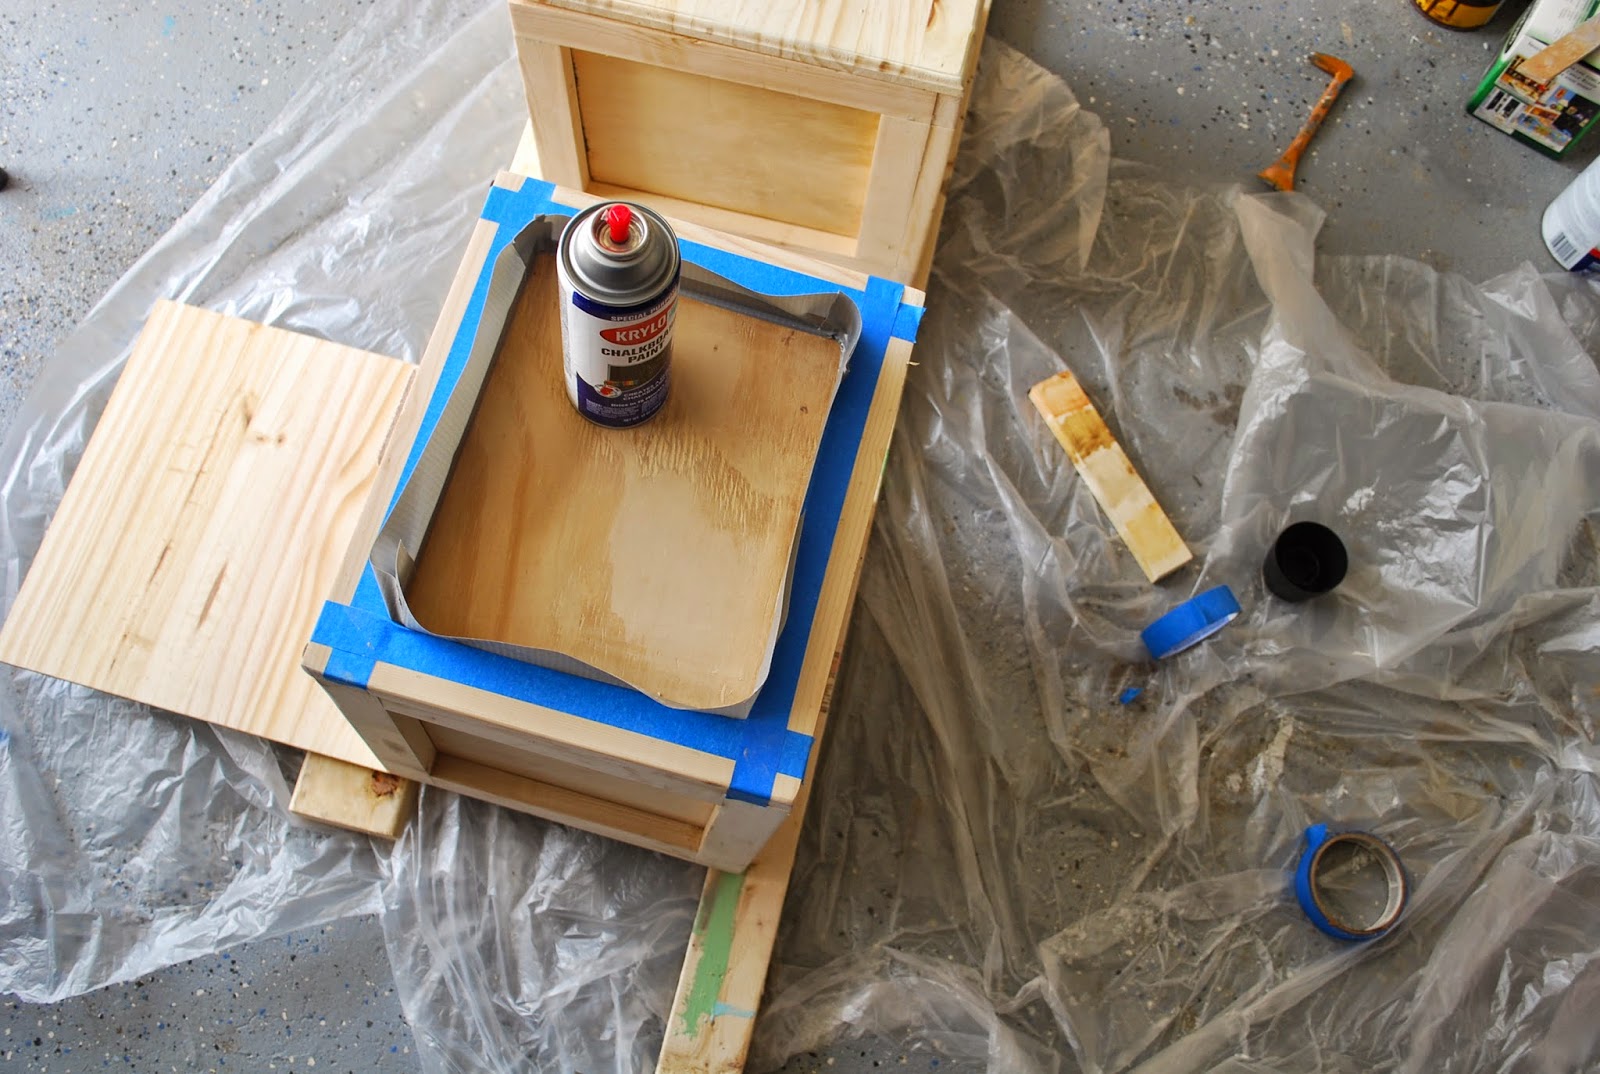
Paint the tabletop and the fronts of the ottomans with chalkboard paint. Use stencils and printouts to make the decorative elements of each side of the boxes. You can use adhesive vinyl decals or decoupage paper cutouts to your table and ottomans. Have fun with it. Make it a family affair by getting the kids involved.


Enjoy and introduce your children to the fun feelings wooden alphabet blocks brought to your childhood.
I hope y’all enjoyed this tutorial. To stay up-to-date on upcoming projects from ToolBox Divas be sure to follow along on Toolbox Divas and Toolbox Divas. Thank you so much Cassity and Remodelaholics for giving me this opportunity.


——————————————–
Thanks so much for sharing, Timisha! Fun and creative!
Remodelaholics, head right over to Toolbox Divas to see Timisha’s lovely kitchen makeover (including how she removed the dated tile backsplash without damaging the drywall) and, yeah, I need one of these workbenches for my table saw!
Lorene has been behind the scenes here at Remodelaholic for more than a decade! She believes that planning projects and actually completing them are two different hobbies, but that doesn't stop her from planning at least a dozen projects at any given time. She spends her free time creating memories with her husband and 5 kids, traveling as far as she can afford, and partaking of books in any form available.


Thank you so much for having me here today!
Thanks so much for being our guest, Timisha!