Rustic Square Bedside Table Building Tutorial
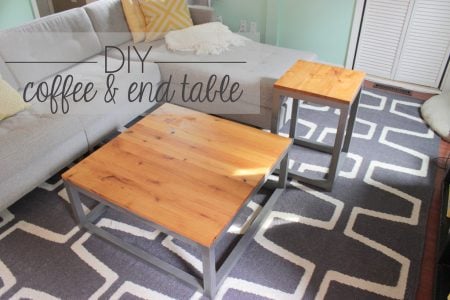
Hey everyone! It’s Jamison from Rogue Engineer again. Today I’m going to show you how to build a simple rustic side table for under $25! We made this side table for our guest bedroom and love how it turned out. Get the full tutorial below and the building plans at Rogue Engineer.
How to Build a Rustic Square Bedside Table
>> Free DIY Plans by Rogue Engineer <<
Required Tools
- Miter Saw
- Kreg Jig
- Drill/Driver
- Tape Measure
- Pencil
Materials
- 4x – 2 x 2 x 8′
- 3x – 2 x 4 x 8′
- 8x – 4″ Corner Brackets
- 2-1/2″ Pocket Hole Screws
Cut List
- 2x – 2 x 2 x 24″
- 2x – 2 x 2 x 21″
- 8x – 2 x 2 x 17-1/2″
- 4x – 2 x 2 x 22-1/2″
- 6x – 2 x 4 x 21″
- 5x – 2 x 4 x 17-1/2″
Start by cutting all your wood according to the cut list above.
Step 1: Assemble the Top
Then drill pocket holes as shown in the six 2x4x21″ boards and assemble the top using 2-1/2″ pocket hole screws.
Step 2: Assemble the Shelf
Do the same for the five 2x4x17-1/2″ boards as shown in the following two pictures. Drill pocket holes and assemble the top using 2-1/2″ pocket hole screws.
Step 3: Assemble the Sides (Qty 2)
Drill pocket holes in each side of the remaining 2x2x17-1/2″ boards and assemble the sides using 2-1/2″ pocket hole screws. The lower 17-1/2″ board should be 4″ up from the bottom of the legs.
Step 4: Assemble the Base
If you haven’t already, drill pocket holes in each board end on the side of the lower shelf and assemble the base using 2-1/2″ pocket hole screws.
Step 5: Final Assembly
Center the base onto the top and fasten in place using 2-1/2″ wood screws.
Step 6: Finishing
We decided to finish this bedside table with Ash wood stain.
Then we sprayed the 4″ corner brackets with chalkboard spray paint to give them that matte black look.
Finally, we installed the brackets using decorative nail heads. (Note: These clearly offer no structural support and could possibly be pulled off if you tried hard enough but we like the looks of it so we went with it.)
I hope you enjoyed this tutorial. For sneak peeks of our upcoming projects from Rogue Engineer be sure to follow me on Facebook and Instagram.
————————————
For more side table building plans, try these:


I LOVE all of Jamison’s stuff! His plans are so easy to follow and look so cool! This table is a perfect example!
I agree! Great furniture and great instructions! Thanks for the comment, Rebekah!
This looks so easy. I can’t wait to build it!
We’d love to see when you do! Email us or send your photos here: https://www.remodelaholic.com/share-brag-post/
LOVE THIS! I’m actually building it right now. Just a heads up that in your materials (Cut) list, you have 5x – 2 x 4 x 17-1/5″ – – I believe the measurement should be 17-1/2″, based on your instructions. Cheers!
Thanks Micah, I went ahead and updated this. Thanks for the heads up!
Where is the bedding from?
I believe there is either something wrong with the cut list or the instructions. If you follow the instructions, when you get to step 3(Assemble The Sides) you should be left with the following:
2 2x2x24
2 2x2x21
6 2x2x17-1/2
The instructions for this step mention the horizontal pieces being 2x2x17-1/2, however they do not mention the vertical. If they were to mention the vertical i’m not quite sure what they’d say because if you were to use the 2x2x24 that would leave you with the legs for the second side being 3 inches shorter and vice versa if you were to use the 2x2x21. According to the picture all 4 legs are the same length. I just assumed the instruction were wrong however Micah was in the process of building this and never came back to mention the discrepancy. As of right now it looks like I have to head back to Lowe’s for another 2×2. I’d just cut the two 24 inchers down to give me four of the same size, but it’s already a shorter table and i want the longer legs. Is there something I’m missing? If not the cut list should probably be changed to reflect either 4 of the 2x2x24 or 2x2x21.
Ignore my previous comment. These directions aren’t exactly clear. Instead of telling you what 2×2 pieces to use in step one they leave you to draw conclusions from the pictures/cut list. I now realize that i used the wrong pieces in step 1 leaving me with the wrong pieces for step 3. It’s late, please forgive me lol
Where do you get your lumber to keep the overall cost down so low? The Home Depot by my house charges $11.50 for a single 2x2x8ft
Hello,
What are the finished measurements? Height and depth of the top? Thanks
Hi Christa,
The bedside table top is 24×24 inches.