Newly Upholstered Entryway or Bedroom Bench
I love a good before and after, and have I ever admitted that I have a special place in my heart for little benches. I think they are so quaint, and I love how Korrie at Red Hen Home has totally re-imagined this well used, and abused garage sale find into something simply wonderful, here is what she did:
School started this week. For many a mother, that would be cause for rejoicing and more projects! But I’m a homeschooler! I’m afraid I may haveless time for projects, and I’m not really OK with that. I’ll be struggling to find the balance in the next couple of weeks!
Something that has me feeling good is the completion of a new project–another bench! I found this treasure at a garage sale a couple of weeks ago: 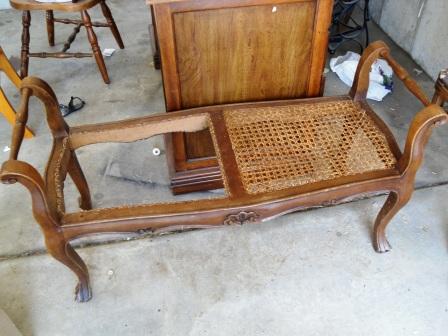
Isn’t she purty?? Let me just say that there was a LOT of great furniture at this particular yard sale, but the owner obviously thought VERY HIGHLY of what he had! This little bench, however, with the caning completely missing from one side, was a good buy! 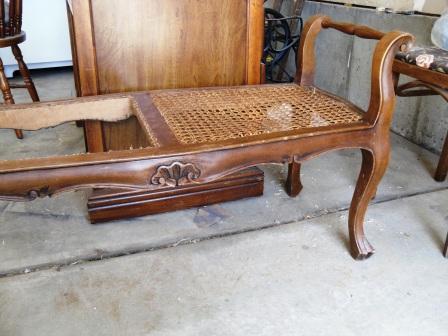
My friend “D” had been wanting a bench for her bedroom, so I sent her a picture of this one immediately. Sold!
The plan was to put an upholstered seat on the bench. I had a piece of plywood cut to the general dimensions by my table-saw-owning friend. Then I made a pattern out of scraps of wrapping paper to follow the curves and corners of the bench. I taped the pattern directly to the plywood, and… 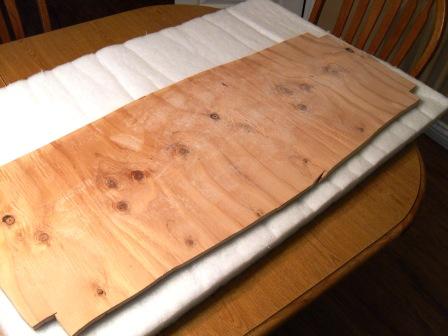
Look at this! I cut this shape out my very own self with my very own jigsaw! (I bought the jigsaw a couple of months ago. Had to wait until it was properly “aged” to use it, you know.)
Please ignore a couple of little zigs into the wood. I promise they won’t show. 
First a layer of 2″ Nu-Foam went on the plywood, and then I stapled a layer of batting on with my pneumatic stapler (another fun toy) to give nice smooth edges. 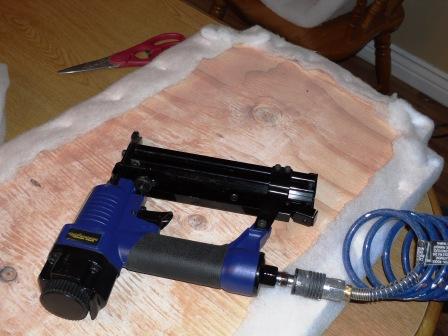
Next came the fabric! Do you recognize it? It is the same that is on this bench at the end of my bed! I had just enough left. 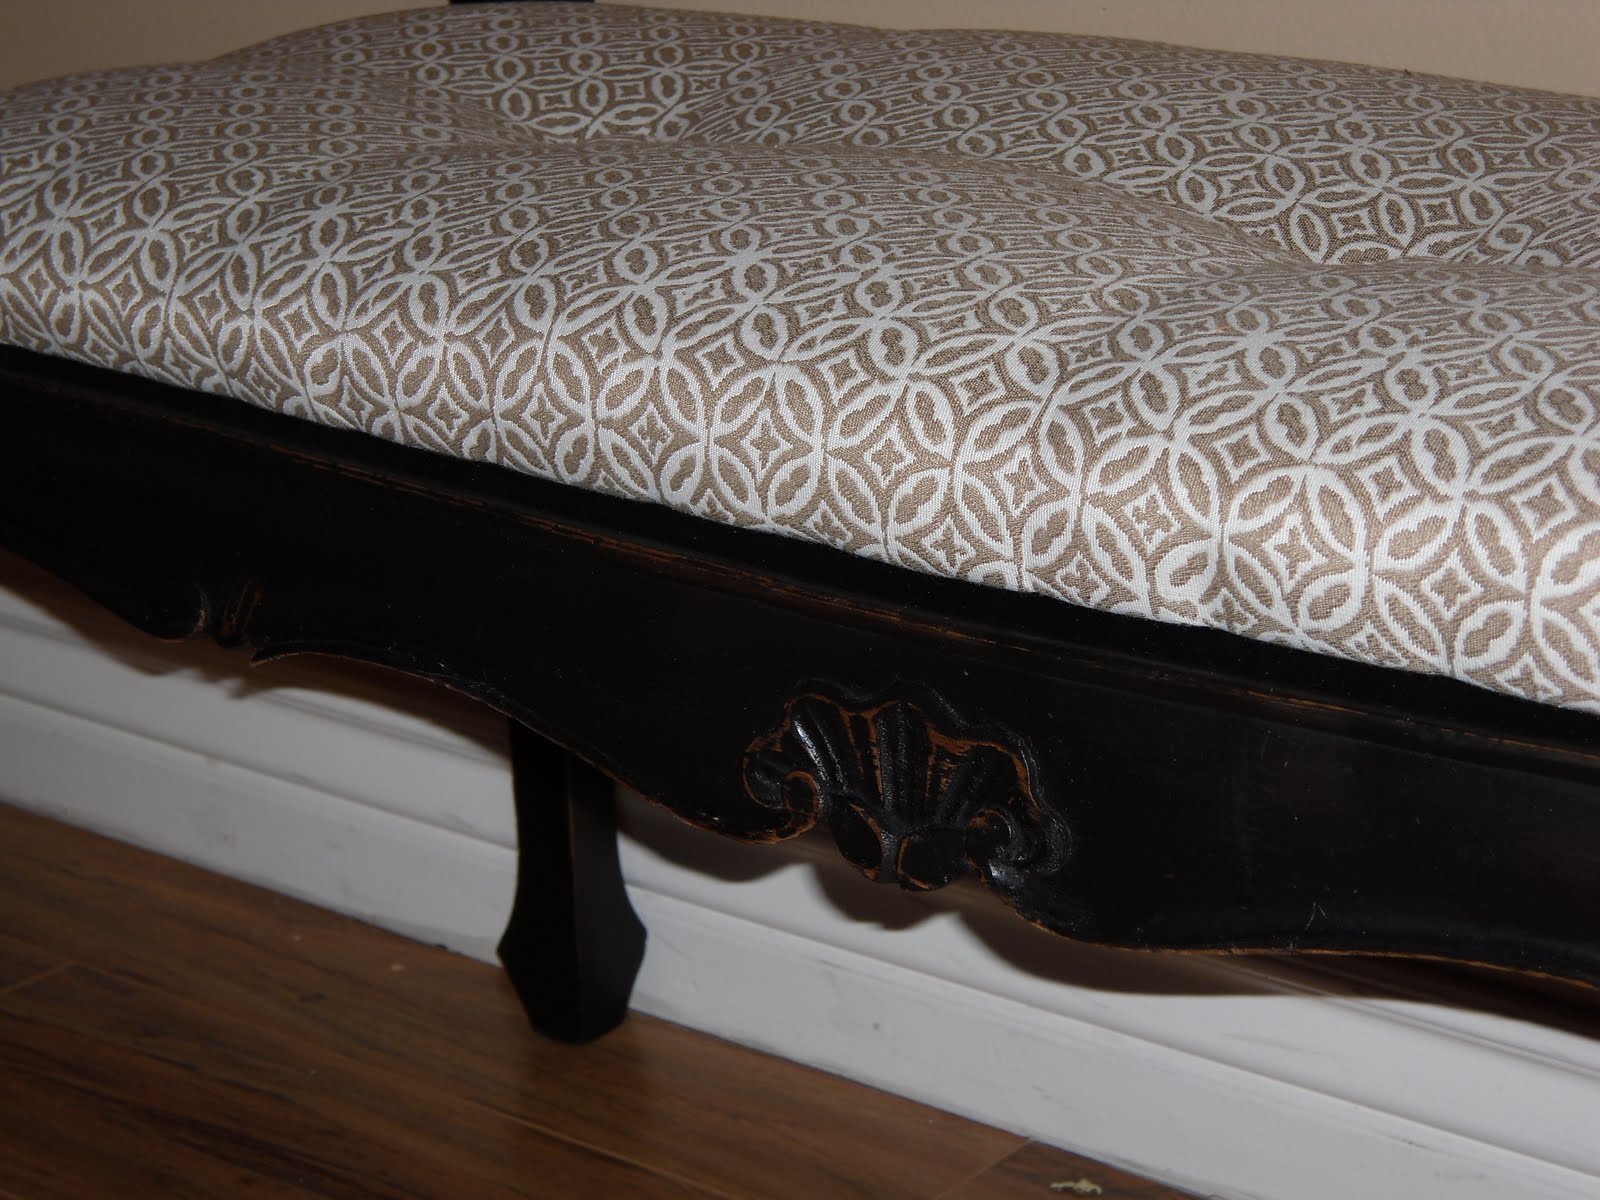
Oh, I probably forgot to mention the paint job. I used Rustoleum’s flat black paint, and then distressed it to show the pretty details. 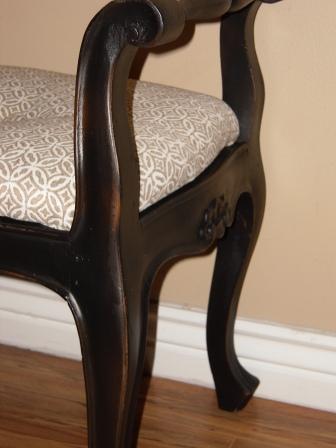 I love the pretty curved handles.
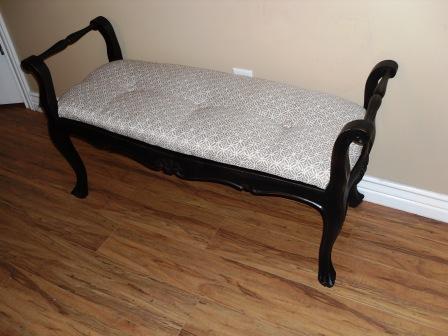
I added three buttons on top. I used my stapler to staple through all the layers of fabric and foam, and then hot-glued the buttons on. That particular method seems to work just as well (and it’s a lot easier) than stringing them through holes in the plywood. 
Cassity Kmetzsch started Remodelaholic after graduating from Utah State University with a degree in Interior Design. Remodelaholic is the place to share her love for knocking out walls, and building everything back up again to not only add function but beauty to her home. Together with her husband Justin, they have remodeled 6 homes and are working on a seventh. She is a mother of four amazing girls. Making a house a home is her favorite hobby.


>I love this soooooooo much. How chic.
<3
>Wow! That looks soooo beautiful! You really did a great job on it. I've got this really sad chair that I found on the side of the road that will be so pretty once I do something to it. Now that it's getting cooler outside, I might just be able to stand getting out there and making it over! Thanks for the motivation!
~ The Speckled Dog
>Very nice!
S
xo
>Love your blog.. I have added a button to my link party page, I am also following your blog!
>What a find! This has turned out gorgeous. You have done an amazing job. And now I know how to put those buttons on! Thanks!
Megs x