Let there be Light, Candle Holder, Frugal Home Designs
Hello Everyone, it is Fawn again excited to be here on Remodelaholic. This month I have a Pottery Barn hack for you. I noticed the Wood Block Votive Holder in my new Pottery Barn catalog and thought it would be awesome out on the patio table. It seemed like a pretty easy thing to make. Turns out it was so let’s get started. Here’s what you will need: 4 x4 cut to length (I found mine for 51 Cents in the hull bin at Home Depot) Drill with a spade/flat bit Sand paper Stain Legs First, you need to find the center of your 4 x4 (remember the actual measurement isn’t 4″). You will notice in the picture below that I measured and marked the center. I did this on both ends they used a straight edge to connect the dots. 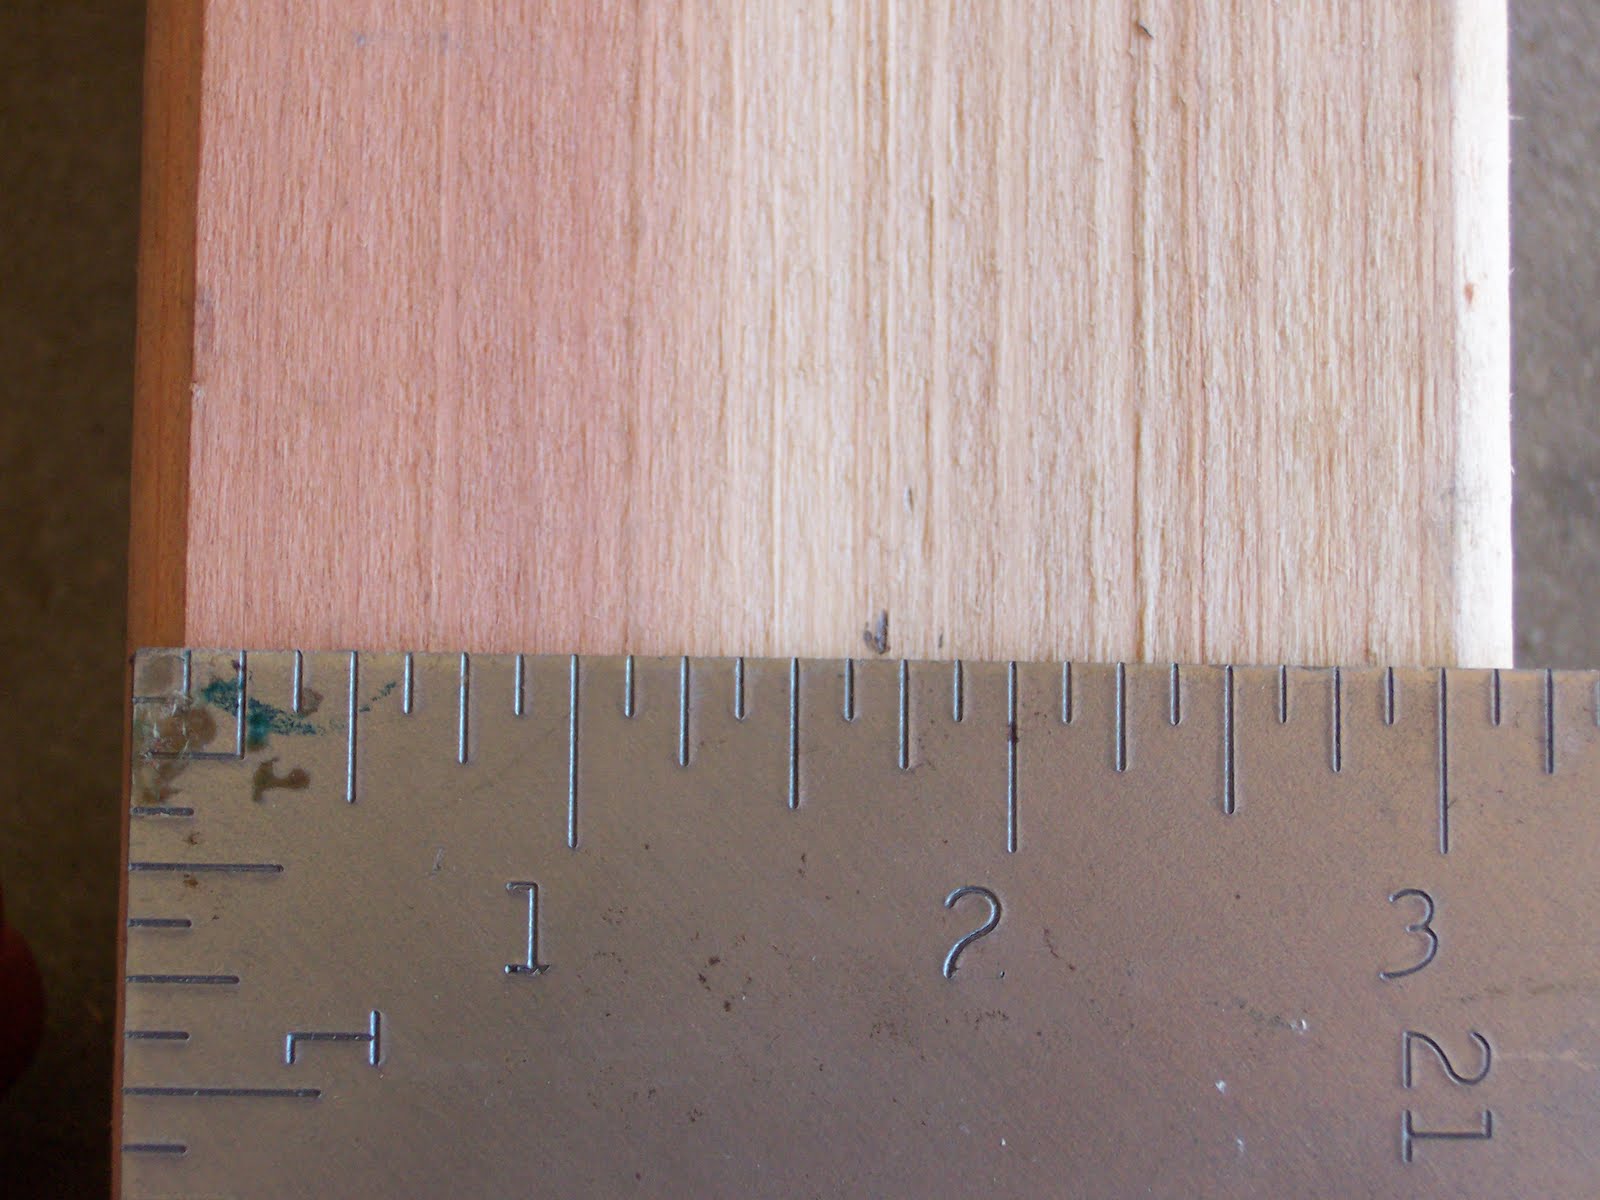 It is a little hard to see, but there is a light pencil line right down the center.
 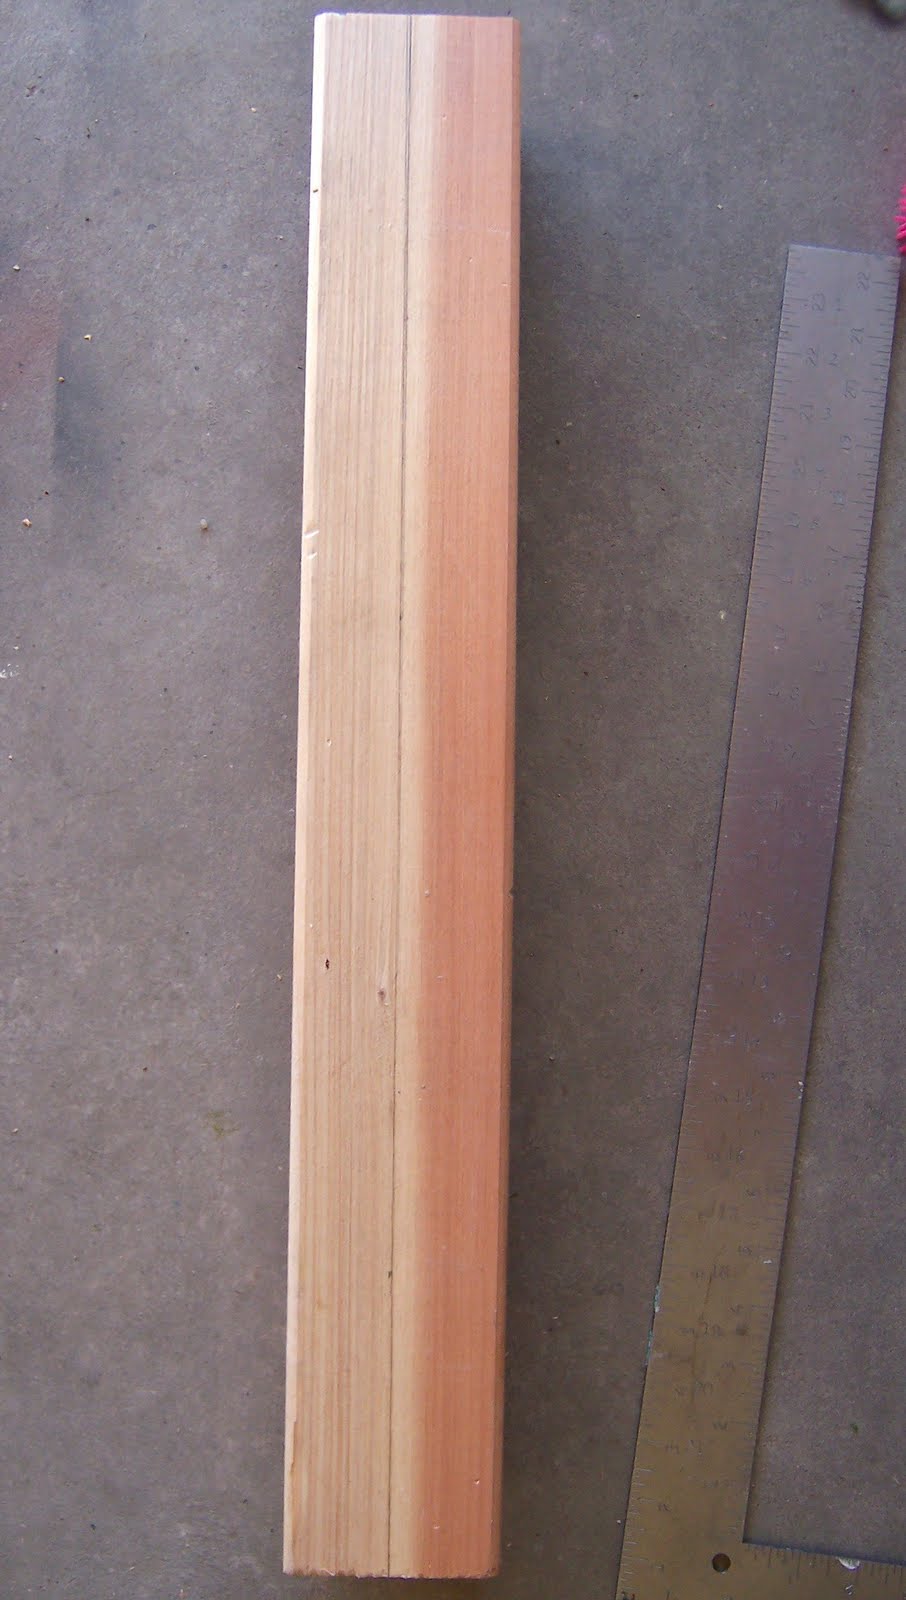 Next you have to determine where you want the votive/tea light hole to begin and mark that off. I wanted there to be about an inch and a half on each end. I measured and drew a straight line with my speed square.
 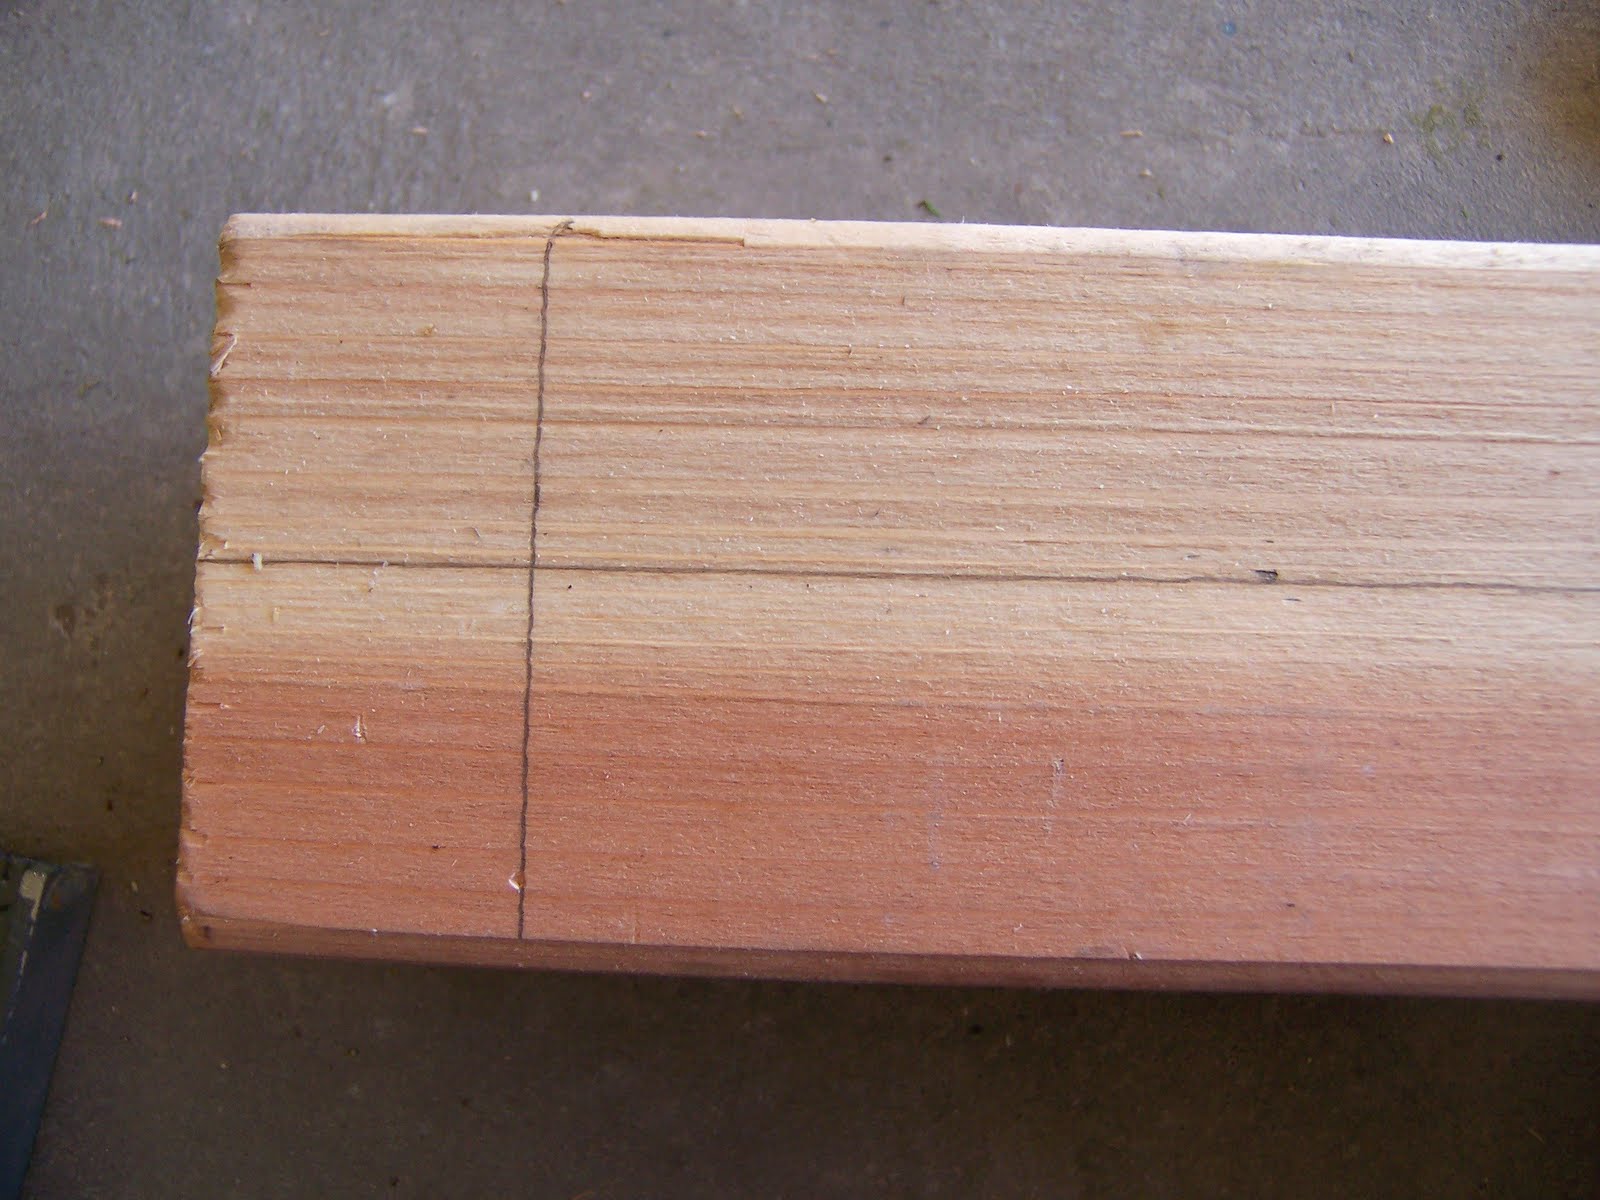 Here is quick preview to illustrate.
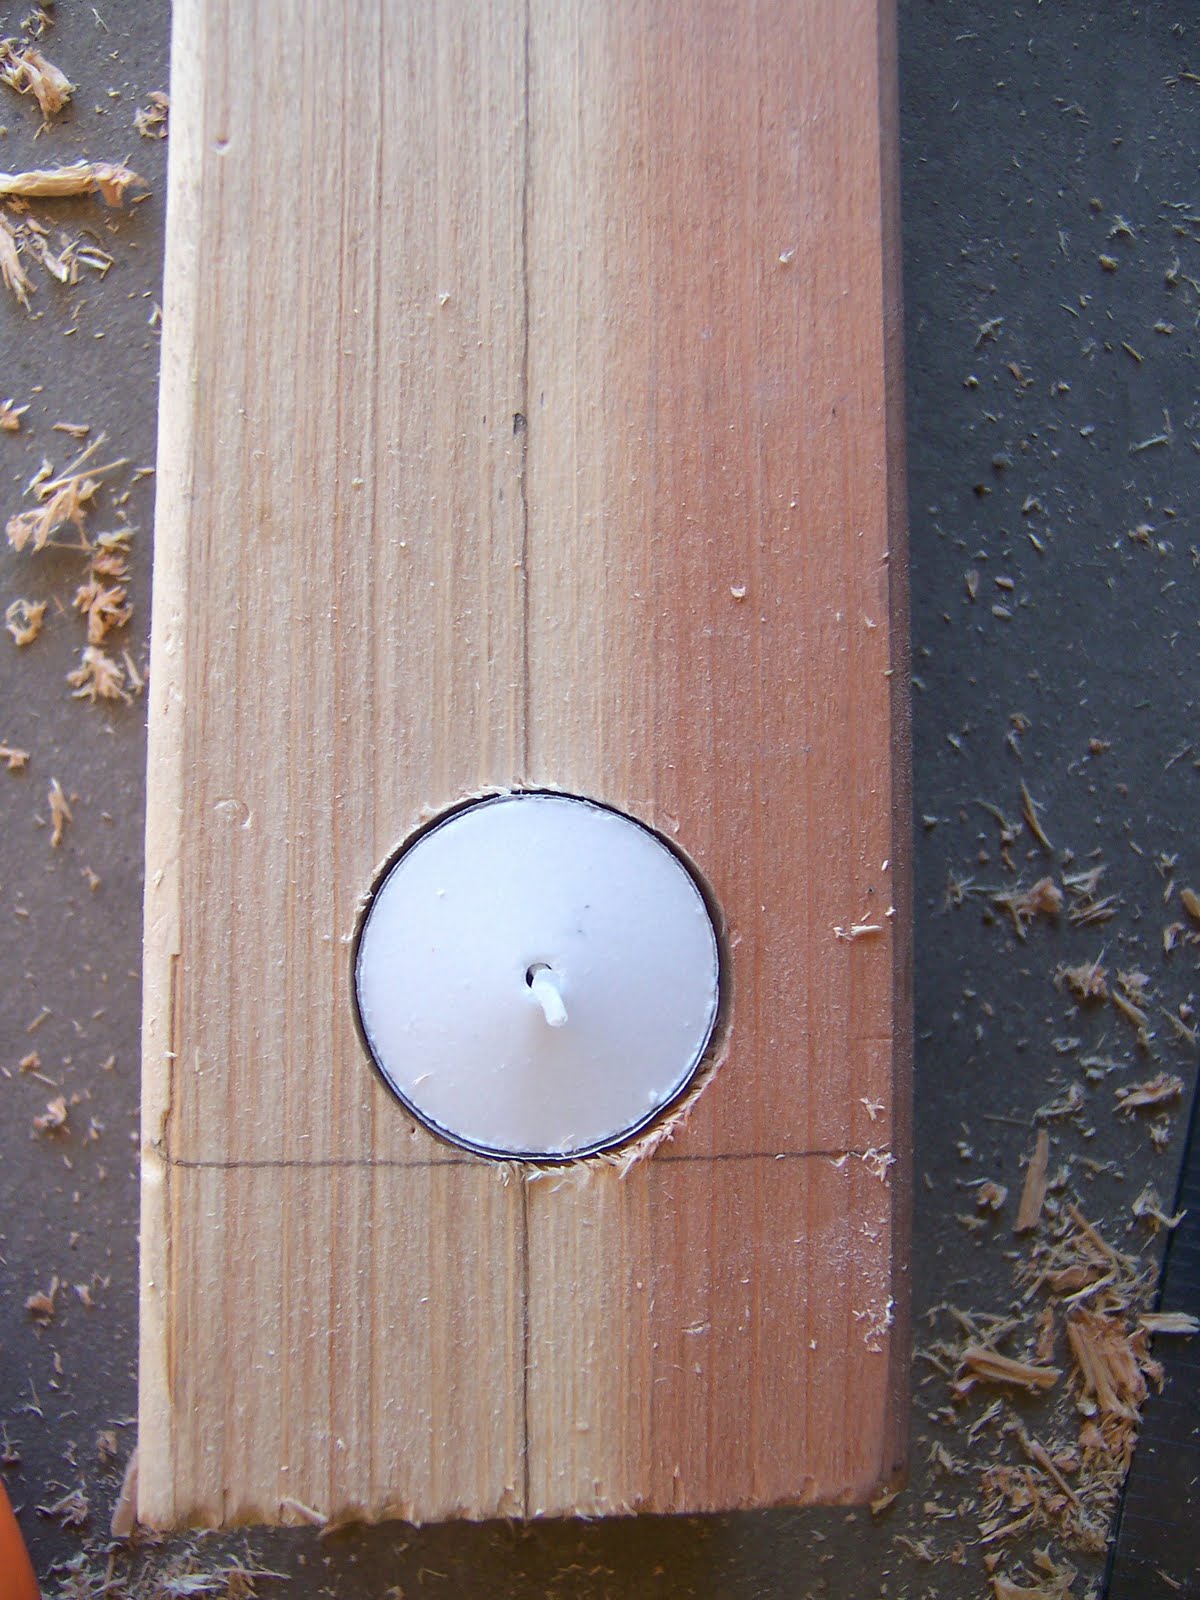
 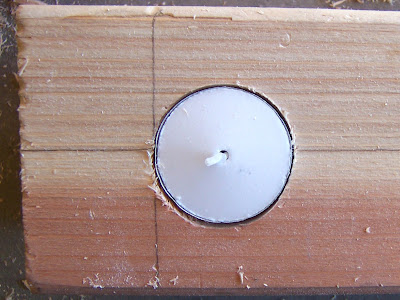 Now on to drilling the holes. I used a 1 1/2″ spade drill bit. You will notice in the picture below the spade bit has a point in the middle. I lined that up with the center line I drew in the first step.
  I am a pretty visual person so this is how I went about spacing out my tea lights. I put my first one lined up with my line I measured for my “edge” then measured one inch-ish from the tea light.
 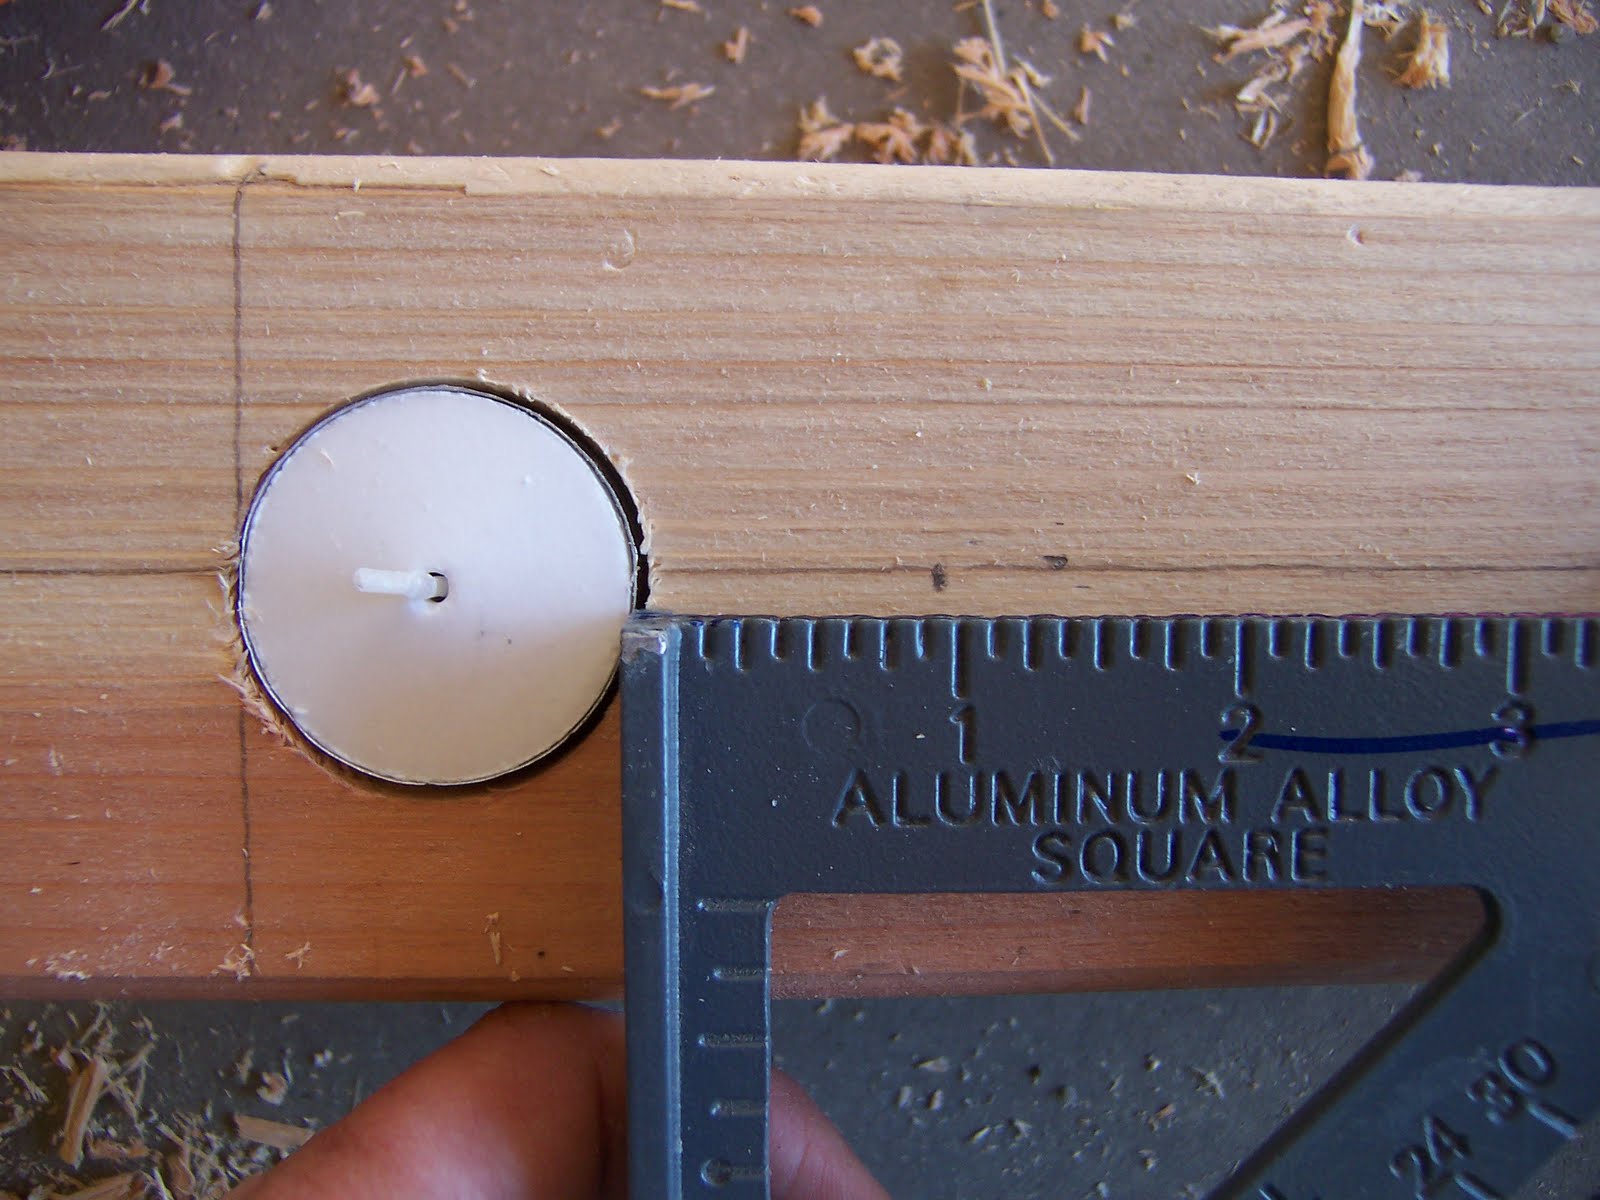 I knew I wanted that one inch mark to be the edge of my next tea light so I lined up the drill and went to town. Notice the edge of the drill is at the one inch measurement mark.
 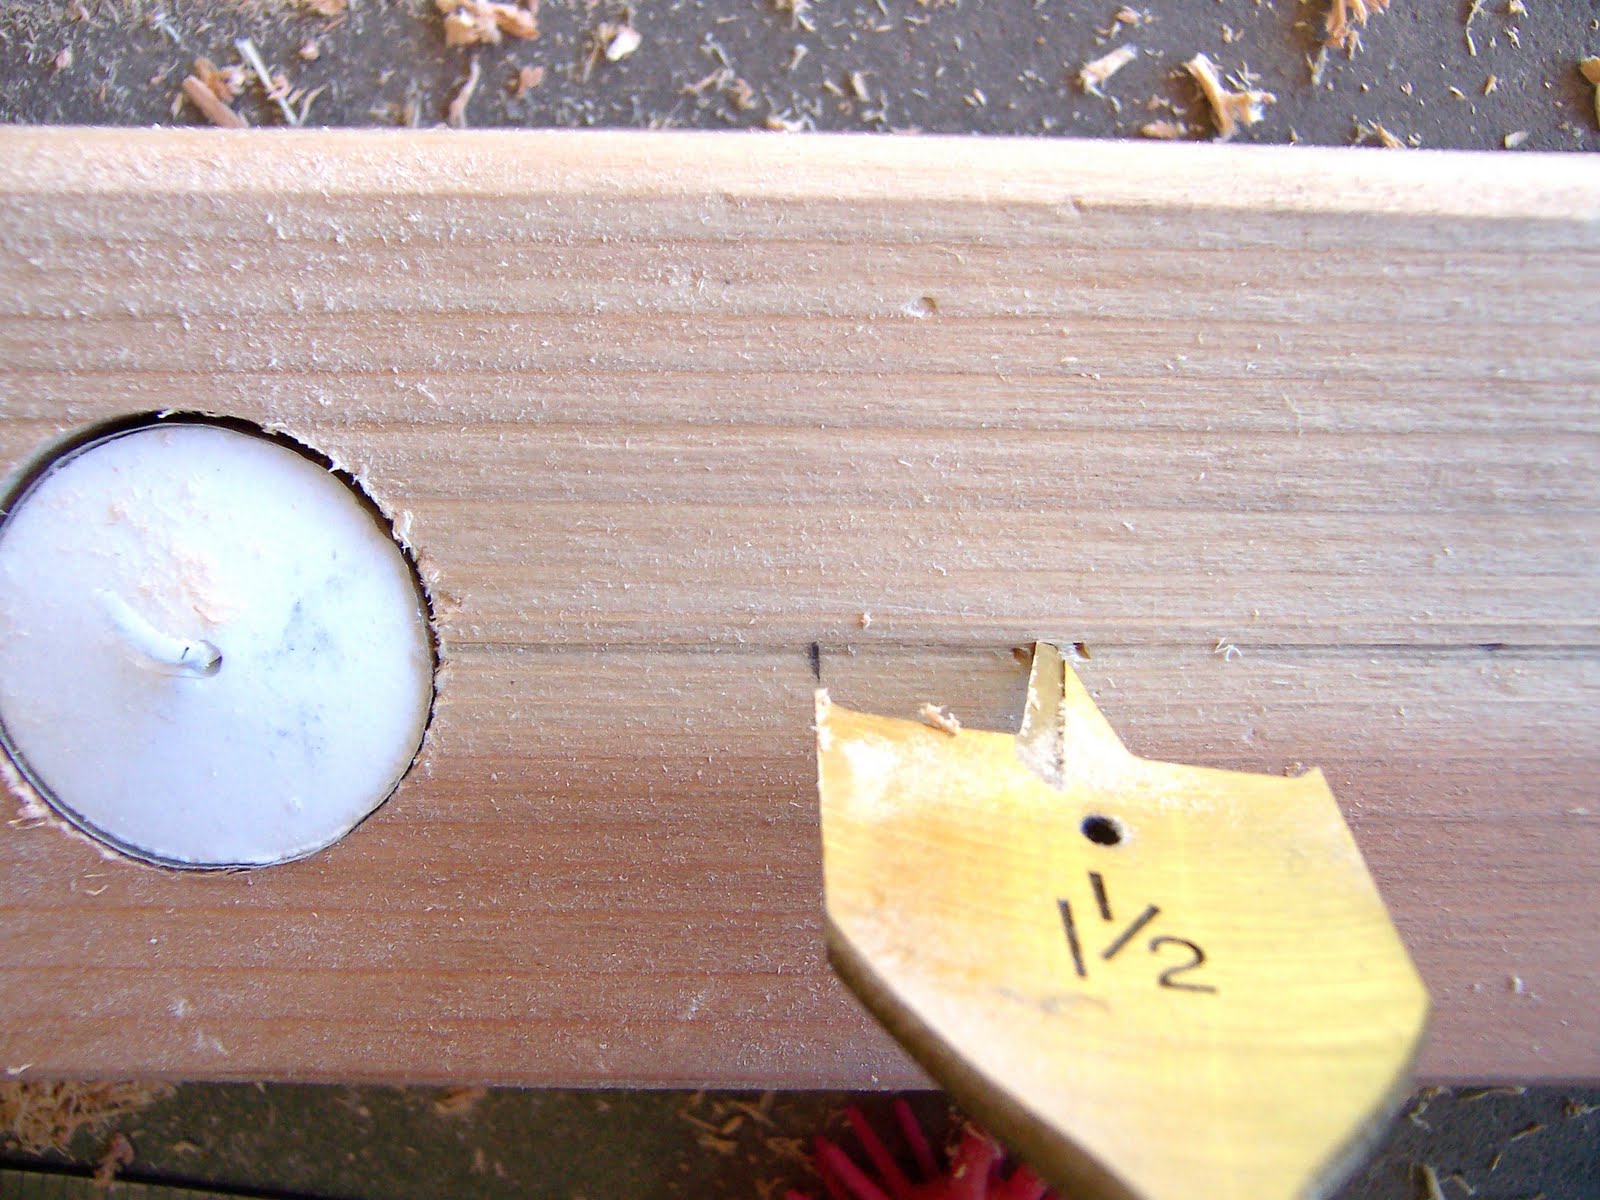 Then repeat
 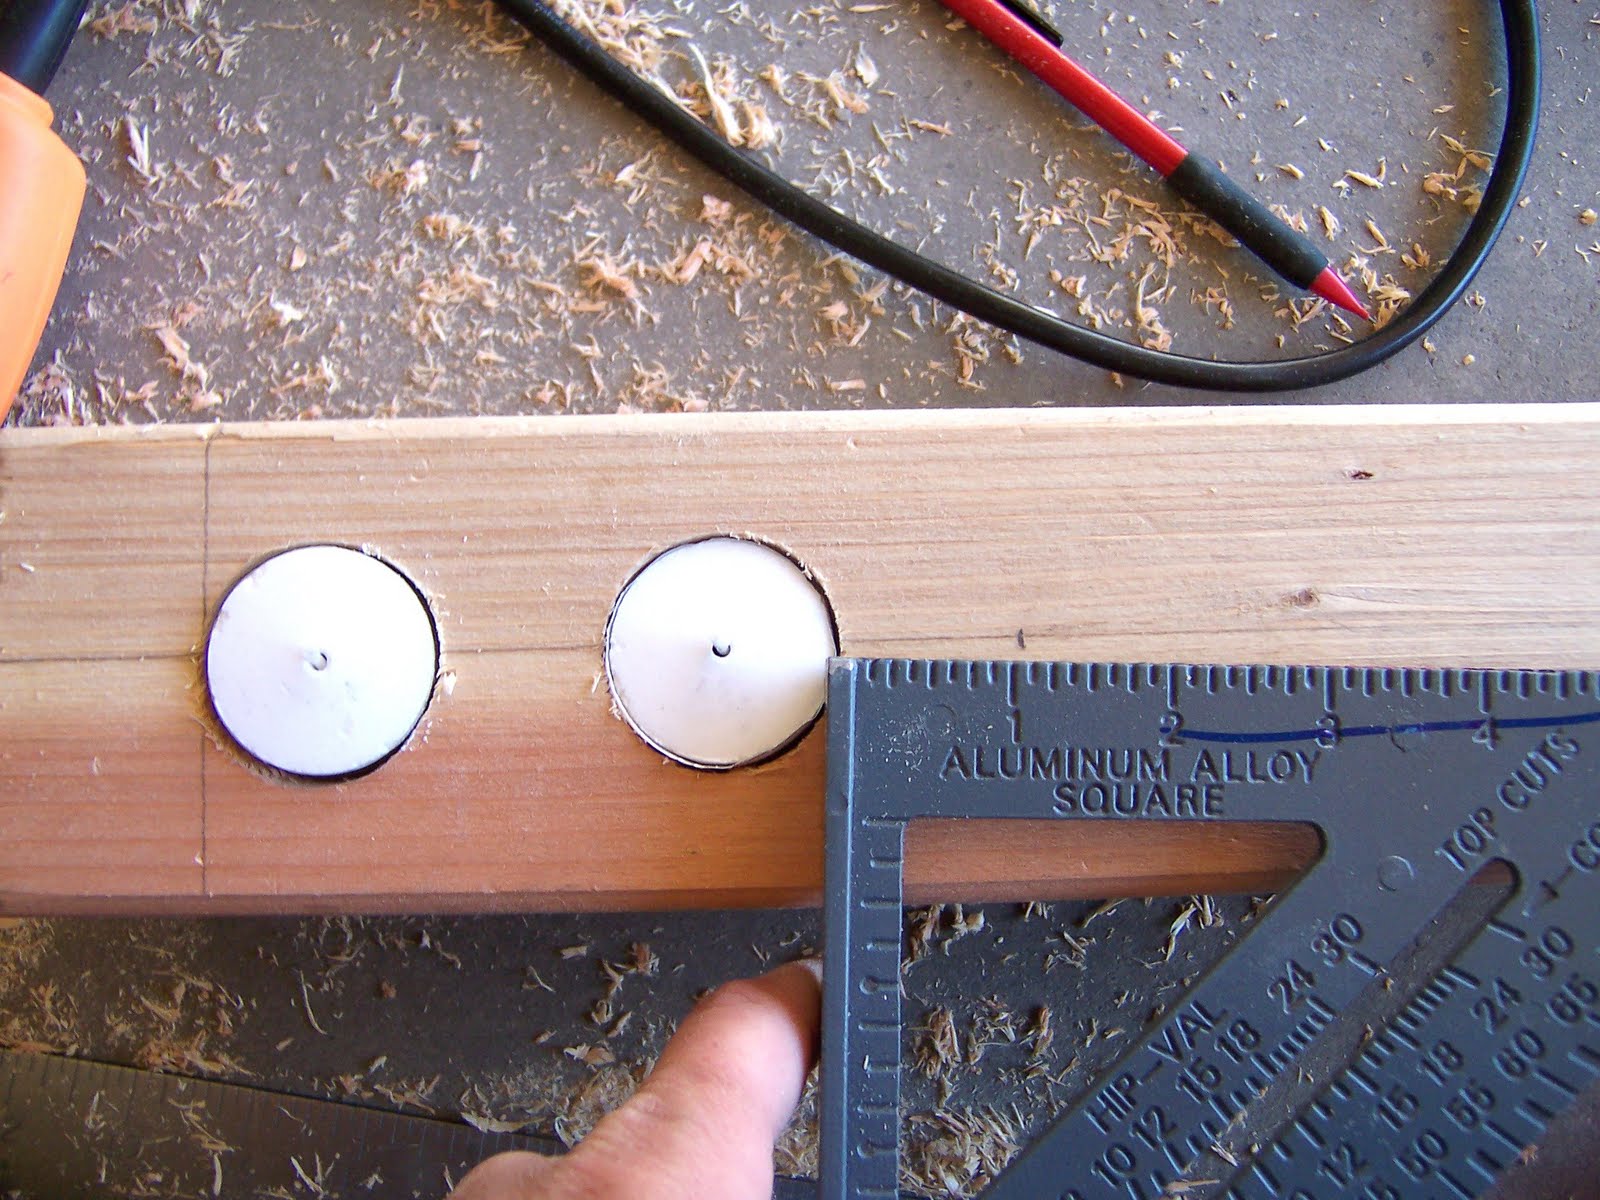 Until you are finished.
 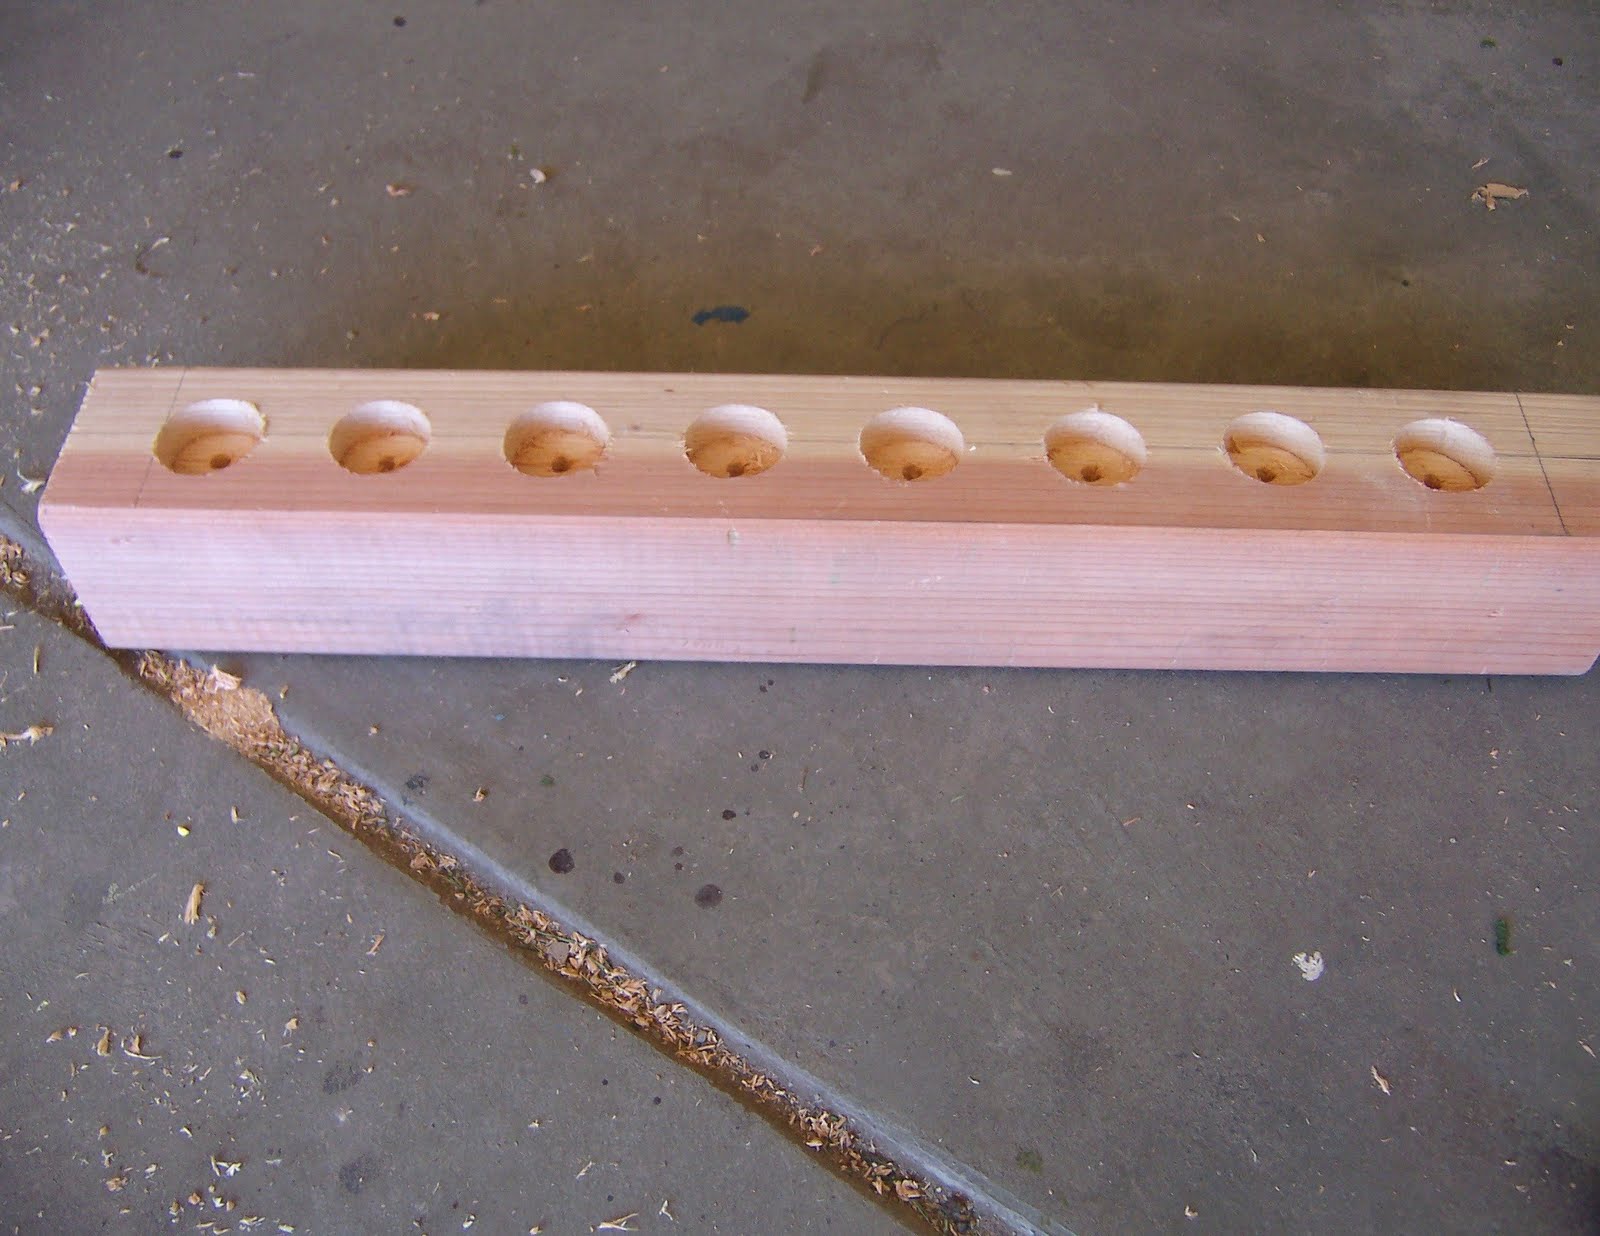 Time to sand. I used 80 grit first then 220 grit to make it nice and soft. After sanding remove all of the dust. I used Minwax Dark Walnut stain. I have found a lint free rag is the best tool for applying stain. Also, do your self a favor and invest in some rubber gloves–I learned this they hard way.
 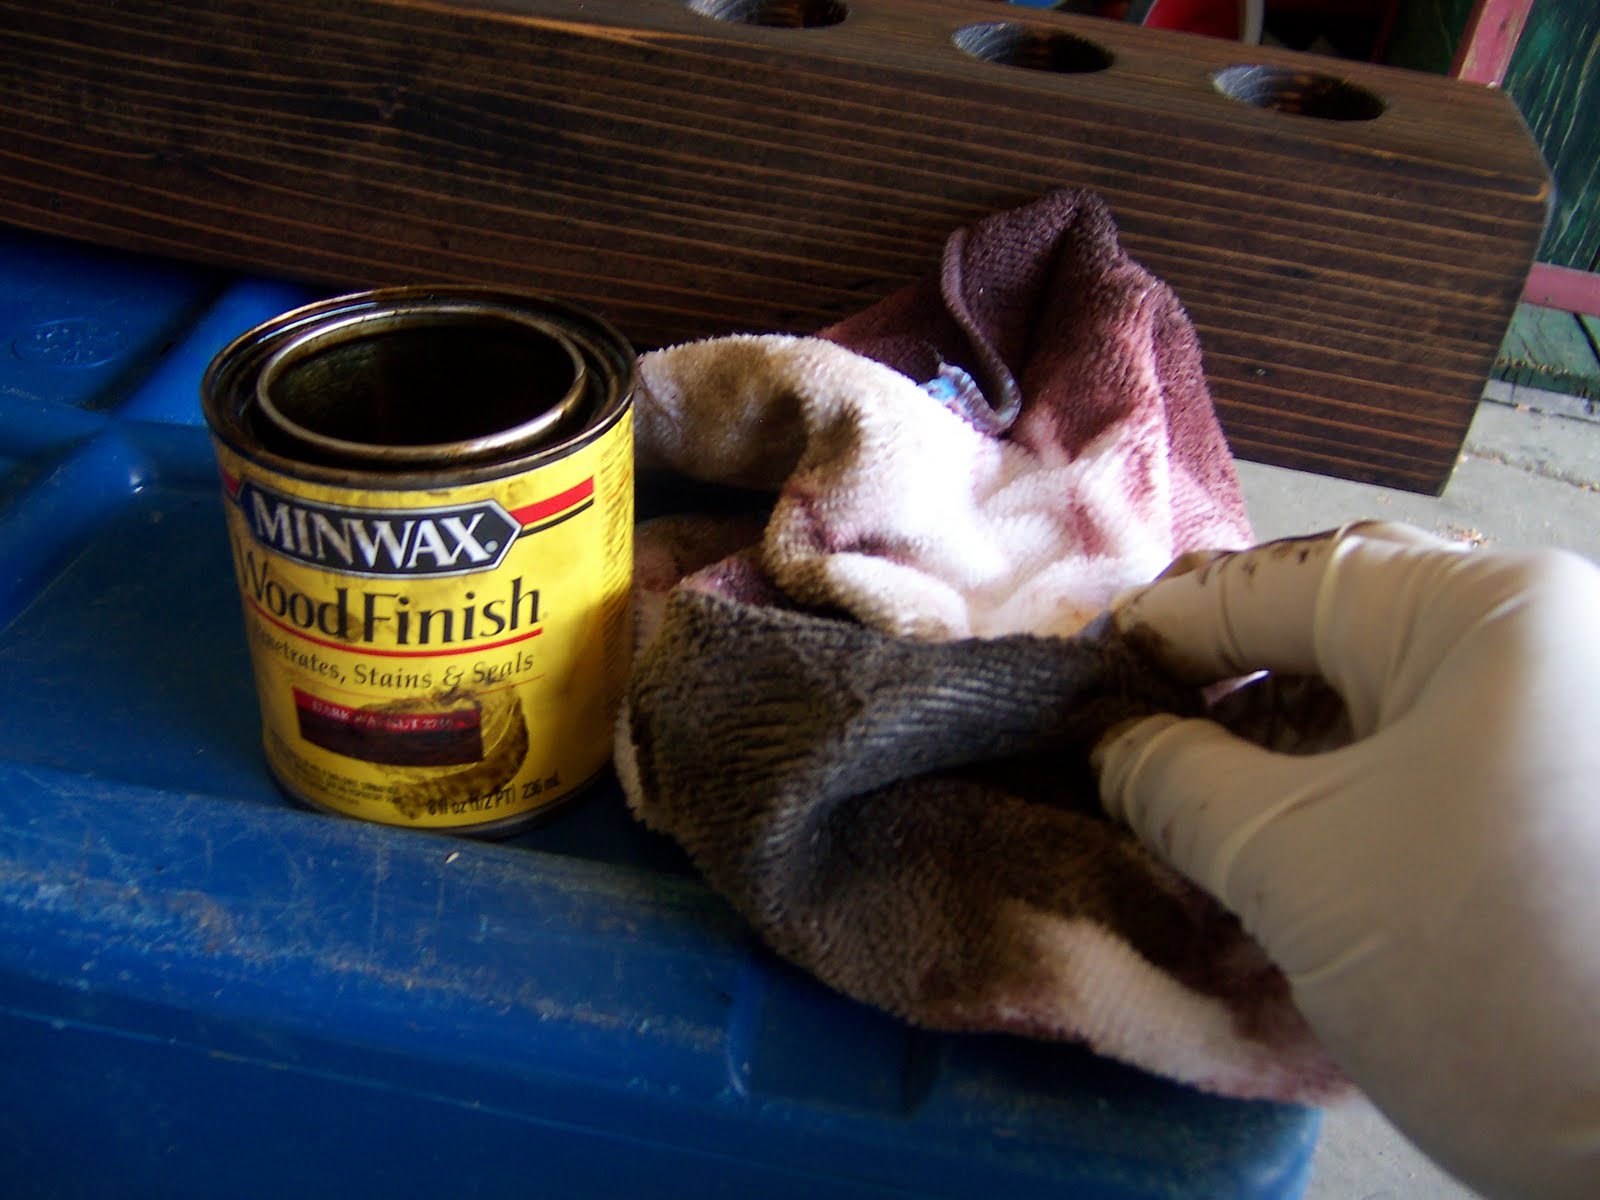 I had some knobs that I got at the Goodwill for 49 cents.
 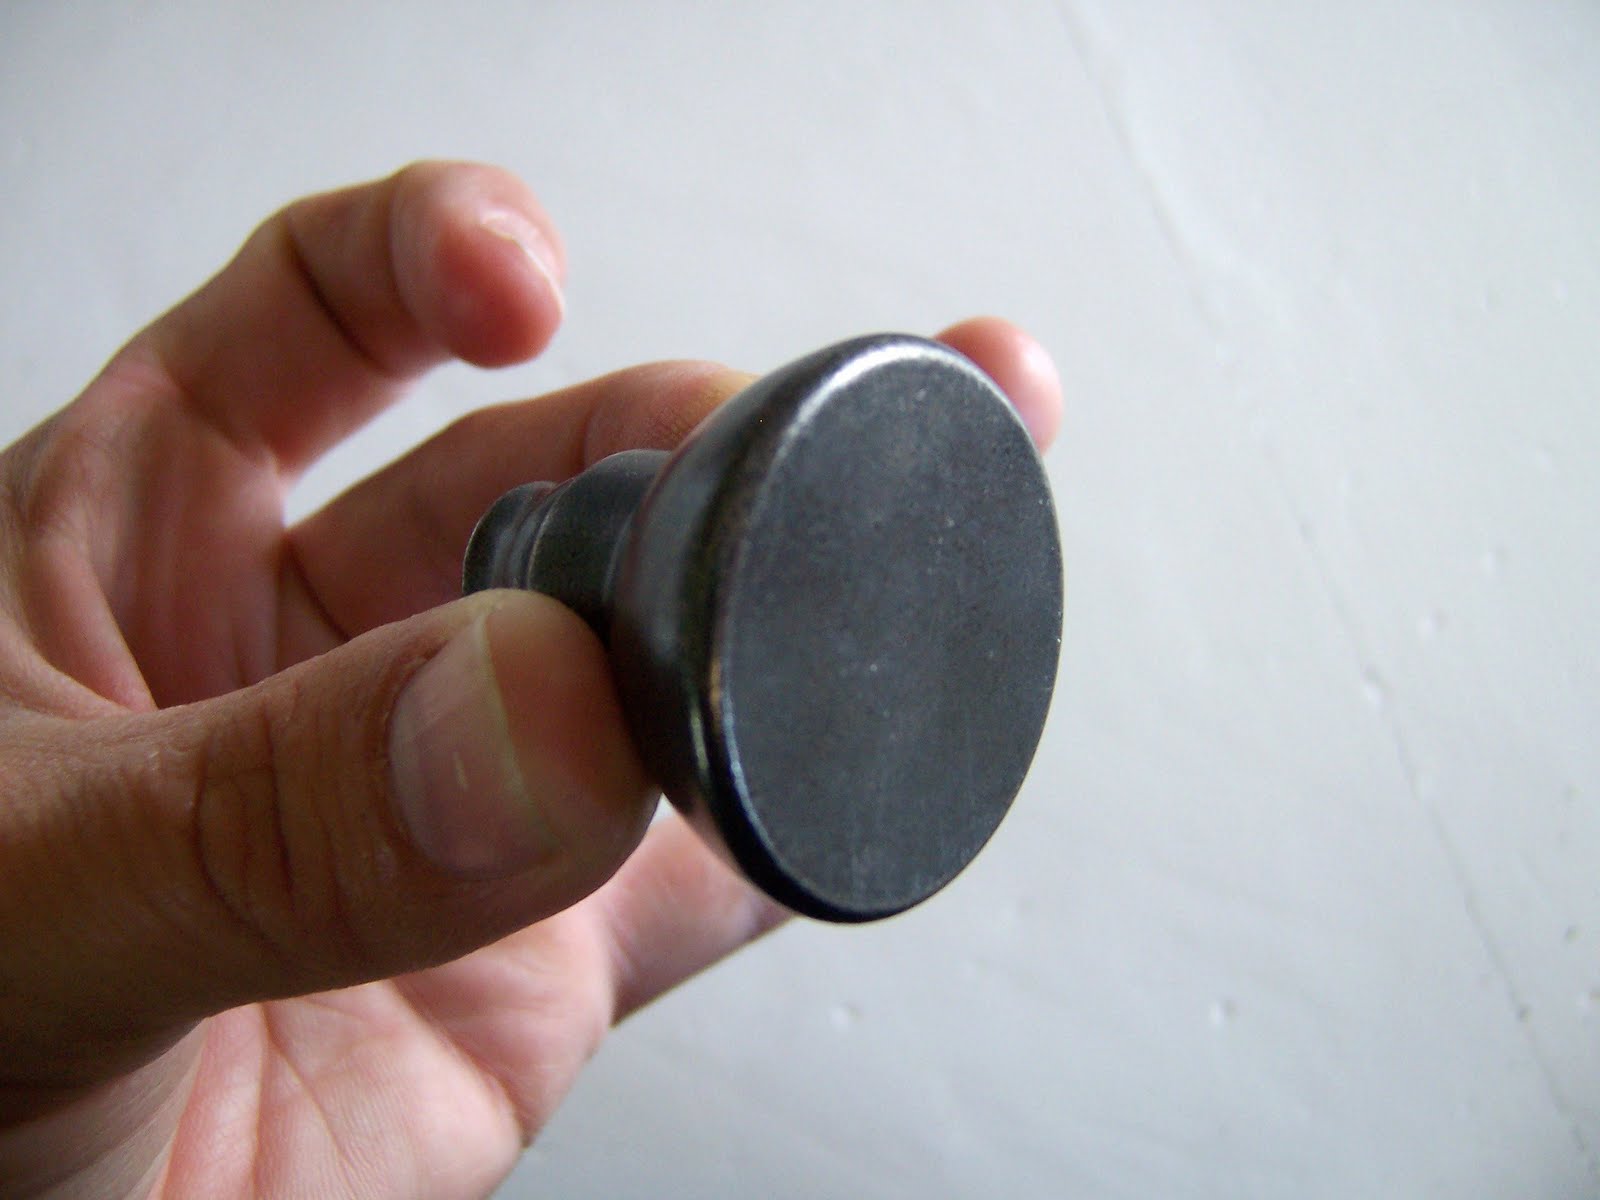 They happen to be flat on the bottom so a little dollop of Gorilla Glue later and this lady has legs. Perfect for the patio table, now it goes right over the “bump” for the umbrella opening.
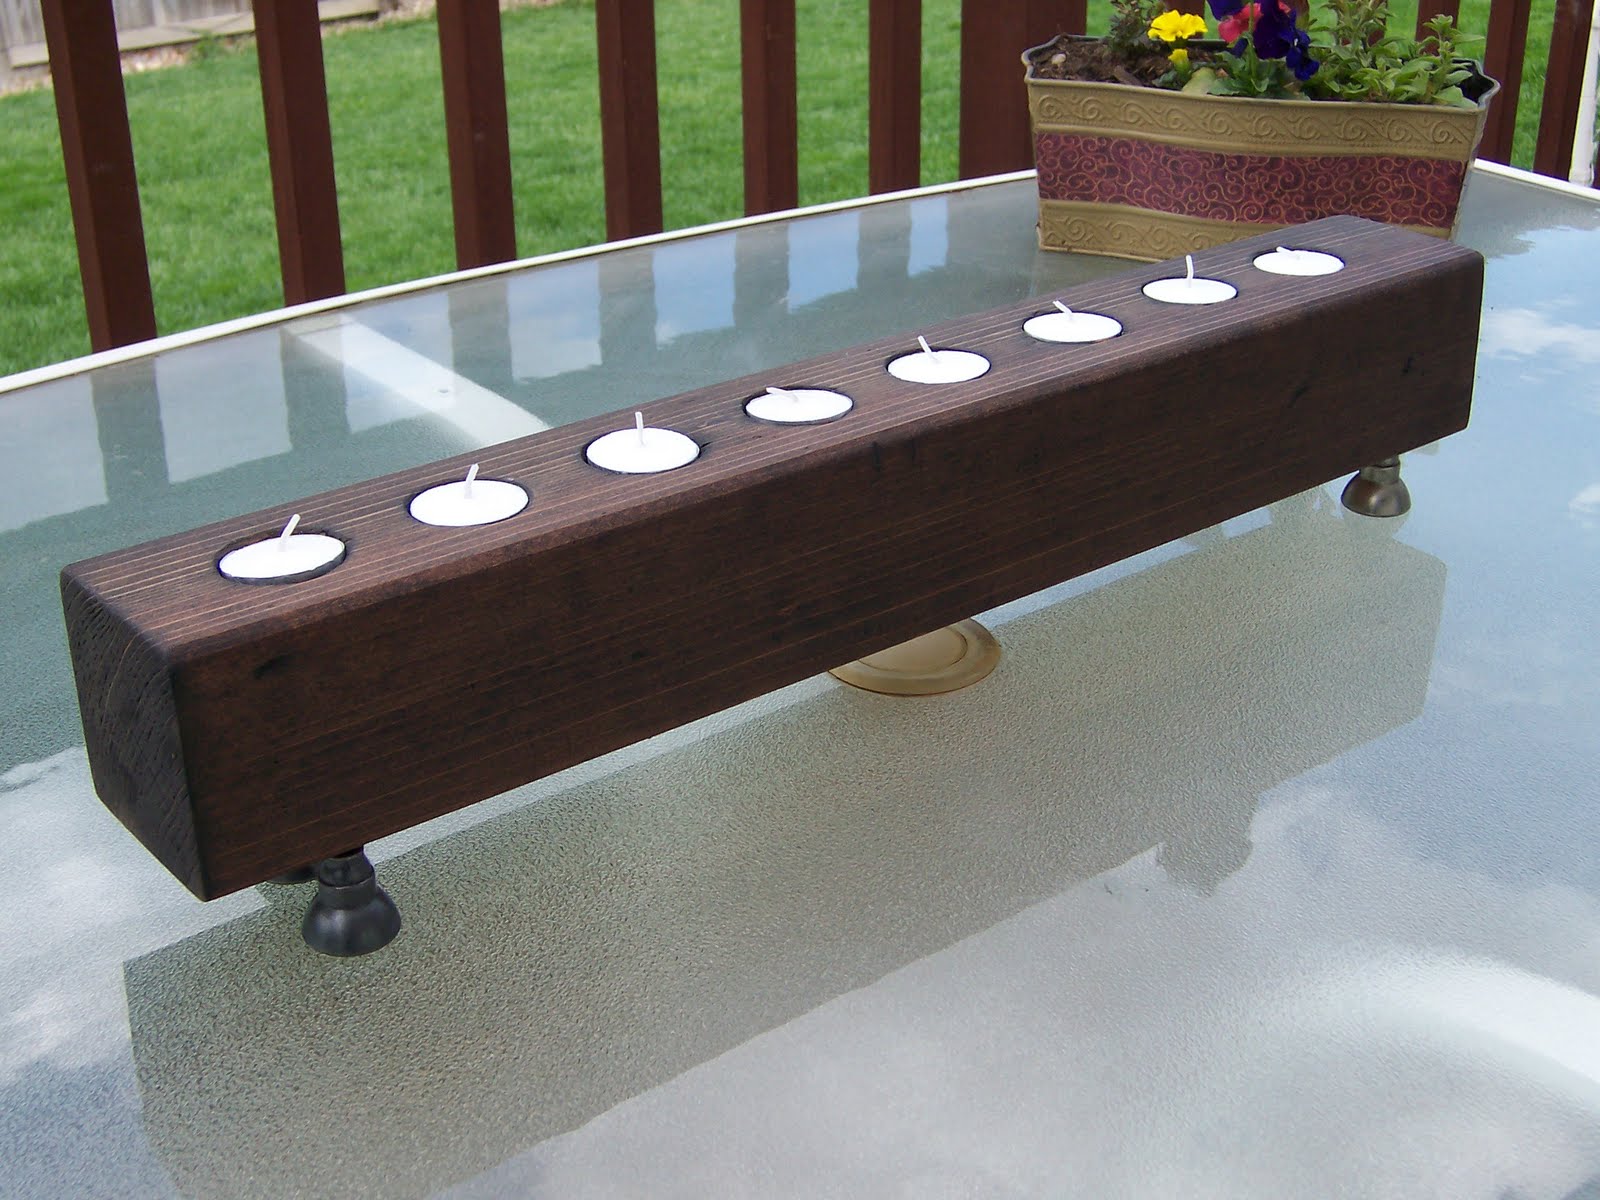
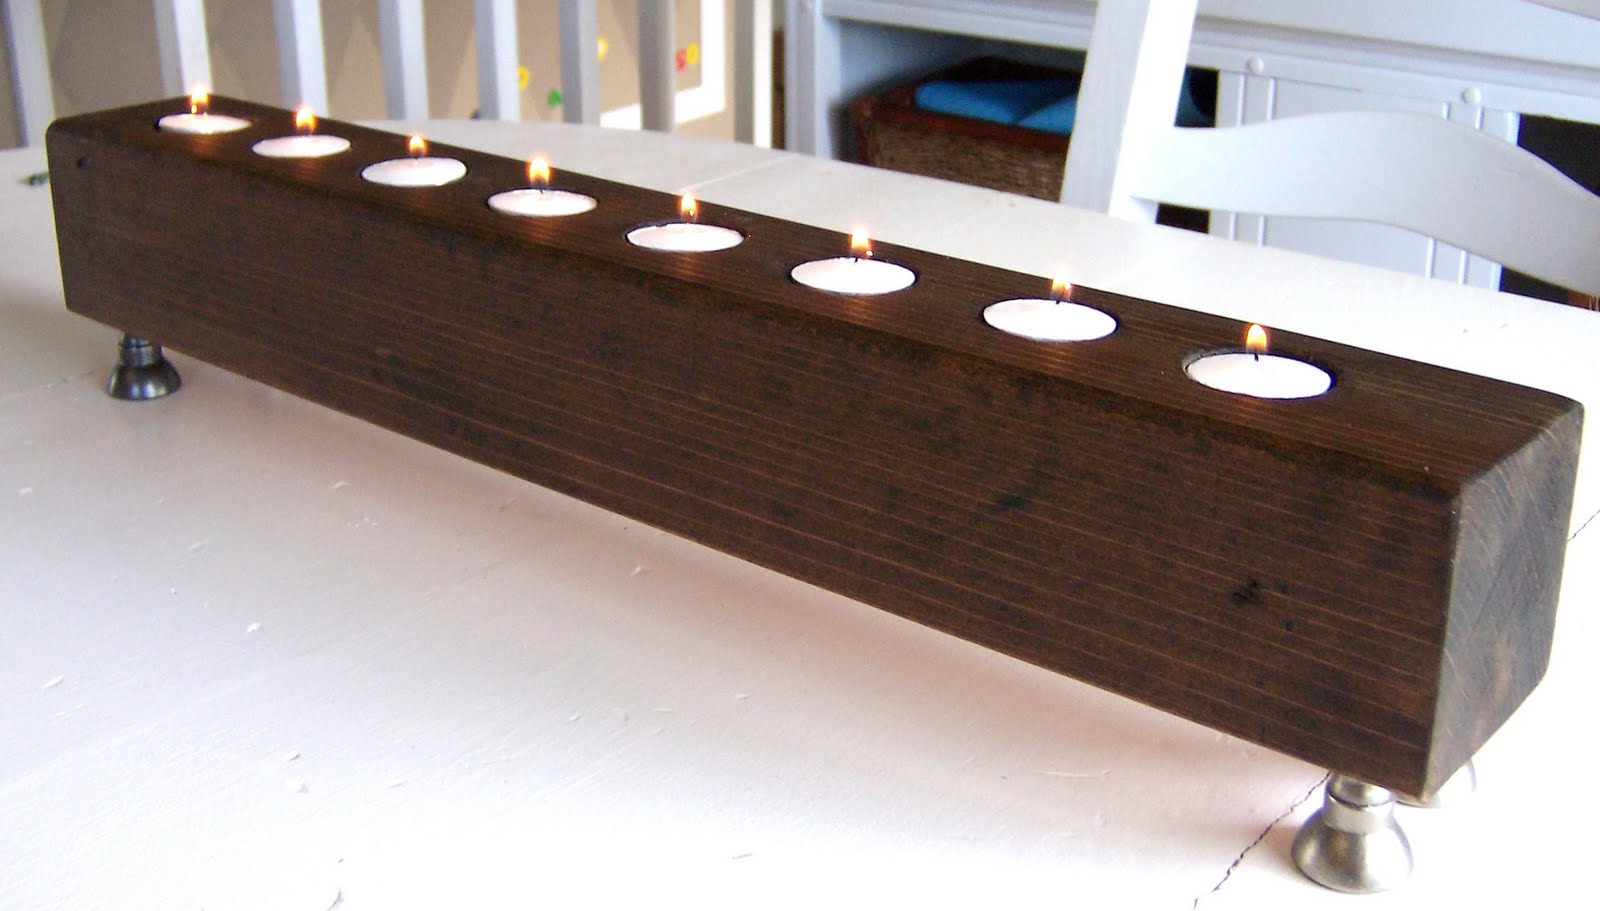
Now I realize those aren’t actual votives. Let me explain. I found some votives that would be perfect for super cheap, but it turns out that they don’t make 2″ spade bits and I didn’t want to have to buy new tools. If you want to use votives larger than 1 1/2 inch you will need a forstner bit. I didn’t want to spend the $20+ so I just switched to tea lights.
My whole project cost $2.50–not bad.
Come on over to Frugal Home Designs to see what else I have been up to.
Cassity Kmetzsch started Remodelaholic after graduating from Utah State University with a degree in Interior Design. Remodelaholic is the place to share her love for knocking out walls, and building everything back up again to not only add function but beauty to her home. Together with her husband Justin, they have remodeled 6 homes and are working on a seventh. She is a mother of four amazing girls. Making a house a home is her favorite hobby.


>Oh, to be at the decor project phase! So many good ideas, but they have to go in my "to do someday" pile. This is a really simple one, and those kinds of candle holders are usually much more expensive than the cost it takes to DIY!
By the way, I am doing some major reno work and would love some input on which flooring stain I should choose. Please stop by my blog and vote!
>wow what a brilliant project! I don't use my drill NEARLY enough.
>i love anything that will put to good use all the scraps we have left over from our latest project! this is so perfect. Thanks!
>Ooo I love this! So simple, yet so cute! I will definitely have to try this. 🙂
>wow that's awesome! I'm not huge on candle holders, but I'm glad I read this one. Love it!
>Awesome job, I love it! I like yours even more than the pottery barn original!
>That is really, really nice looking! And only $2.50 to boot!
Great job!
>Love it, absolutely love it. I wish I knew how to use a drill.