Home Office Makeover
Well, it’s finally done. Our Home Office Makeover is complete! Every bit of elbow grease I put into this room has paid off, as it has quickly become my favorite room in the whole house! This room was a true labor of love, and I am proud to say that the whole room was done for under $400 (I’m sure my husband also appreciates this fact.). Although the room was completed on a very small budget, it truly feels like a million bucks! Here is the completed room, in all its glory, after 2 whole weeks of hard work!
+-+Copy.JPG)
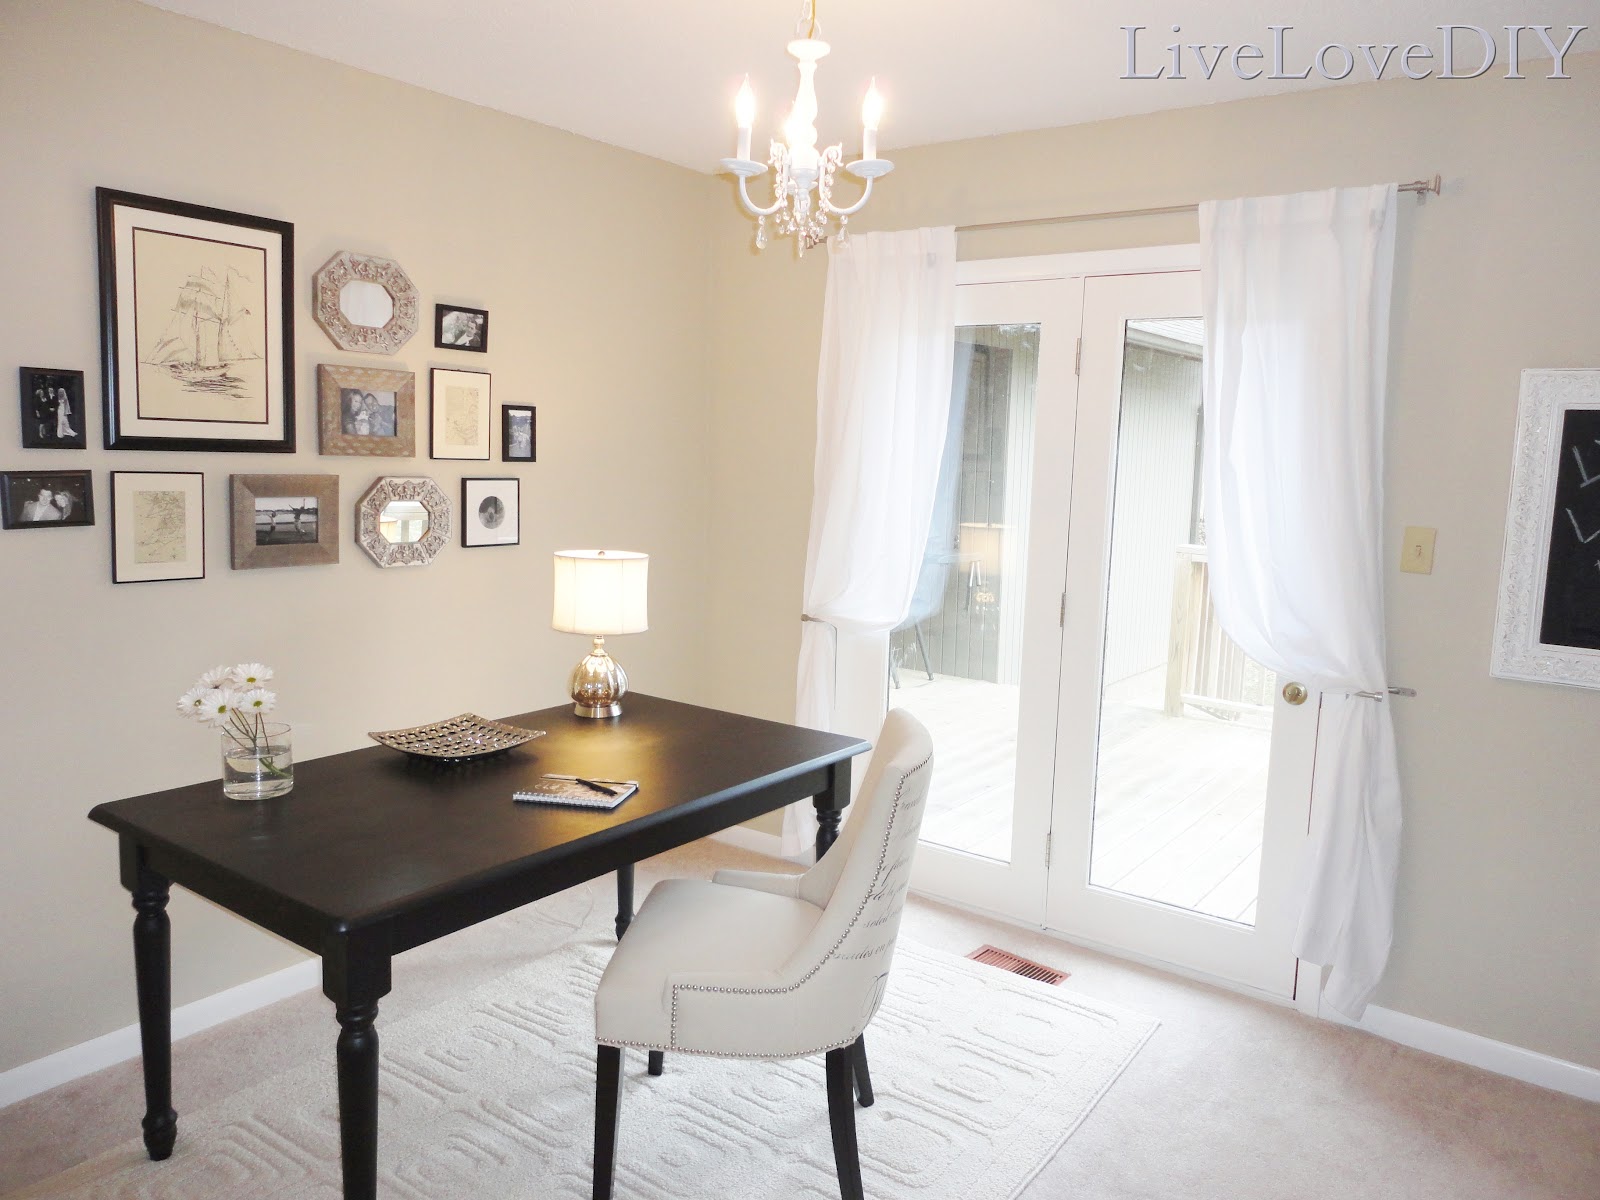
The above photo is the view when you first enter the office. This room opens out onto the deck that overlooks our backyard, so it’s a great space for a home office.
Before its makeover, this room was really dark and had outdated wooden trim and plain white walls (Just like every other room in our house when we first moved in!). Check out how beautiful and fresh this room looks post-makeover when compared to the BEFORE PICTURE! (insert creepy musical interlude here….)
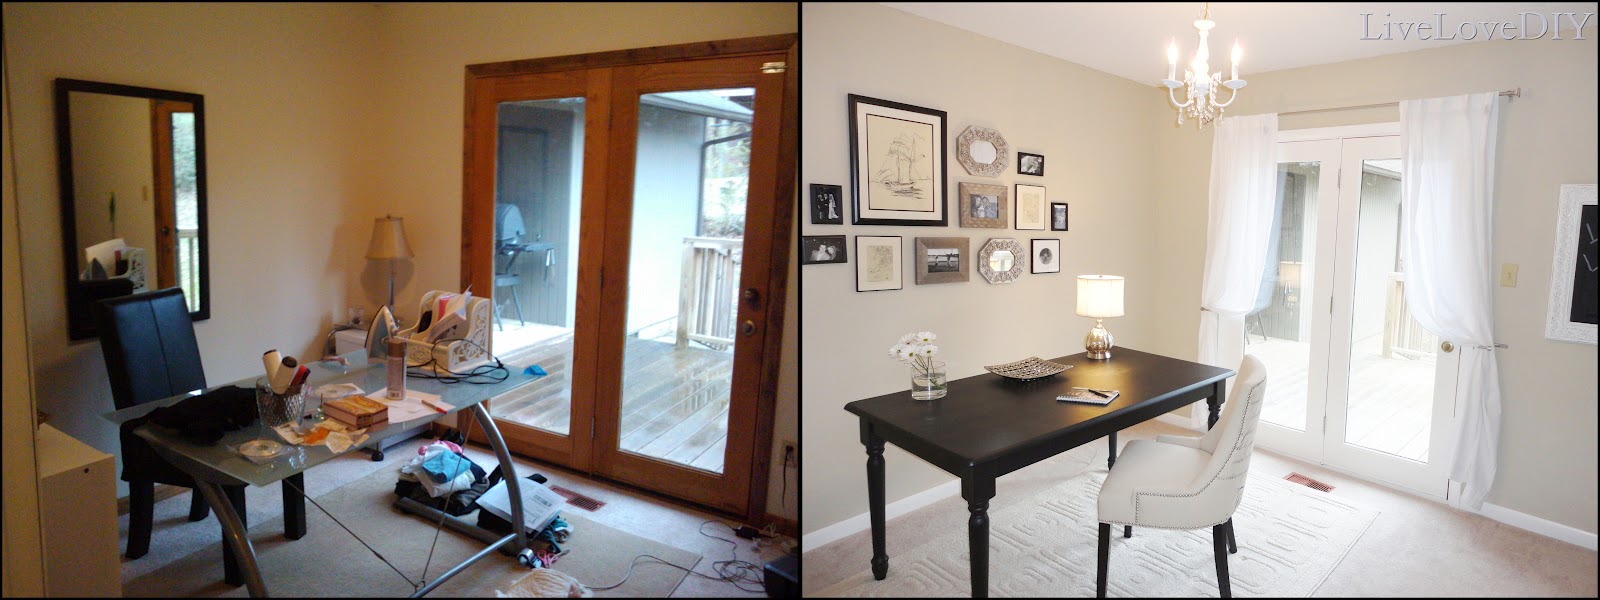
So, yeah…this room feels a bit different now! There are so many things going wrong with the picture on the left that I won’t even begin to explain myself!
Thanks to massive quantities of paint, we were able to resuscitate this room back from the dead! Thank goodness for paint…such a magical little goo! (For those who love the nitty gritty details of a makeover, we used Behr Premium Ultra Pure White in semi-gloss on the trim and Behr Premium Sandstone in flat on the walls.)
Now that I’ve scared you with the terrifying before picture, let’s look at some more pretty things! One of my favorite parts of the room is the linen upholstered chair with french script and nail head trim. I think it’s just the perfect piece and compliments the dark black desk so beautifully!
.JPG)
Another favorite element of the room is the GALLERY WALL! Love love love it!! (Just don’t look behind the frames, as I definitely punched about 400 holes in the drywall while trying to assemble this beauty!)
Just in case you can’t make out what is in each frame, let me break it down for ya: Wedding pictures (essential), a rogue picture of our beloved fat cat, Cheese (She’s really grown into her name quite well.), a photo of me and my brother jumping in the air while yo-yo-ing (Yep.), some maps (in case I get lost), and a giant sketch of a sailboat I found at Goodwill for $10 (SCORE!!). So there you have it, a totally sensible gallery wall. Here is a closeup:
.JPG)
and an even closer closeup (in case you left your bifocals on the bedside table)…
.JPG)
And while we’re up close, let’s stop to smell the roses…or daisies (or whatever they are! I’m no botanist!).
.JPG)
I love fresh flowers…there’s just something so calming about them. Okay, now let’s get back to the tour. Here is another view of the room. I call it…the bookcase.
.JPG)
You may notice the chalkboard over on the wall by the bookcase. Neat fact: that was once a mirror with a dark wooden frame! All it took was a $10 can of chalkboard paint and some leftover white paint and voila! Chalkboard for the office! Here’s a closeup of the lil’ guy:
.JPG)
It usually says stuff like ‘do your taxes’, ‘clean the laundry’ and ‘remember to shower’, but it got primped for this photo shoot.
Next up, here is a lovely view of the opposite way.
.JPG)
and from the other side:
.JPG)
The office has a great big closet and leads out into the hallway which has beautiful hardwood floors. We were lucky in that the house had new carpet when we moved in, so that was ONE thing we didn’t have to do in this room!
We weren’t so lucky with the light fixtures. Nearly every single room in this house had a ‘boob light’ when we moved in. You know the kind…those horrid round lights that usually have a bug or two trapped in them…and look like a big boob. So, yeah, one by one they are getting yanked down and finding a new home at the dump! For the lighting fixture in the room, I got a little crafty. I’m going to blog separately (in great detail!) about what I did to make this chandelier so darn cool, but the quick version is that I found a $20 brass chandelier on eBay (you know, the kind people abandon), spray painted it white, and attached lots of sparkly crystals to it! I think my $20 chandelier is marvelous! (and much cheaper than a near identical $150 chandelier in our guest bedroom!) Here’s this little piece of fixture bling, hung with care (by my sweet husband) and ready to shine!
.JPG)
Not bad, eh? She looks even better when lit!
.JPG)
The chandelier couldn’t be the only shiny thing in this room, so I added a few other sparklies too!
.JPG)
A little transparent silver lamp and silver tray…..PERFECT! (And don’t forget the Audrey Hepburn notebook where I keep all of my secret thoughts!)
Quick tip: I use fresh flowers all over my house. I usually buy a $5 bundle of whatever is white & pretty at my local grocery store each week, and then put a few stems in a vase in each room. It’s the cheapest decor solution ever! Sure, you have to replace it every week once they start wilting, but it’s so much better than the fake stuff (and smells nice, too!).
.JPG)
Another really cool part of this room is the black desk…and not just because it looks great! I actually found this desk for $50 on Craigslist! It was originally brown wood, so it got sanded down and given a few coats of paint. I used Behr Premium in Black Suede in Satin and then coated it with Minwax’s Paste Finishing Wax. Here’s a great before/after of the desk.

Much better, right?
So that’s it….every last little detail. It’s been a lot of hard work, but now I have a beautiful place to work. I couldn’t be happier with the new office! It brings me such joy to share it, so before I sign off, let’s take one last look….
.JPG)
Thank you for allowing me to share all of my hard work! It truly means the world! Until next time…
–Submitted by Live Love DIY
I am the husband of the amazing Cassity of Remodelaholic. I love to problem solve and to design and build things inside and outside the house to make life better. I am a professional Landscape Architect by trade and love the outdoors.


I’m dying to know where you got that chair!
Angela, I’m pretty sure I’ve seen that chair at Ballard Designs or Home Decorators 😉
What a terrific work space! She did a great job! Thanks for sharing.
Cassity,
Thanks for the amazing feature! Love it! ~ Virginia
This room is so beautiful. It should be featured in Good House Keeping magazine. Thanks for sharing.
I have to wonder …. if the desk were sideways off the gallery wall if the view out the doors would be prettier? Just thinking 🙂 Great job on the room by the way! So much lighter and prettier!
Hugs,
Bj
The room is lovely! What a difference. One change I would make would be to turn your desk sideways, against the wall to face the exterior door. That would turn your chair sideways so you don’t have your back to the interior door, allow for easier plugging in of electrical items, and free up a little space to put a wonderful guest chair underneath the chalk board. Whichever way you leave the desk, it is a wonderful space to work in.
BEAUTIFUL! It looks like a room in a model home. Enjoy!
Gorgeous! Where did you get that chair??
It looks gorgeous! The room looks at least twice as big as before, and for a $400 budget…AHHHH MAZING!