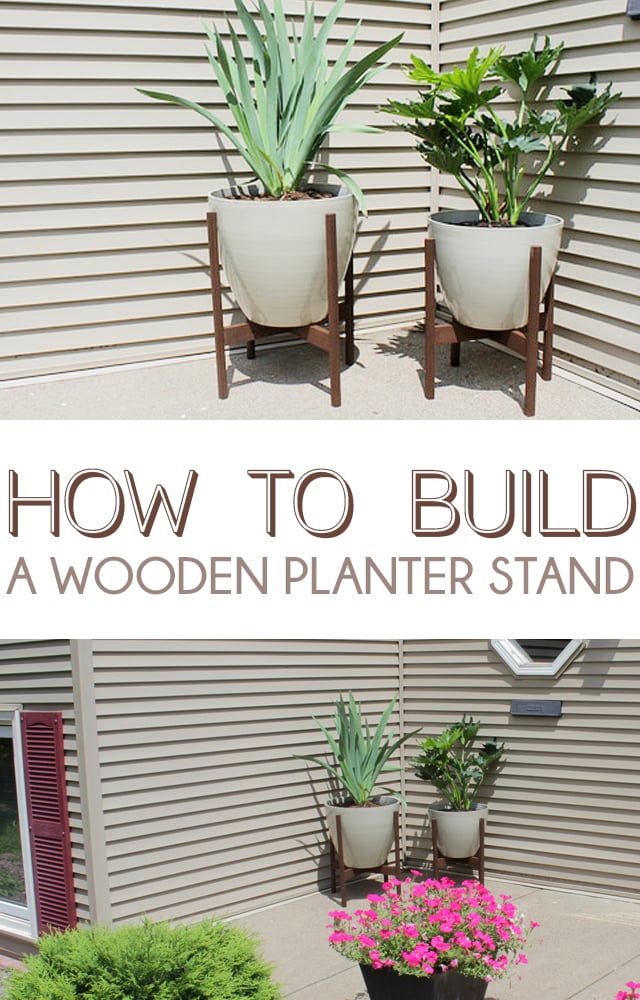
DIY Wooden Planter Stand
Hello Remodelaholic friends. It’s Home Coming, back again for our first official contributor post here at Remodelaholic. We’re pretty darn excited to join such an incredible team of bloggers and can’t wait to show you some of our latest & greatest projects.
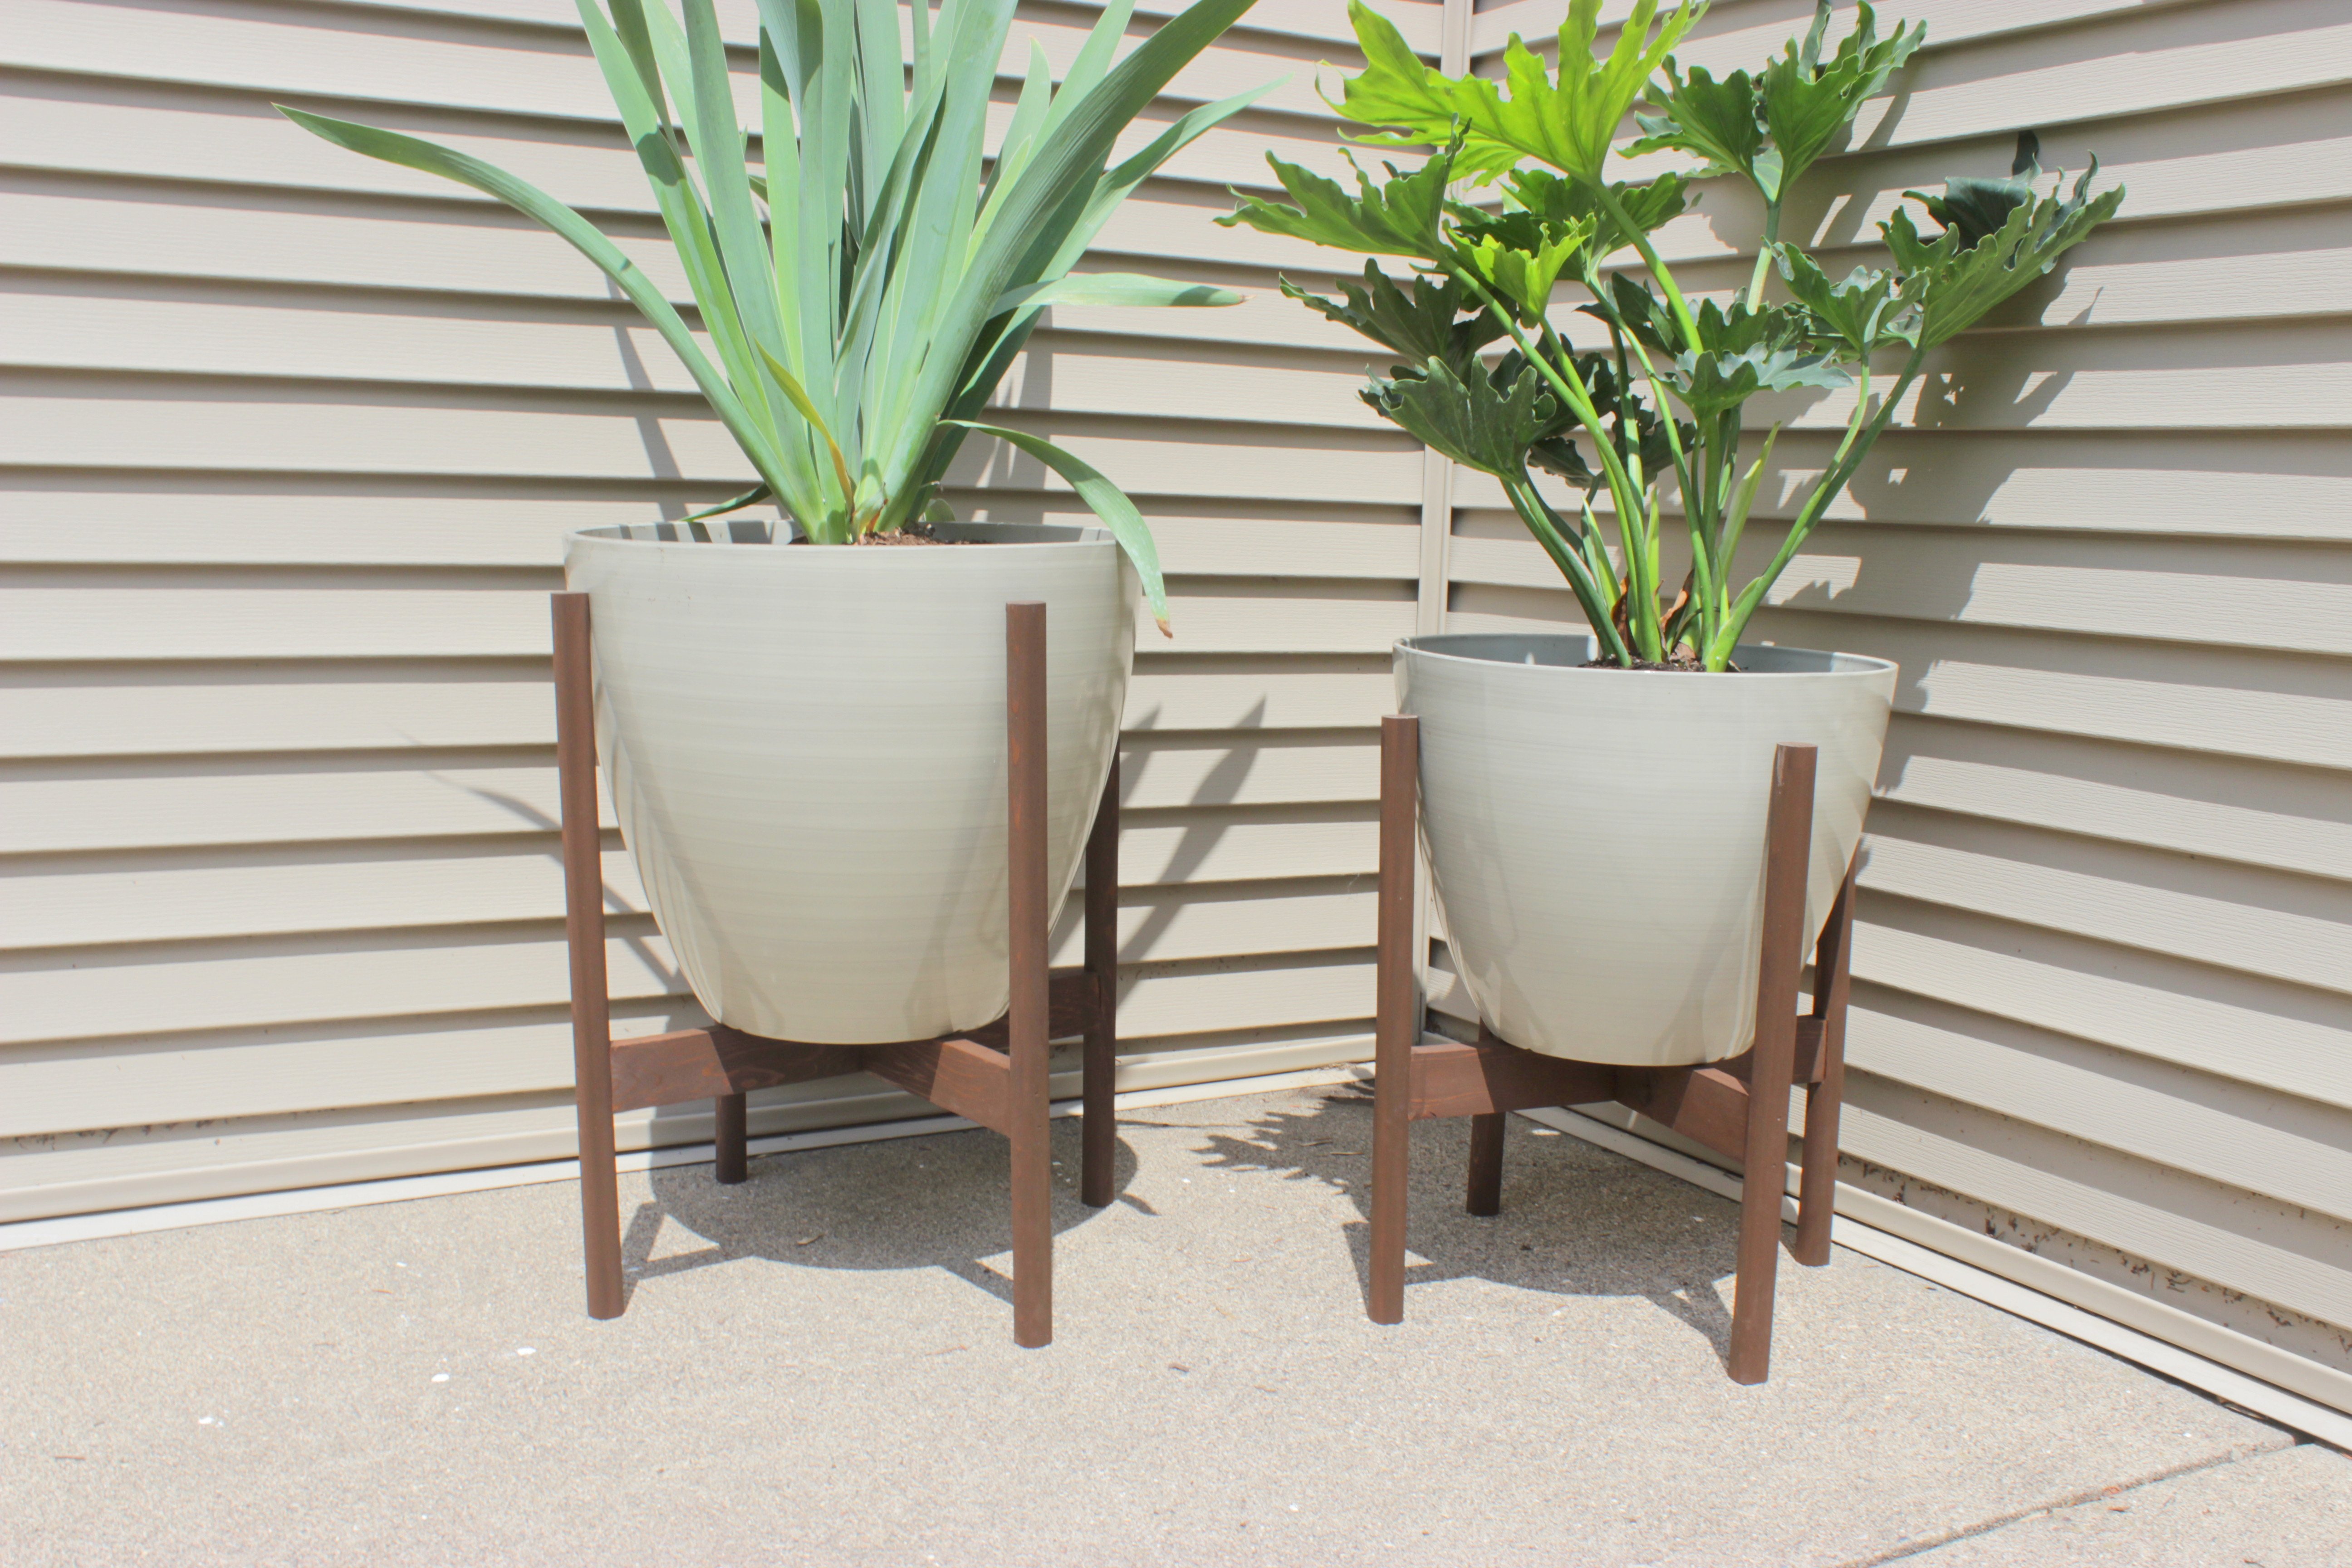
For our first project, we’re going to share how we built these modern DIY Planter Stands for our patio. After coming out of a pretty hefty home remodel, this project was enjoyably simple. Definitely something that you handy folks could DIY without the carpenter husband that I’m lucky enough to have.
How to Build a Wooden DIY Planter Stand
Click Here to Get a Free Printable Version of this Building Plan
Before Justin could get stared with building, I needed to find the perfect planter. Since the majority of retailers are switching out their Summer & Patio product for Back to School (already?!) it took me awhile to find the planter that I was envisioning in my head. We ended up finding these at Lowes.
With that out of the way, Justin was able to measure the specs for our planter stand and start making the pieces. These are pretty large planters, so we decided to have 6″ footings under the base of the planter, and the top of the legs will reach up to 2″ below the top edge of the planer. The X base under each planter will be built so the planter fits snug within the legs. And we’ll be building this in Cedar so it’s resistant to the outdoor weather.
Materials Needed for one planter stand:
(1) 5/4″ x 4″ x 8′ cedar plank (for the legs)
(1) 1″ x 4″ x 4′ cedar plank (for the X base)
Outdoor stain & poly
Brad Nailer & Air Compressor
Router
Orbital Sander
Table Saw
Chop Saw
Wood Glue
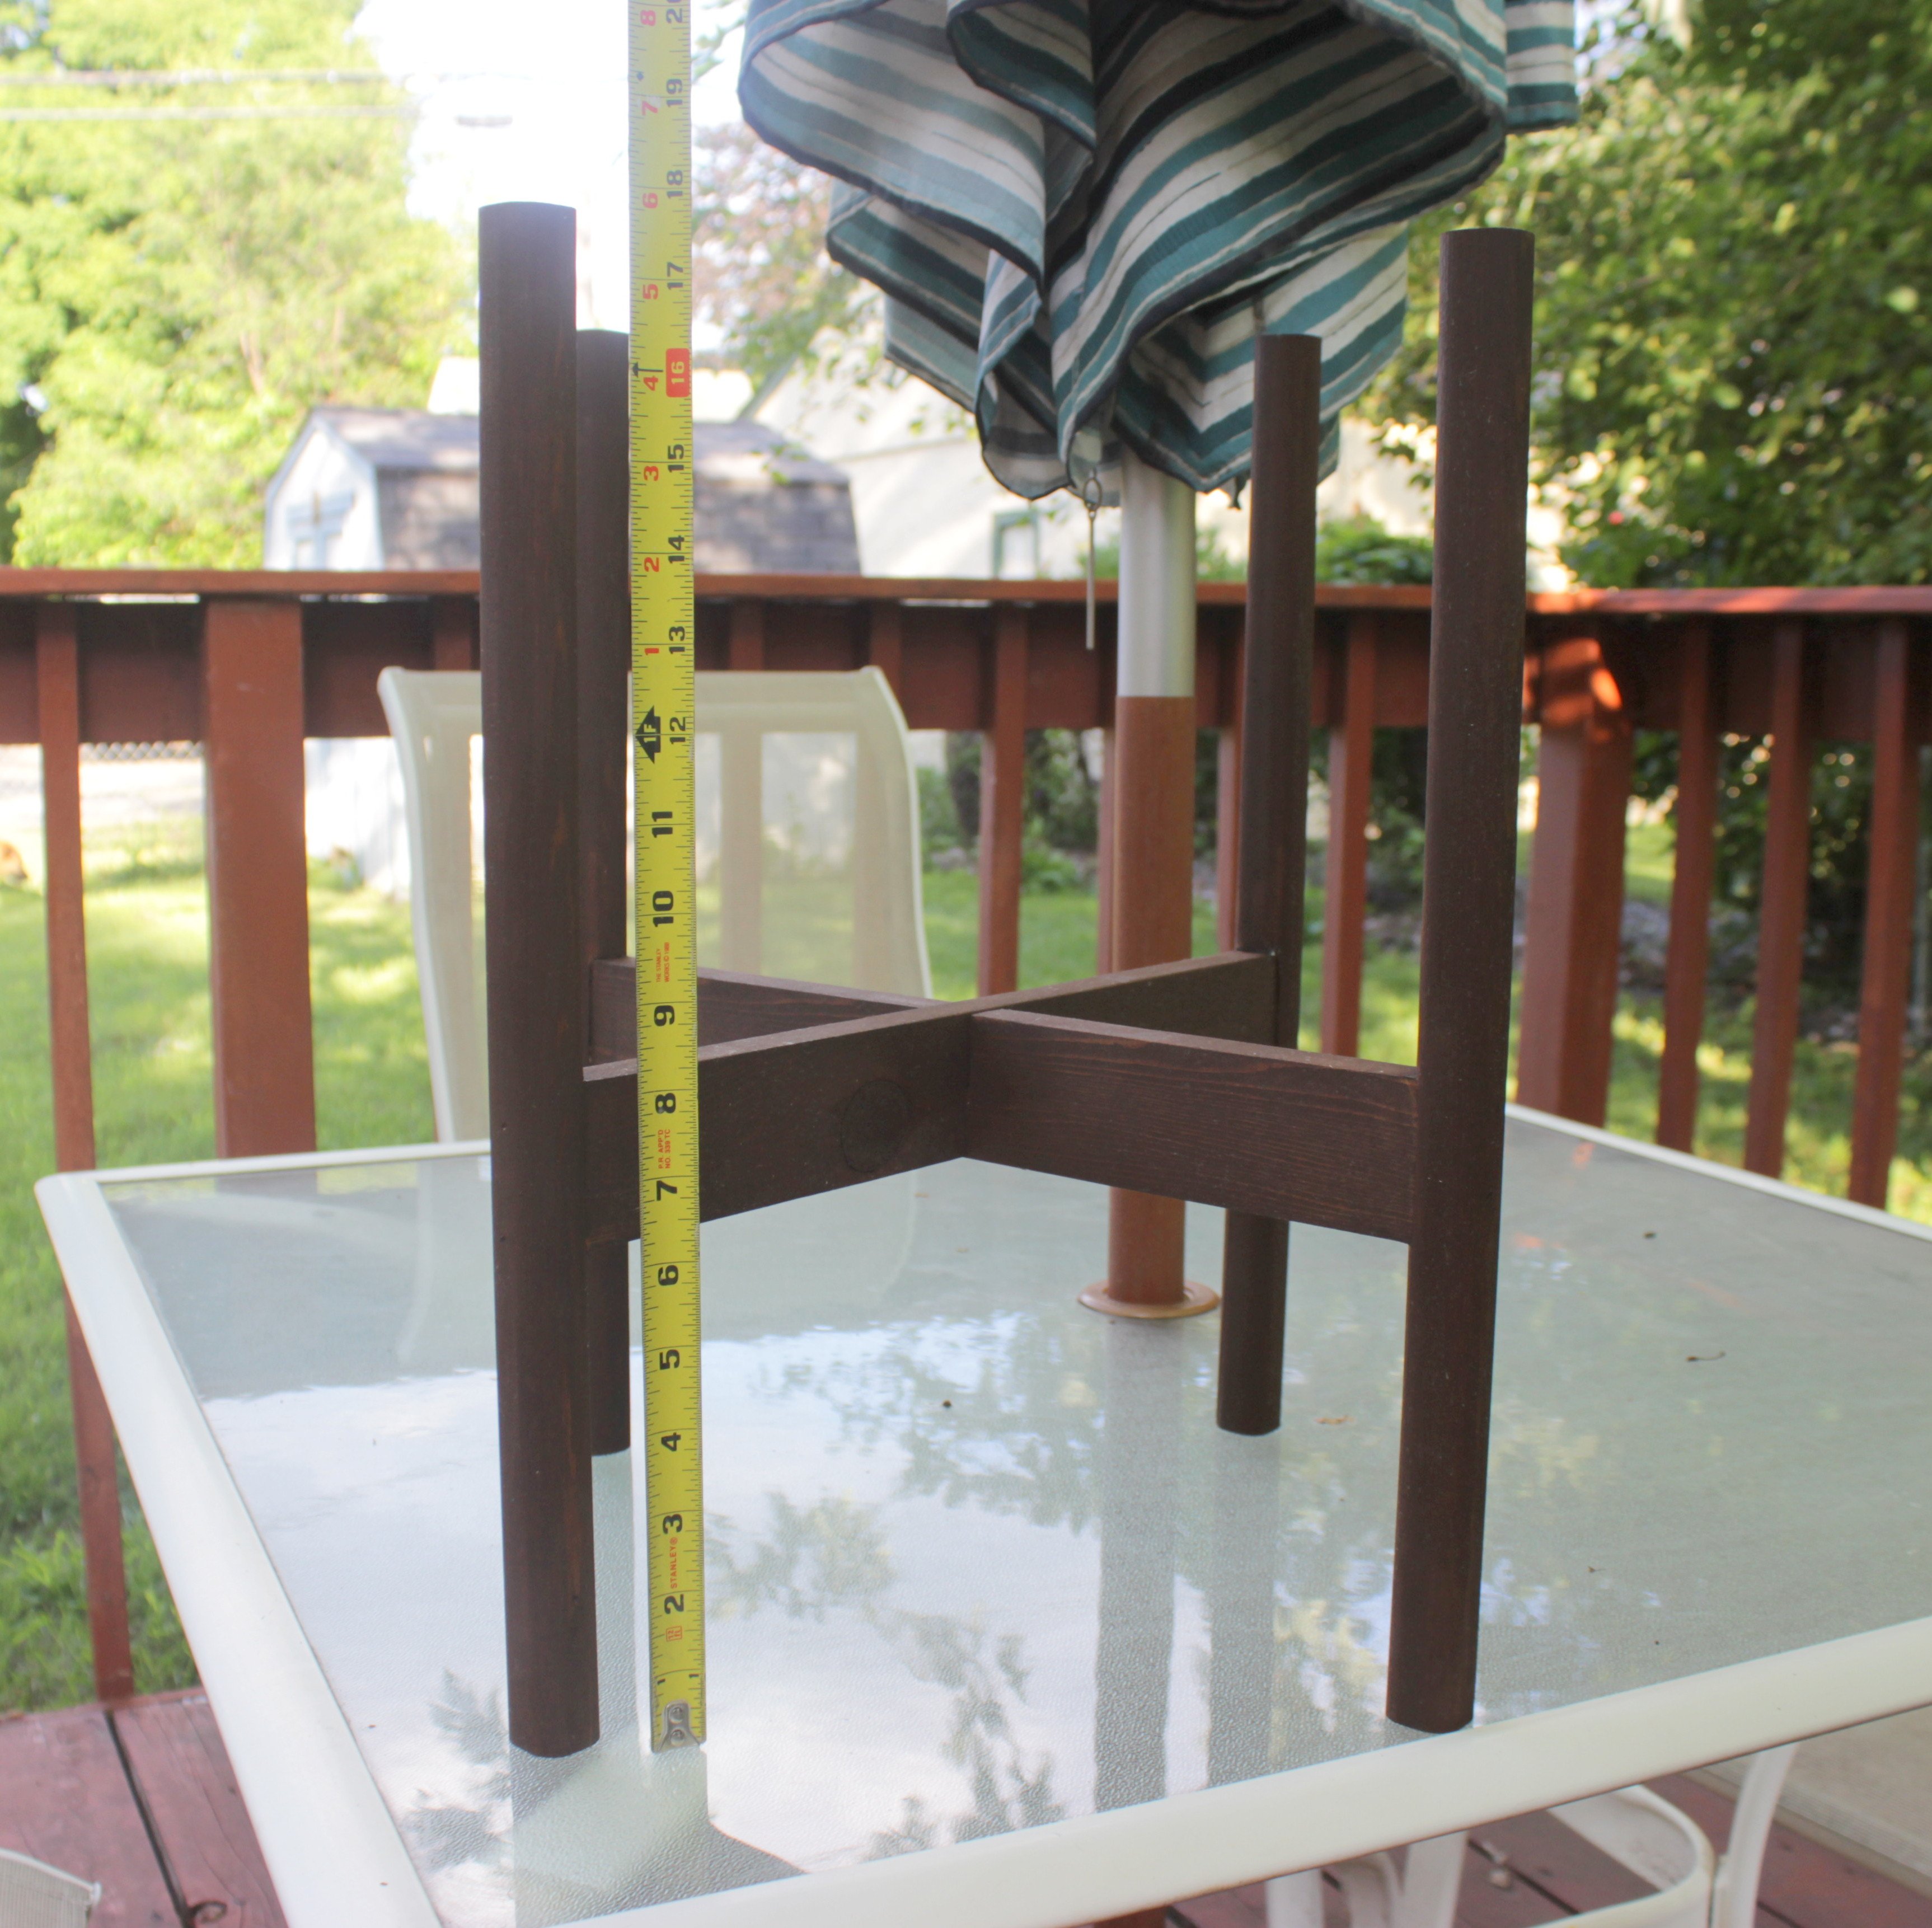
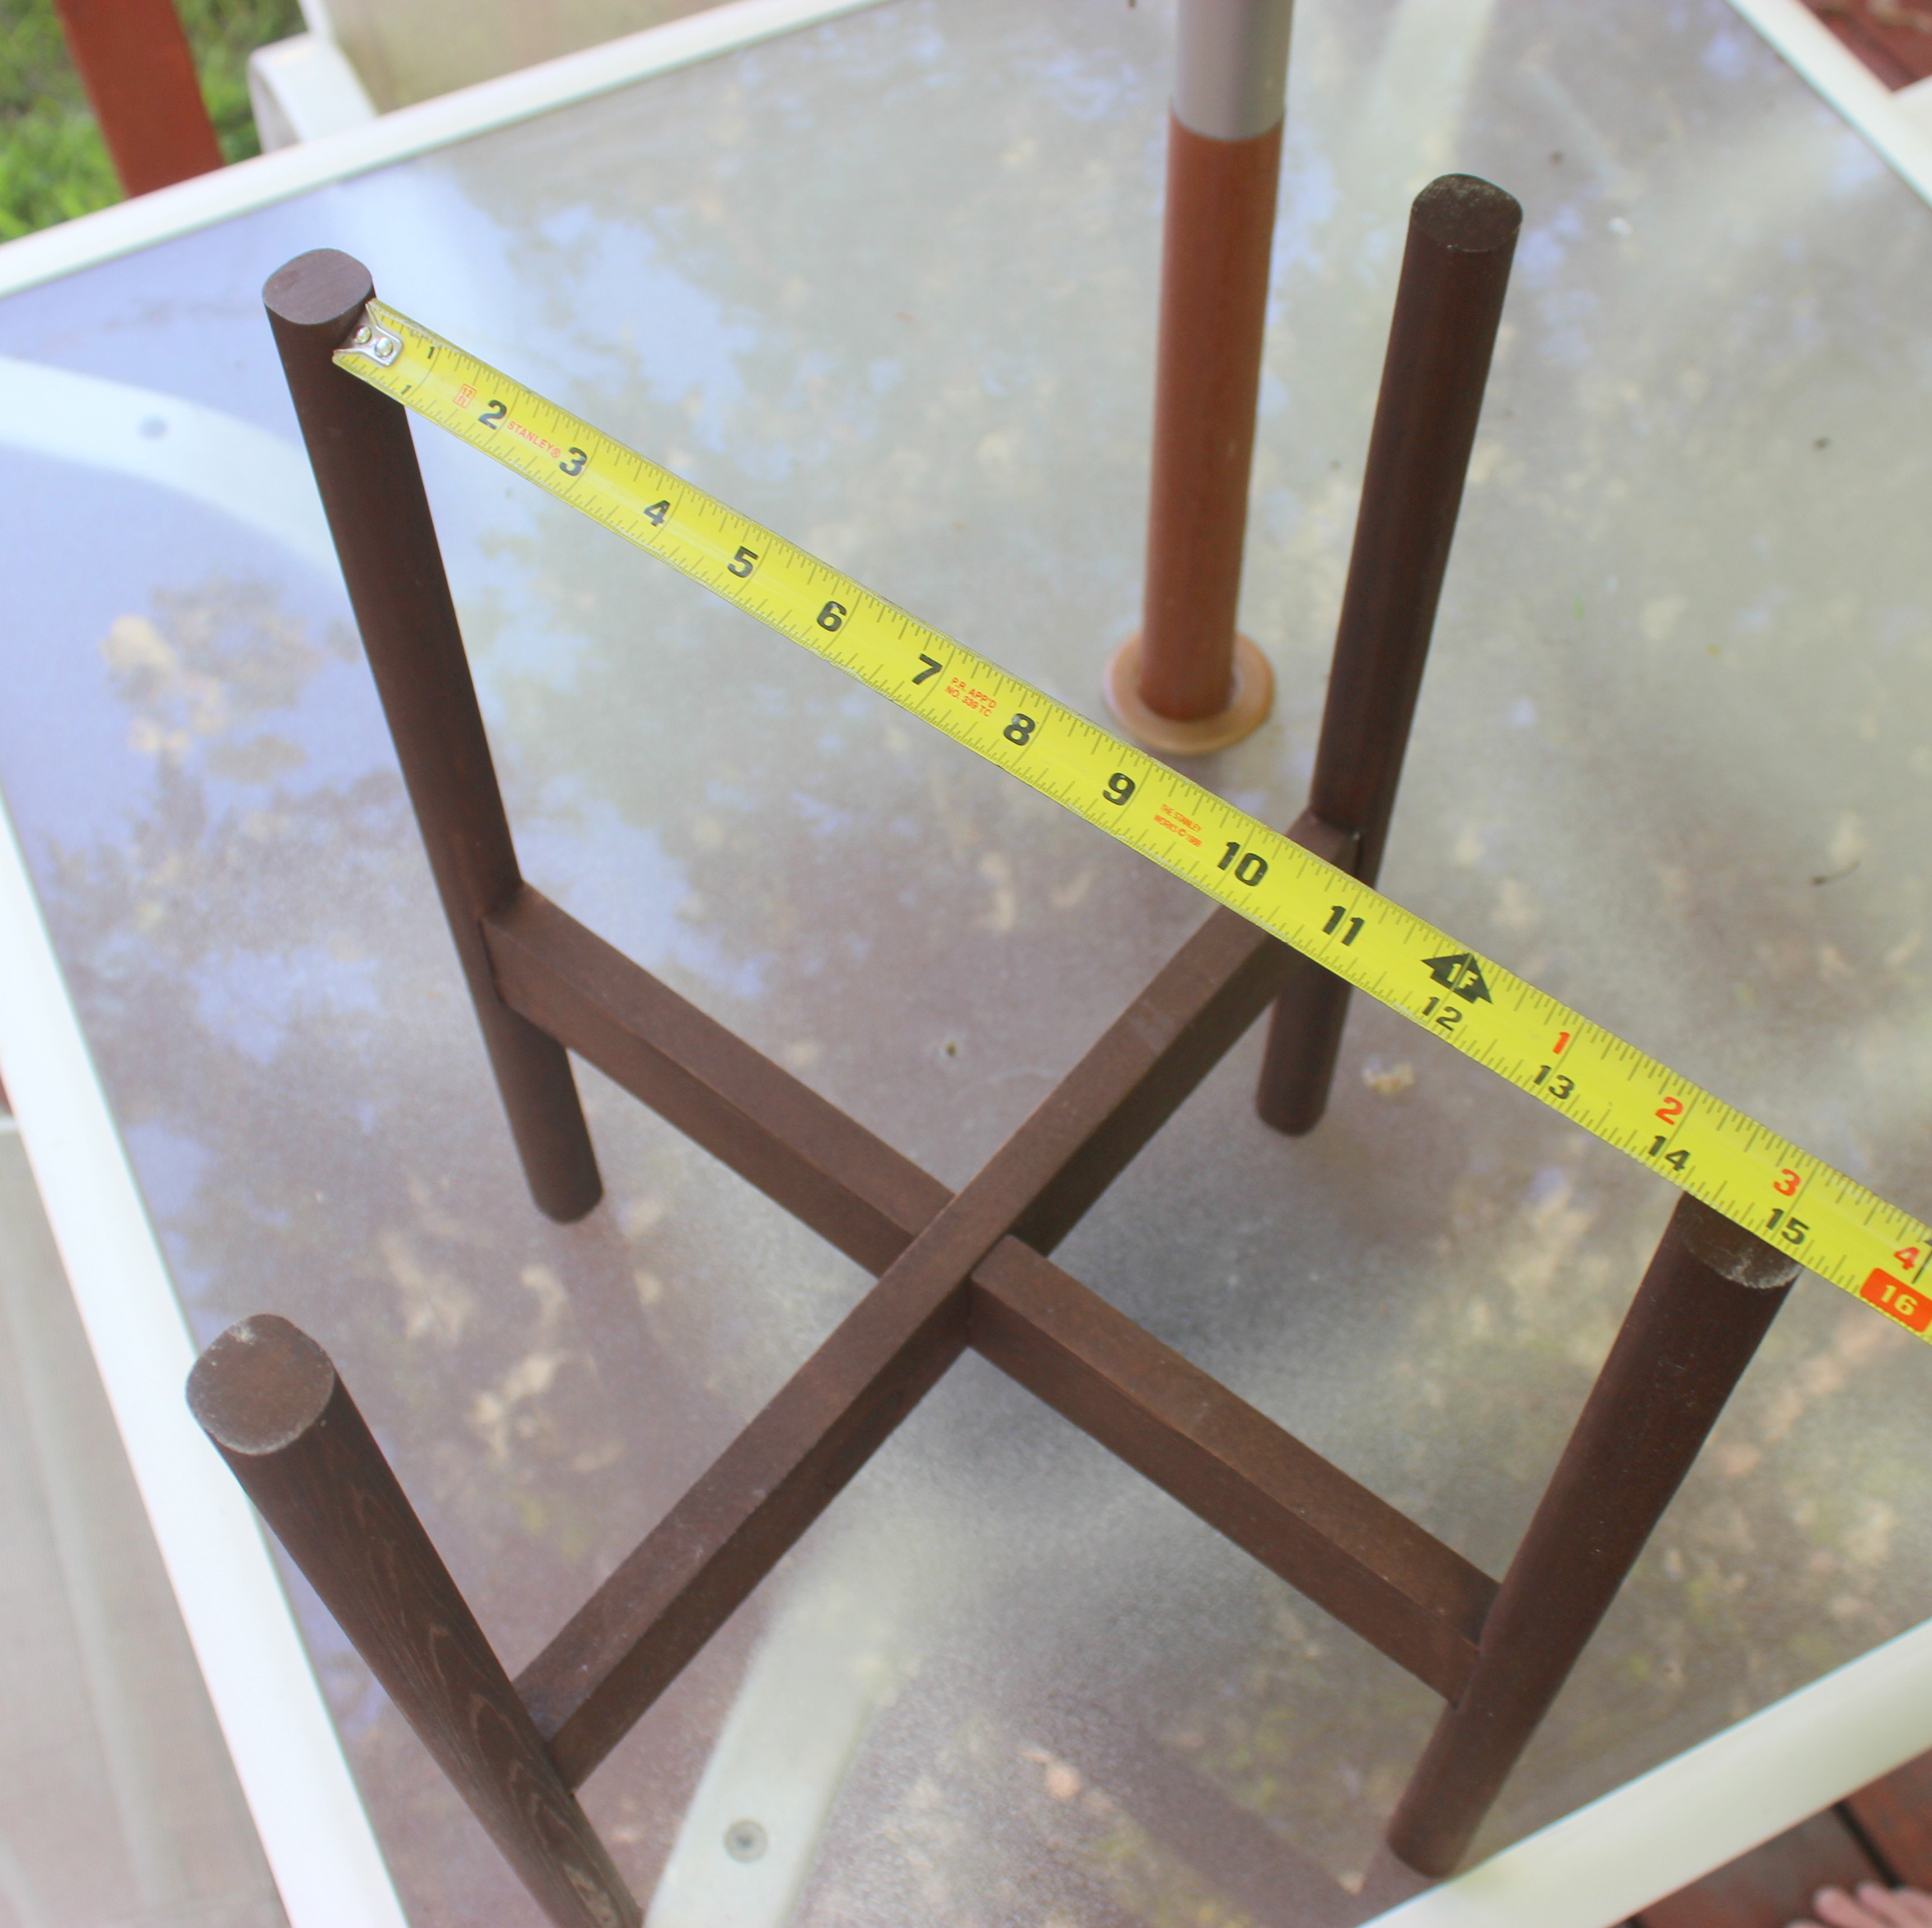
Planter Stand Dimensions:
To best showcase the dimensions, I’m going to use two photos. The height of the planter stand is 17 3/4″, and the inside width is 141/4″. We’ll describe how we came to those dimensions in the following steps, based on the size of our planter.
 Now let’s get building, shall we?
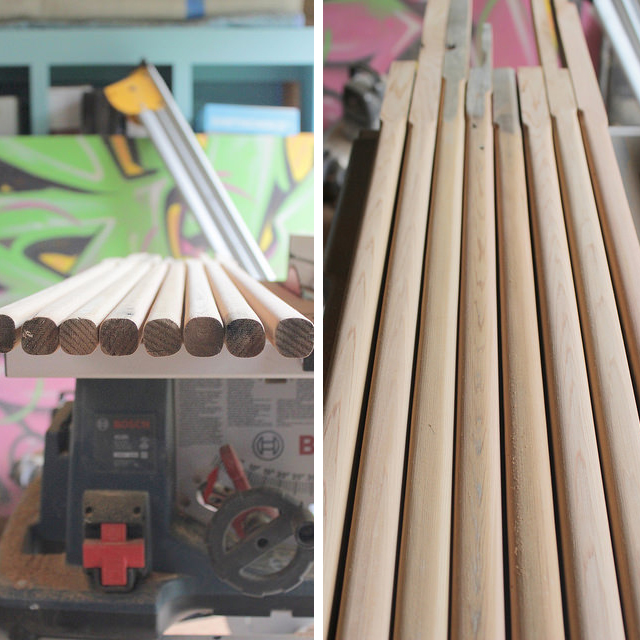
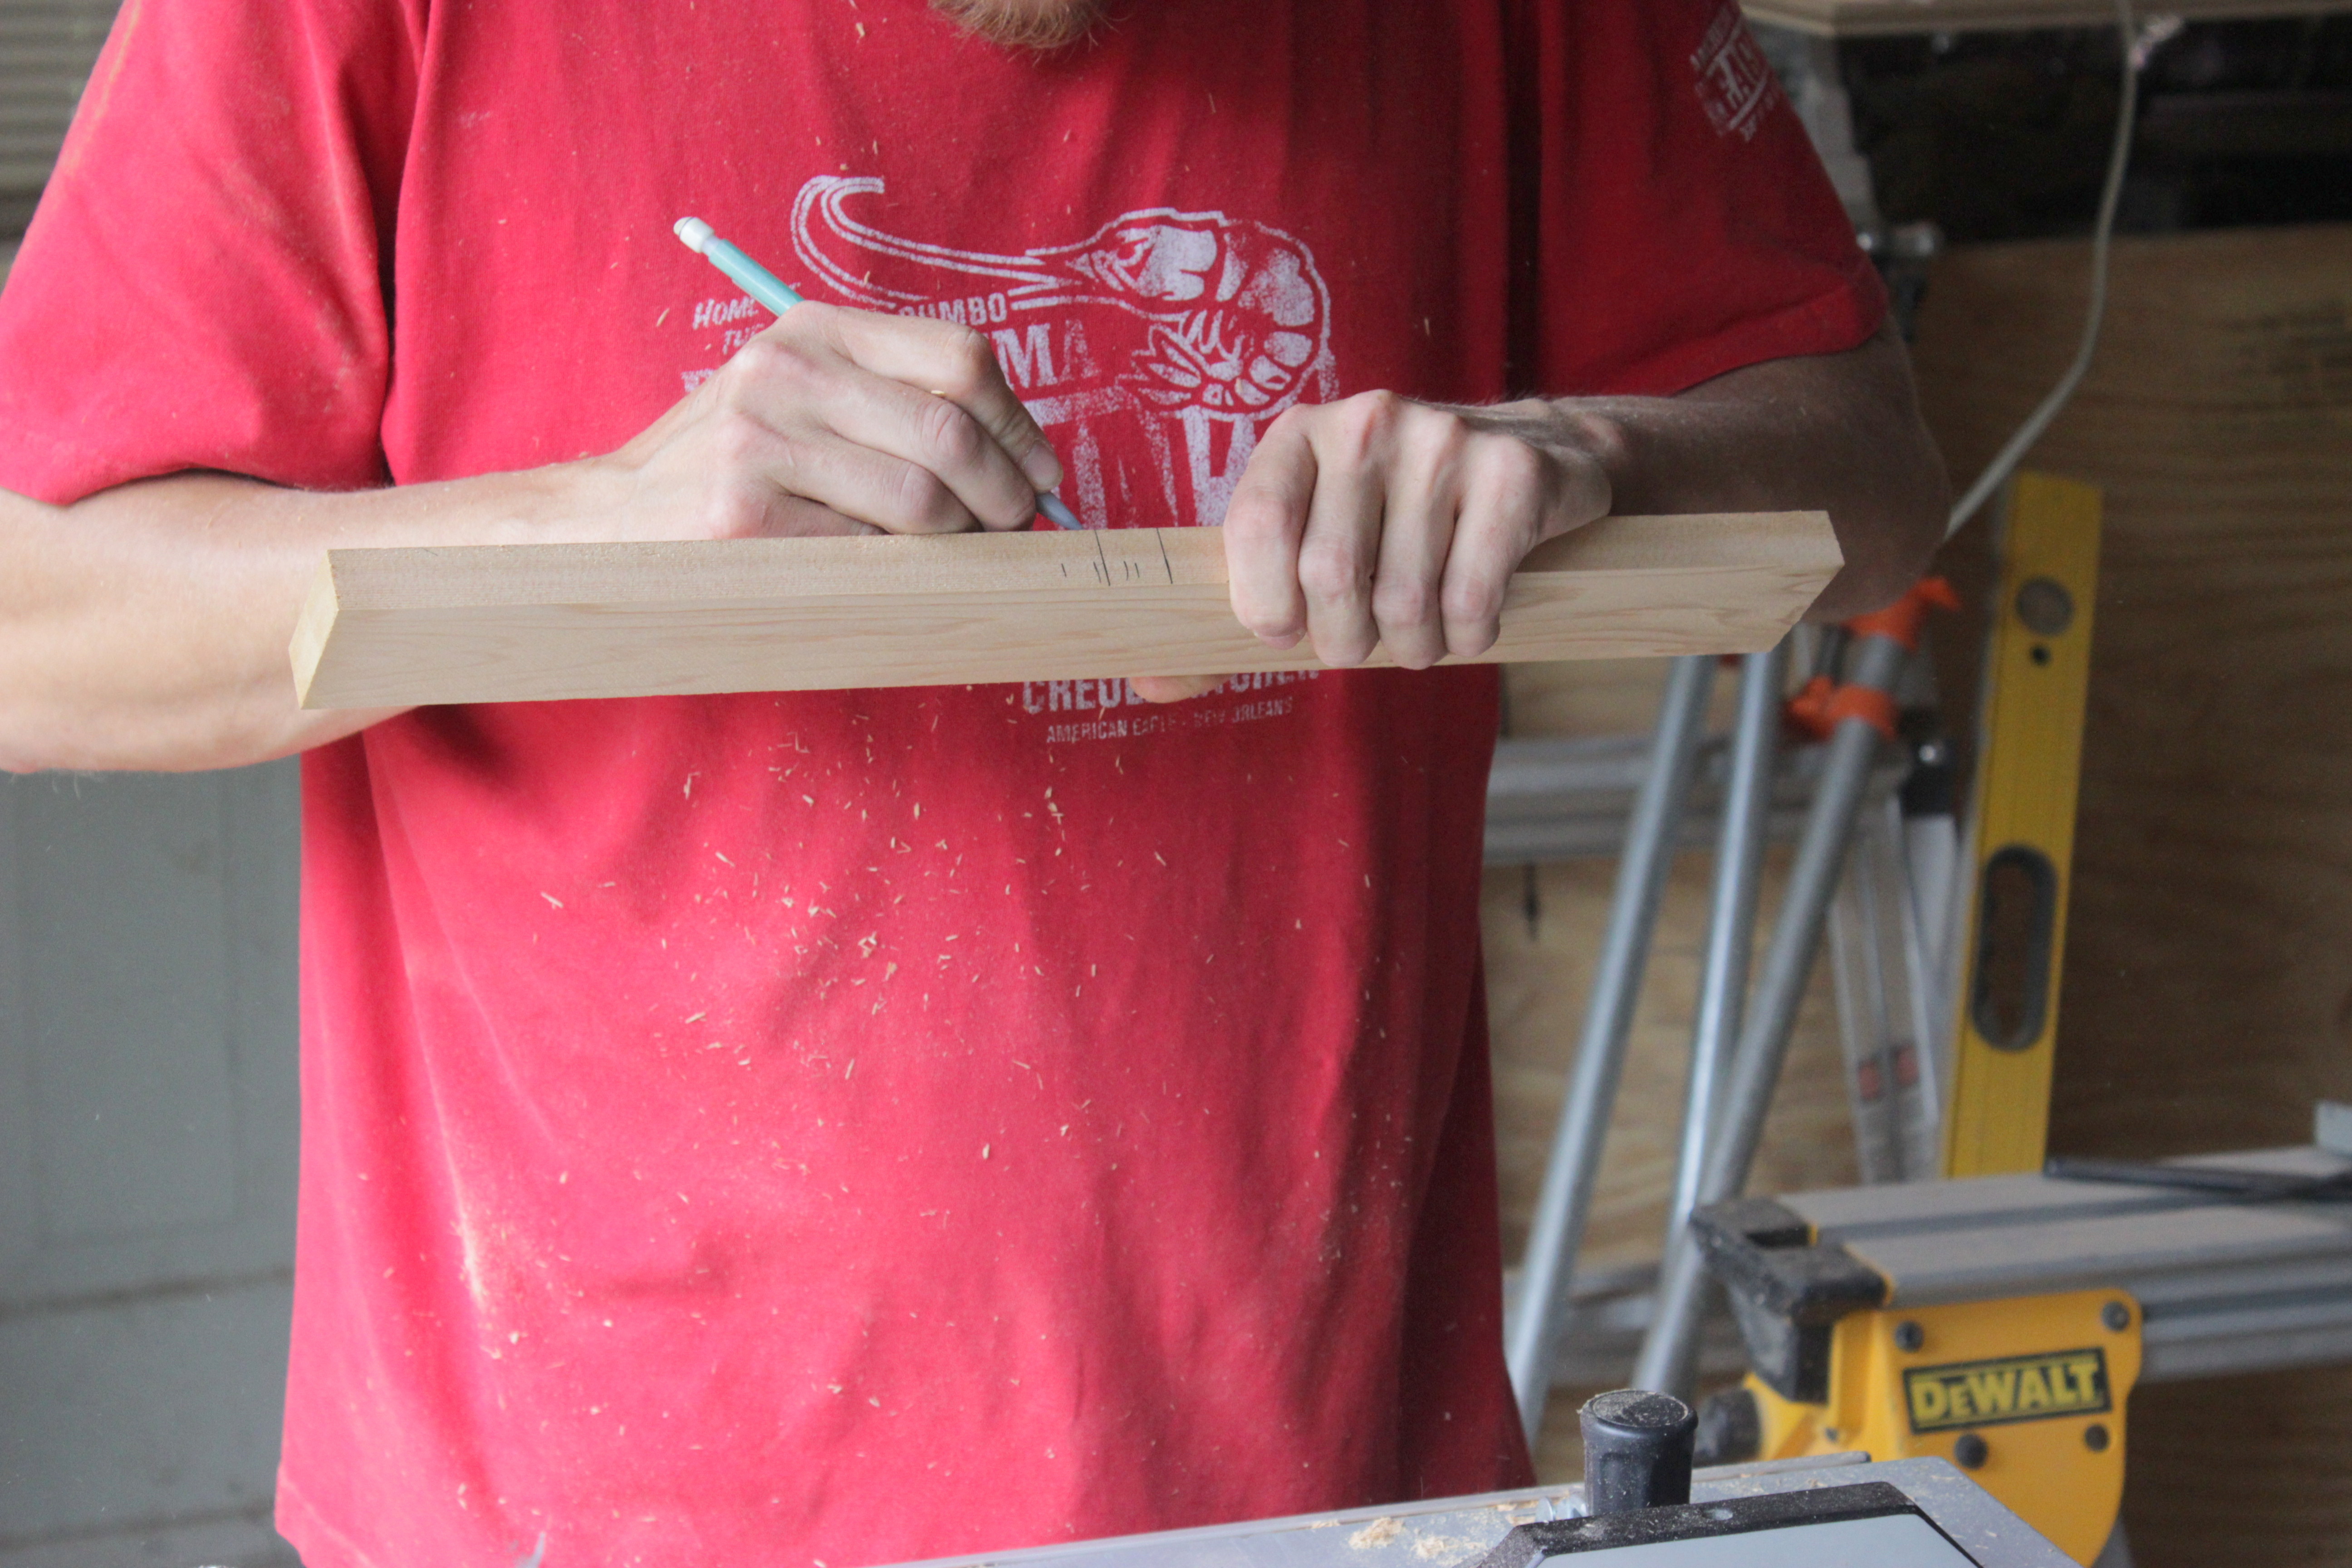
Step 1: Round the legs
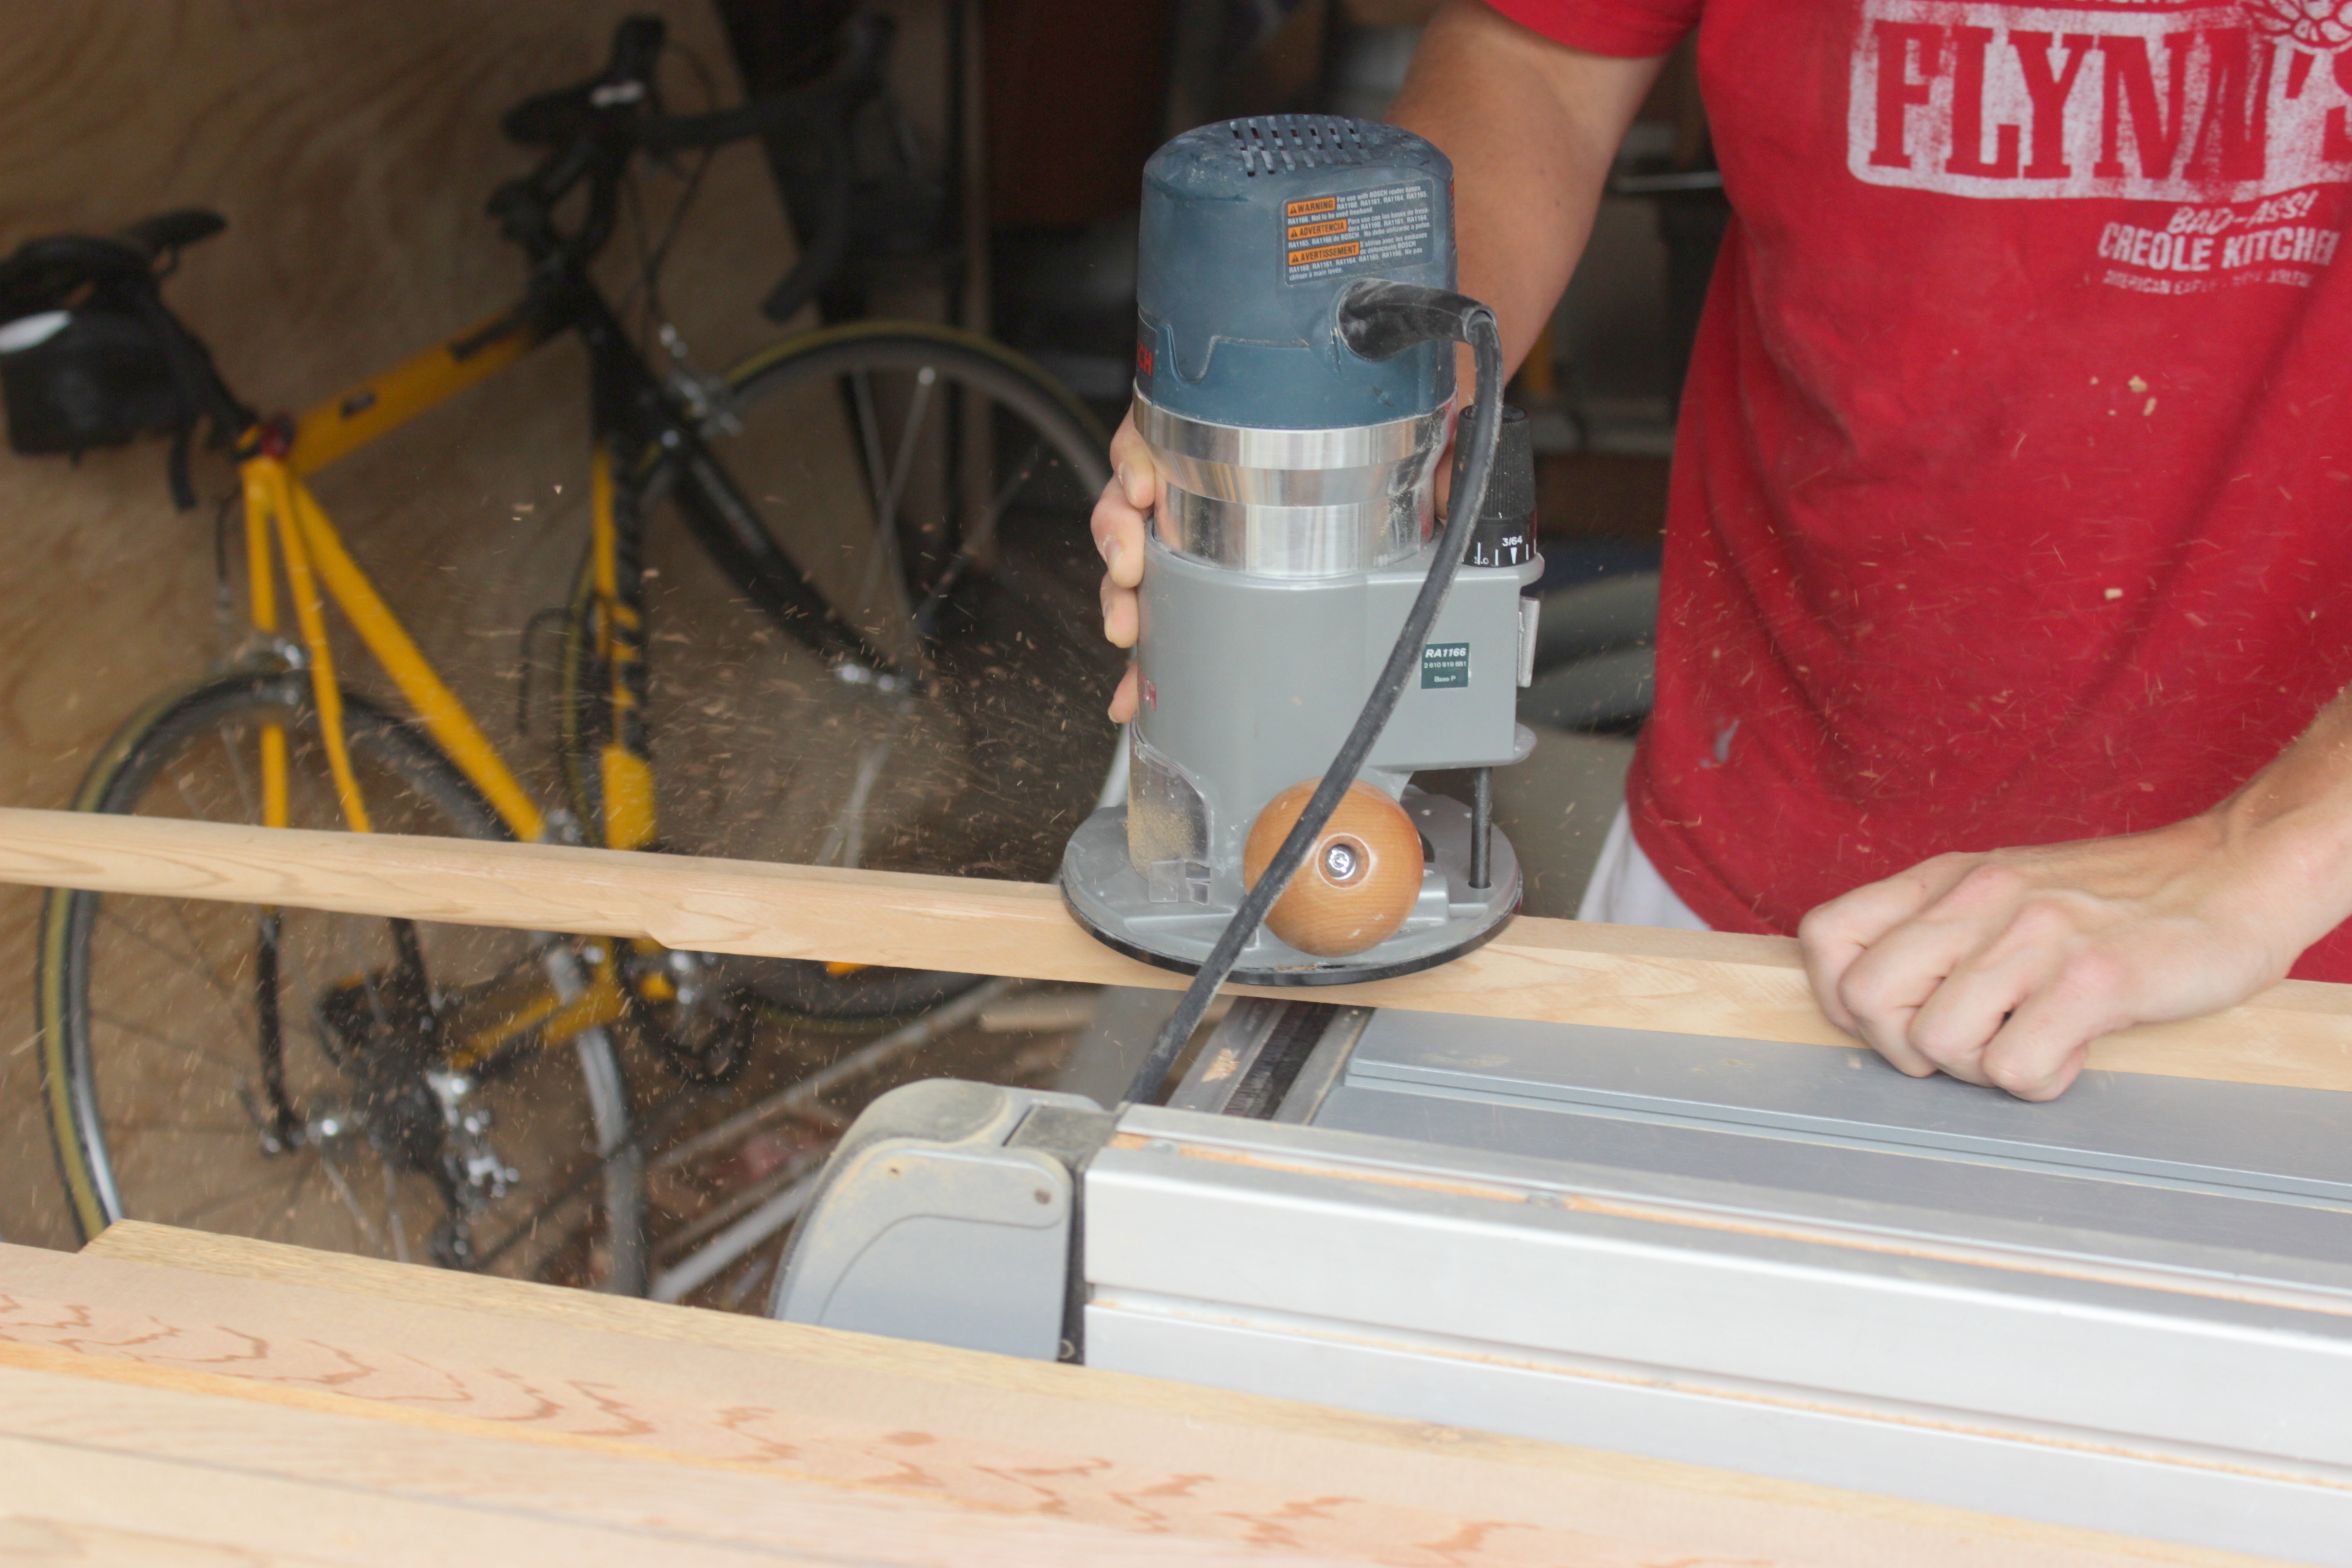
Using a router with 3/8″ (or larger) round over bit, Justin rounded the edges on all four sides of a 1×1″ piece of cedar. The larger the round over bit, the rounder the edges are. He only had a 3/8″ bit, so our legs are more of a rounded edge-square, than a circle.
Step 2: Sand the legs
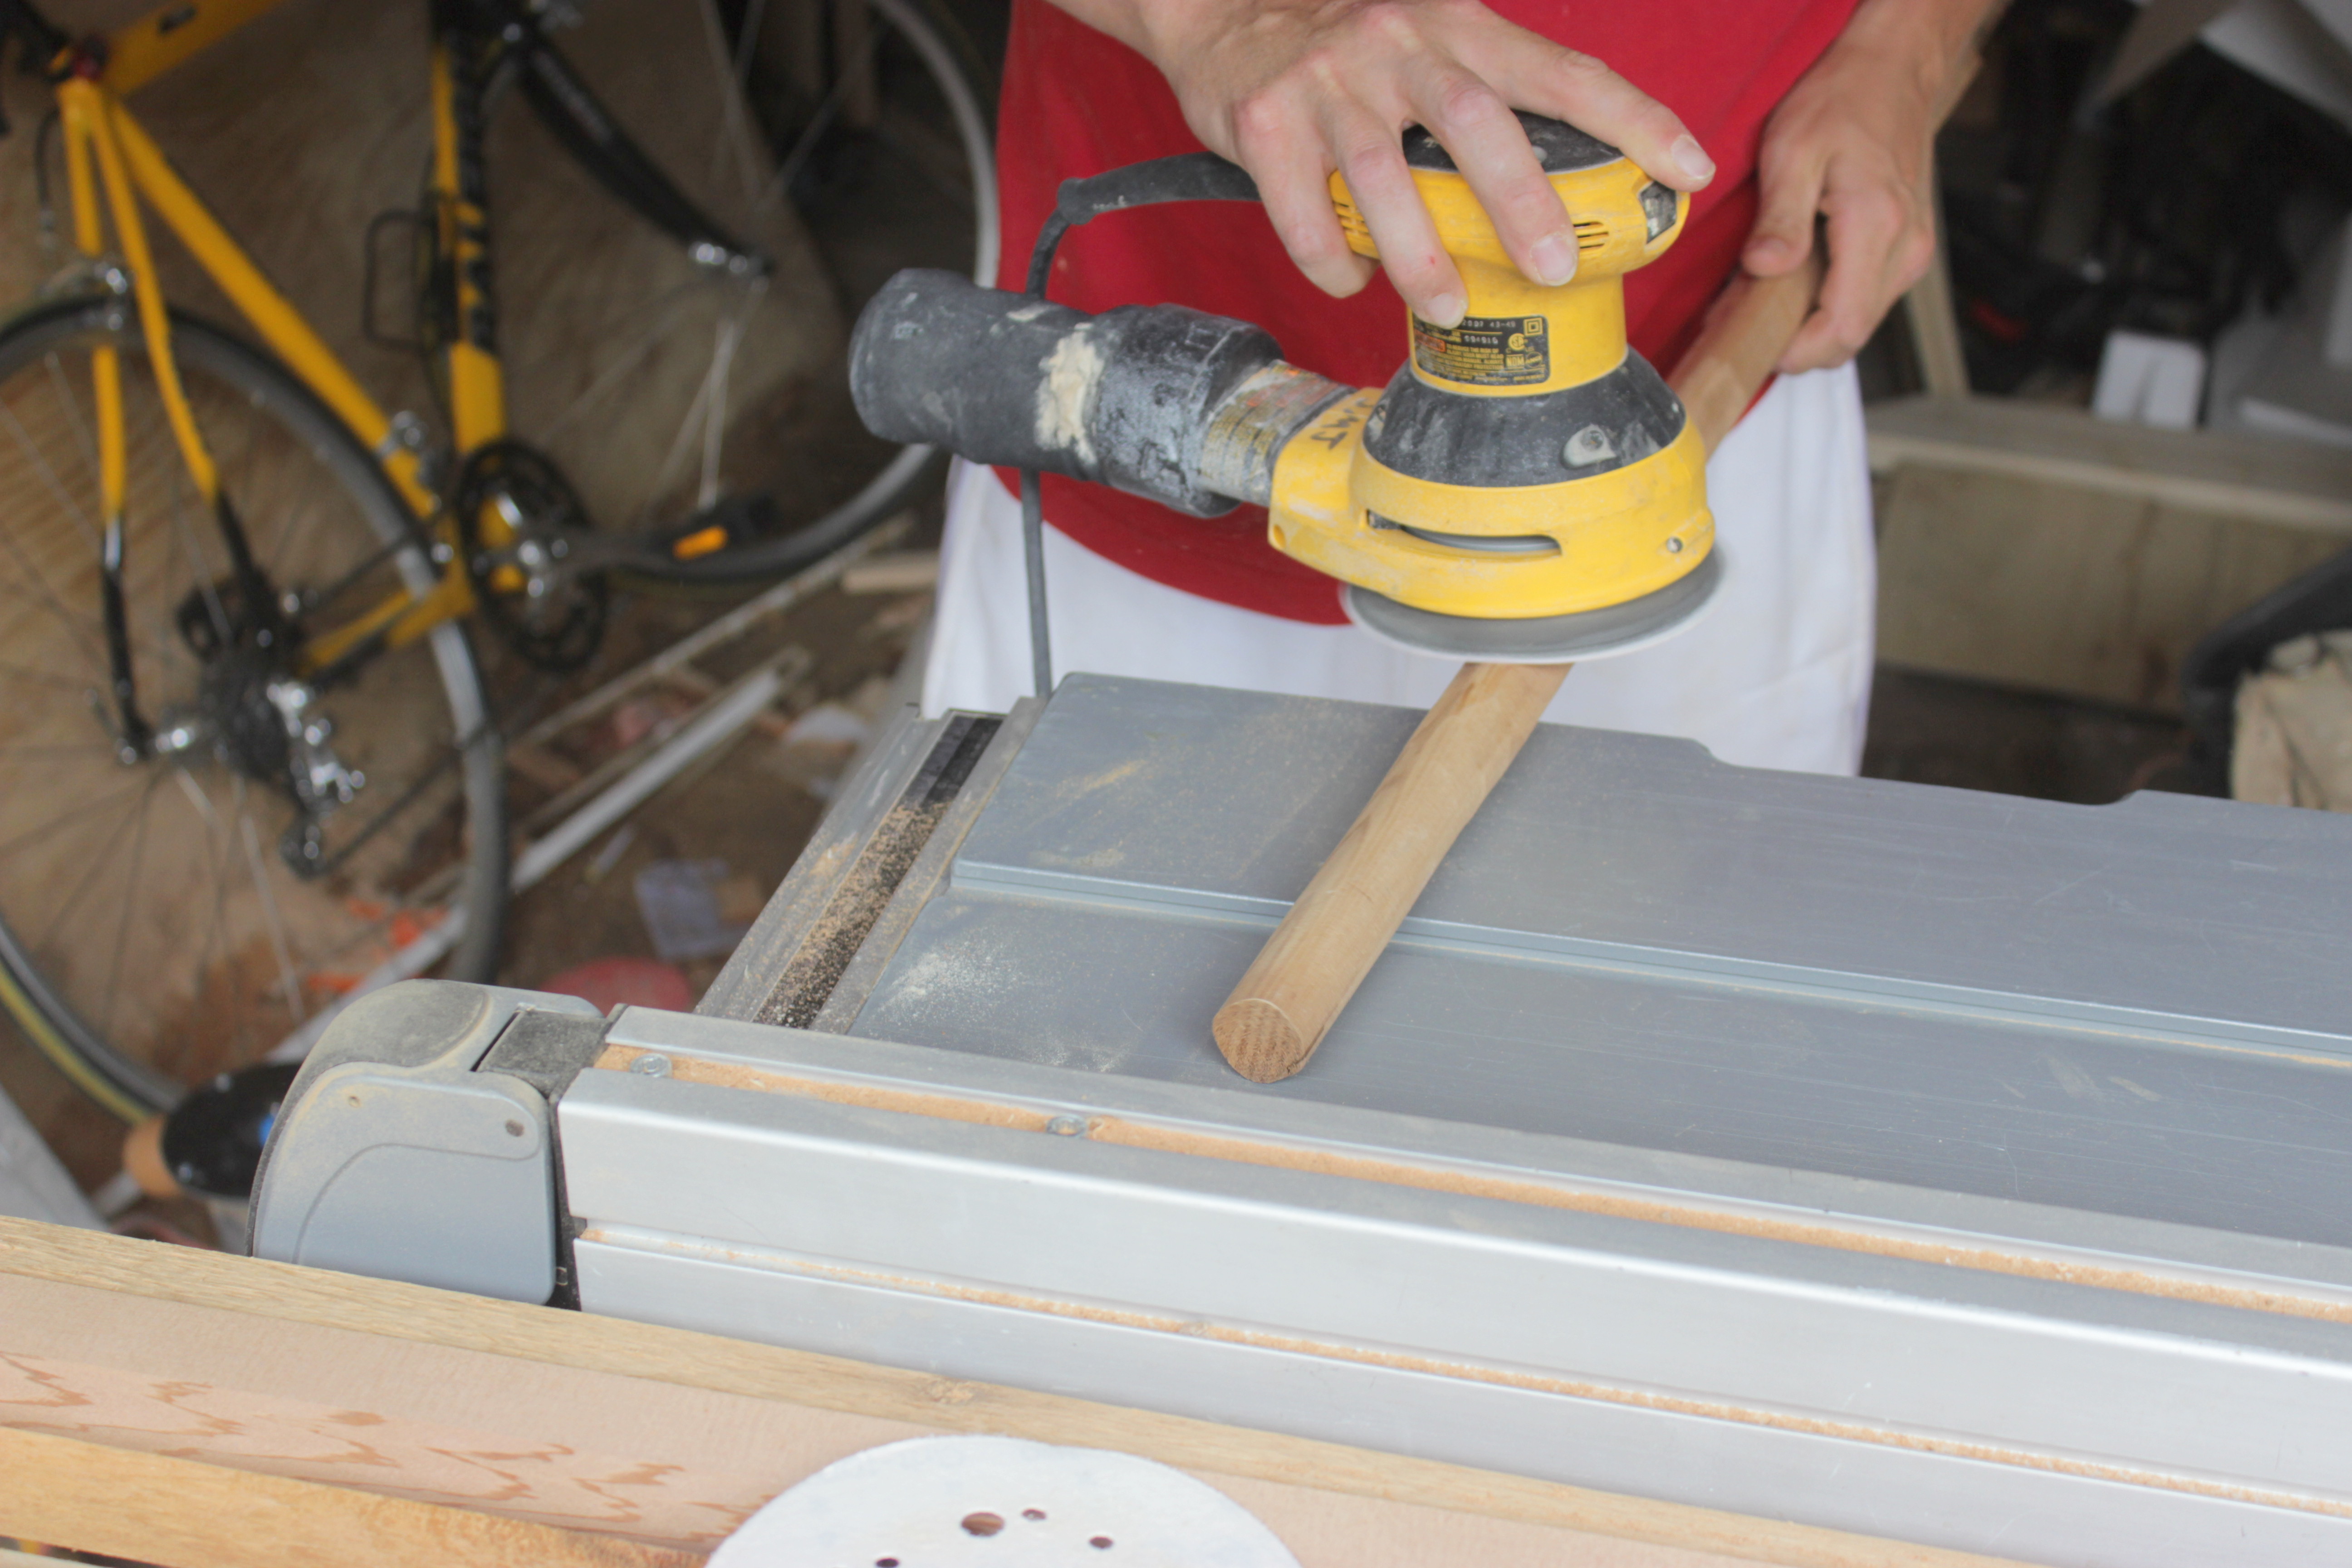
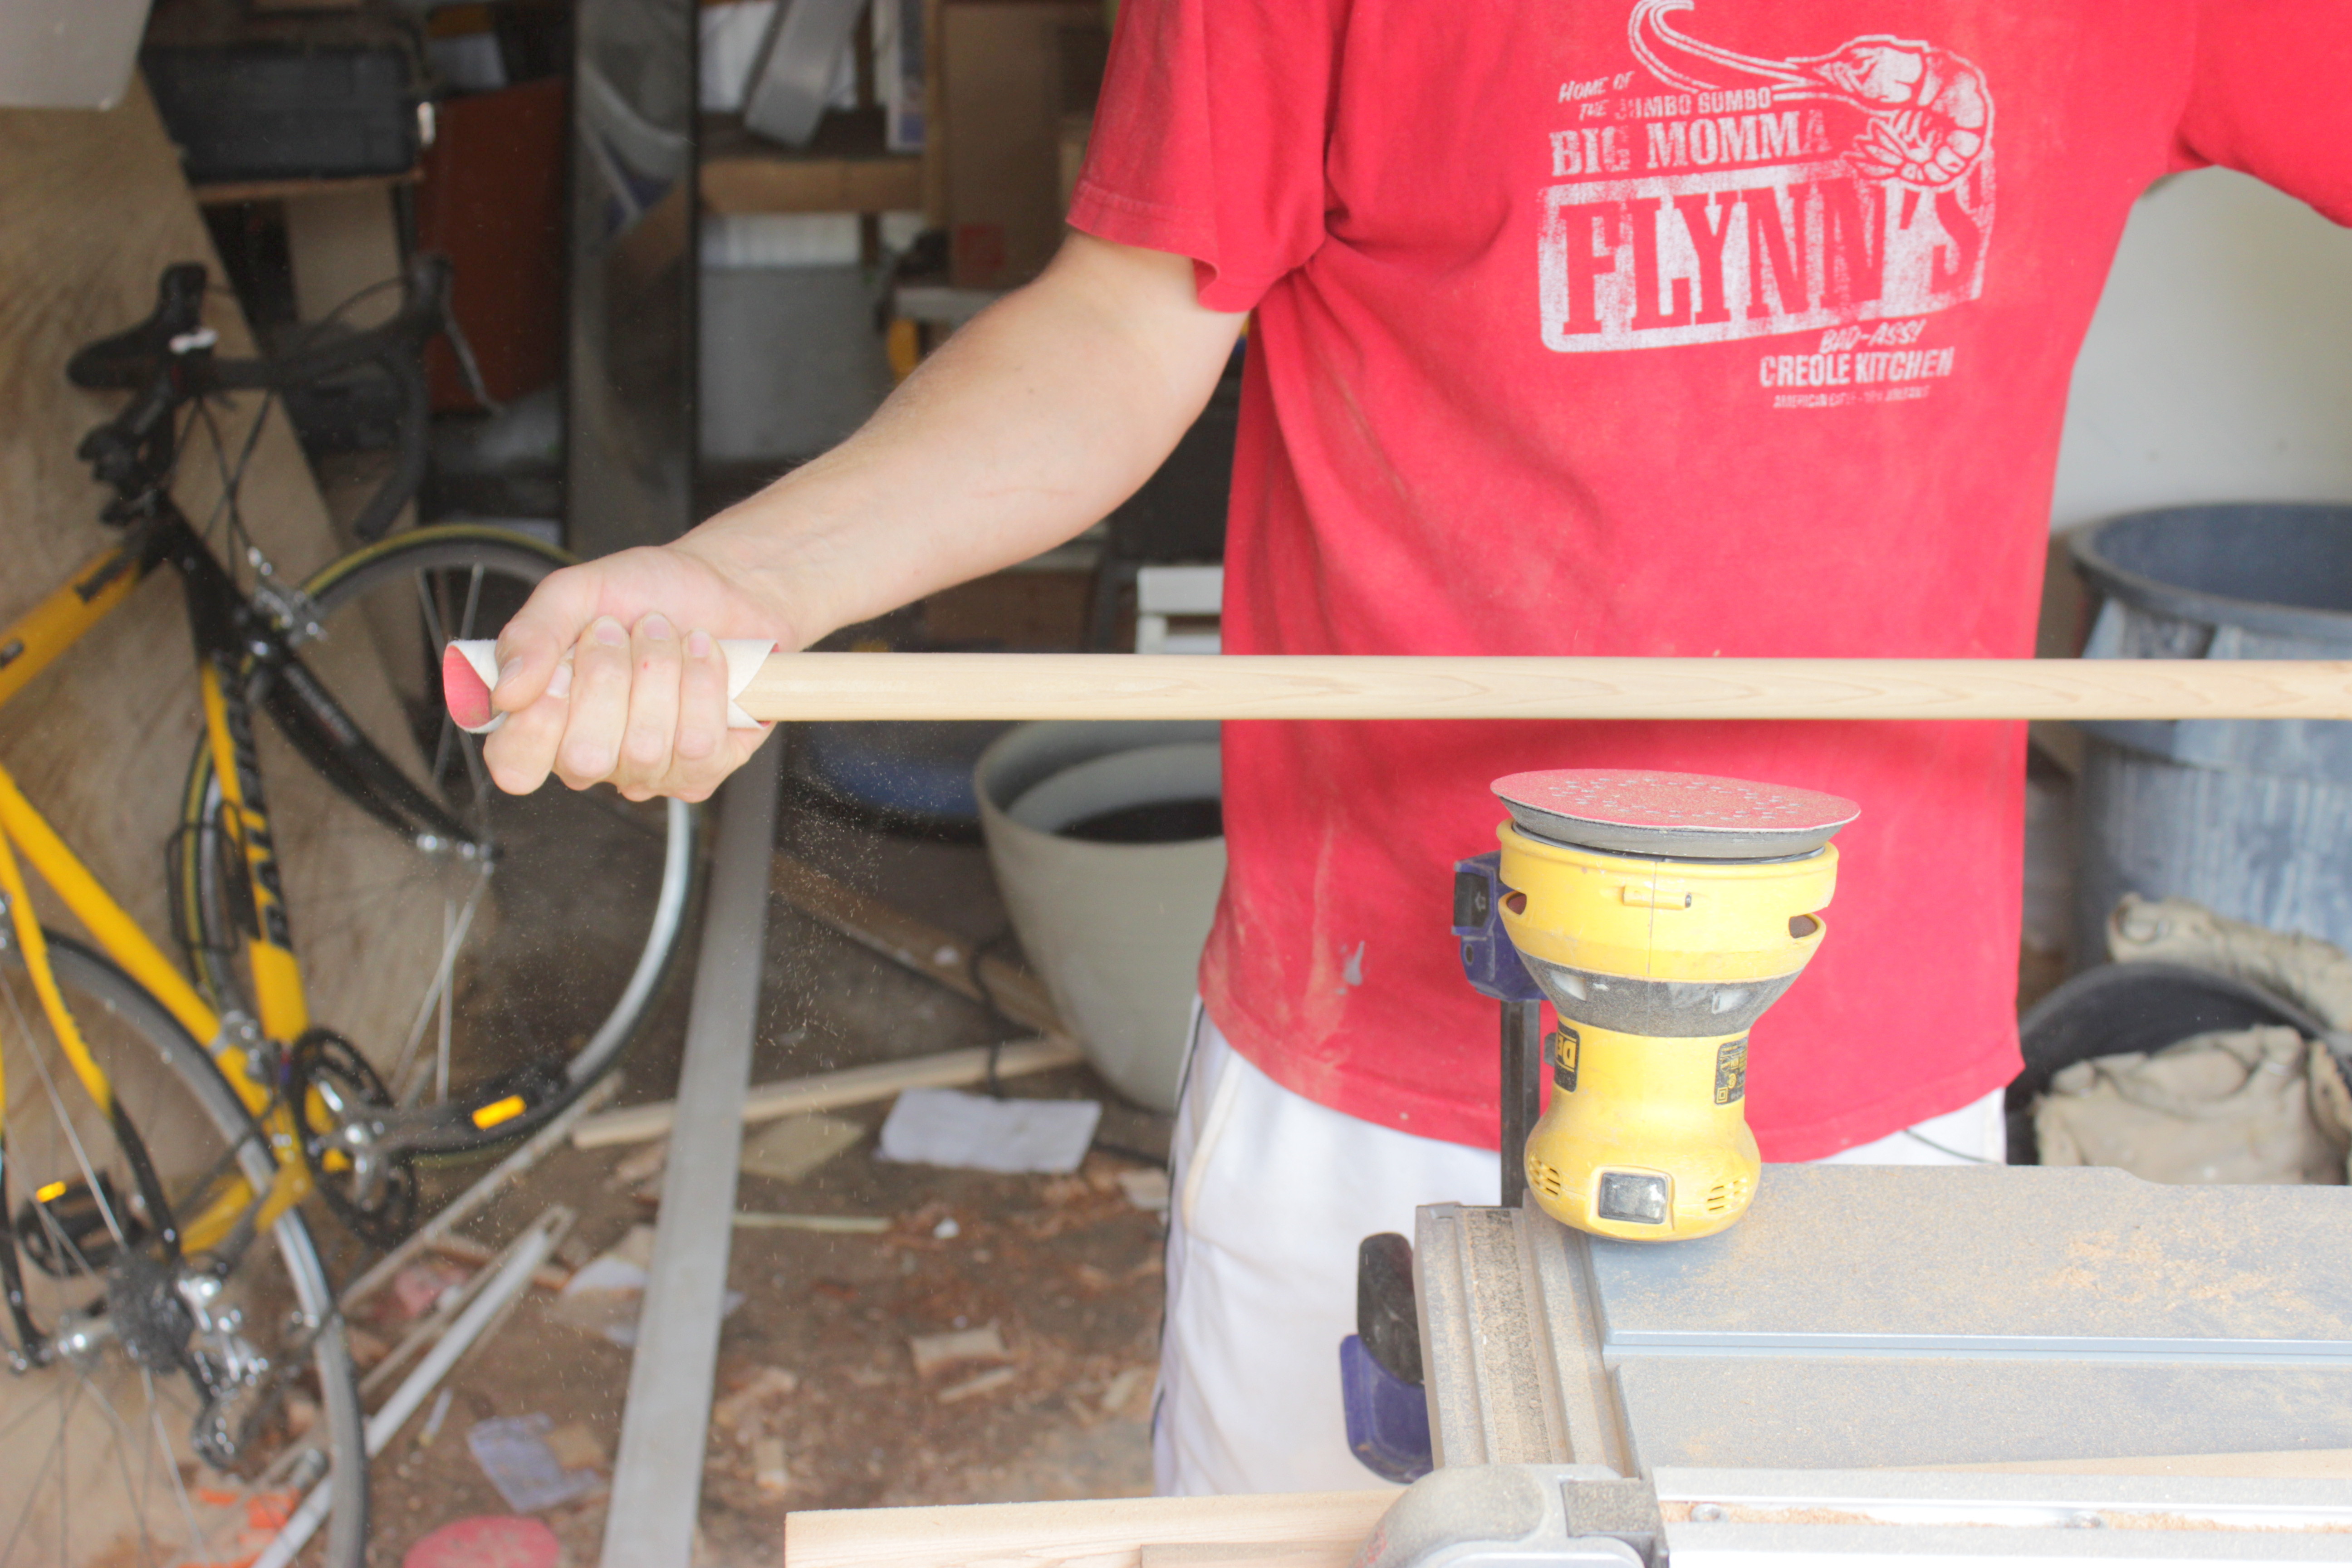
To help round out the legs, sand the legs with an orbital sander & 80 grit sandpaper, and follow behind by hand sanding it using 80 grit sandpaper.
Here’s what our legs looked like once Justin was done rounding them.
Note: If you’d like to use a stairwell spindle, or have square legs, that would work as well. Round spindle’s don’t come in Cedar, so Justin custom made these for us.
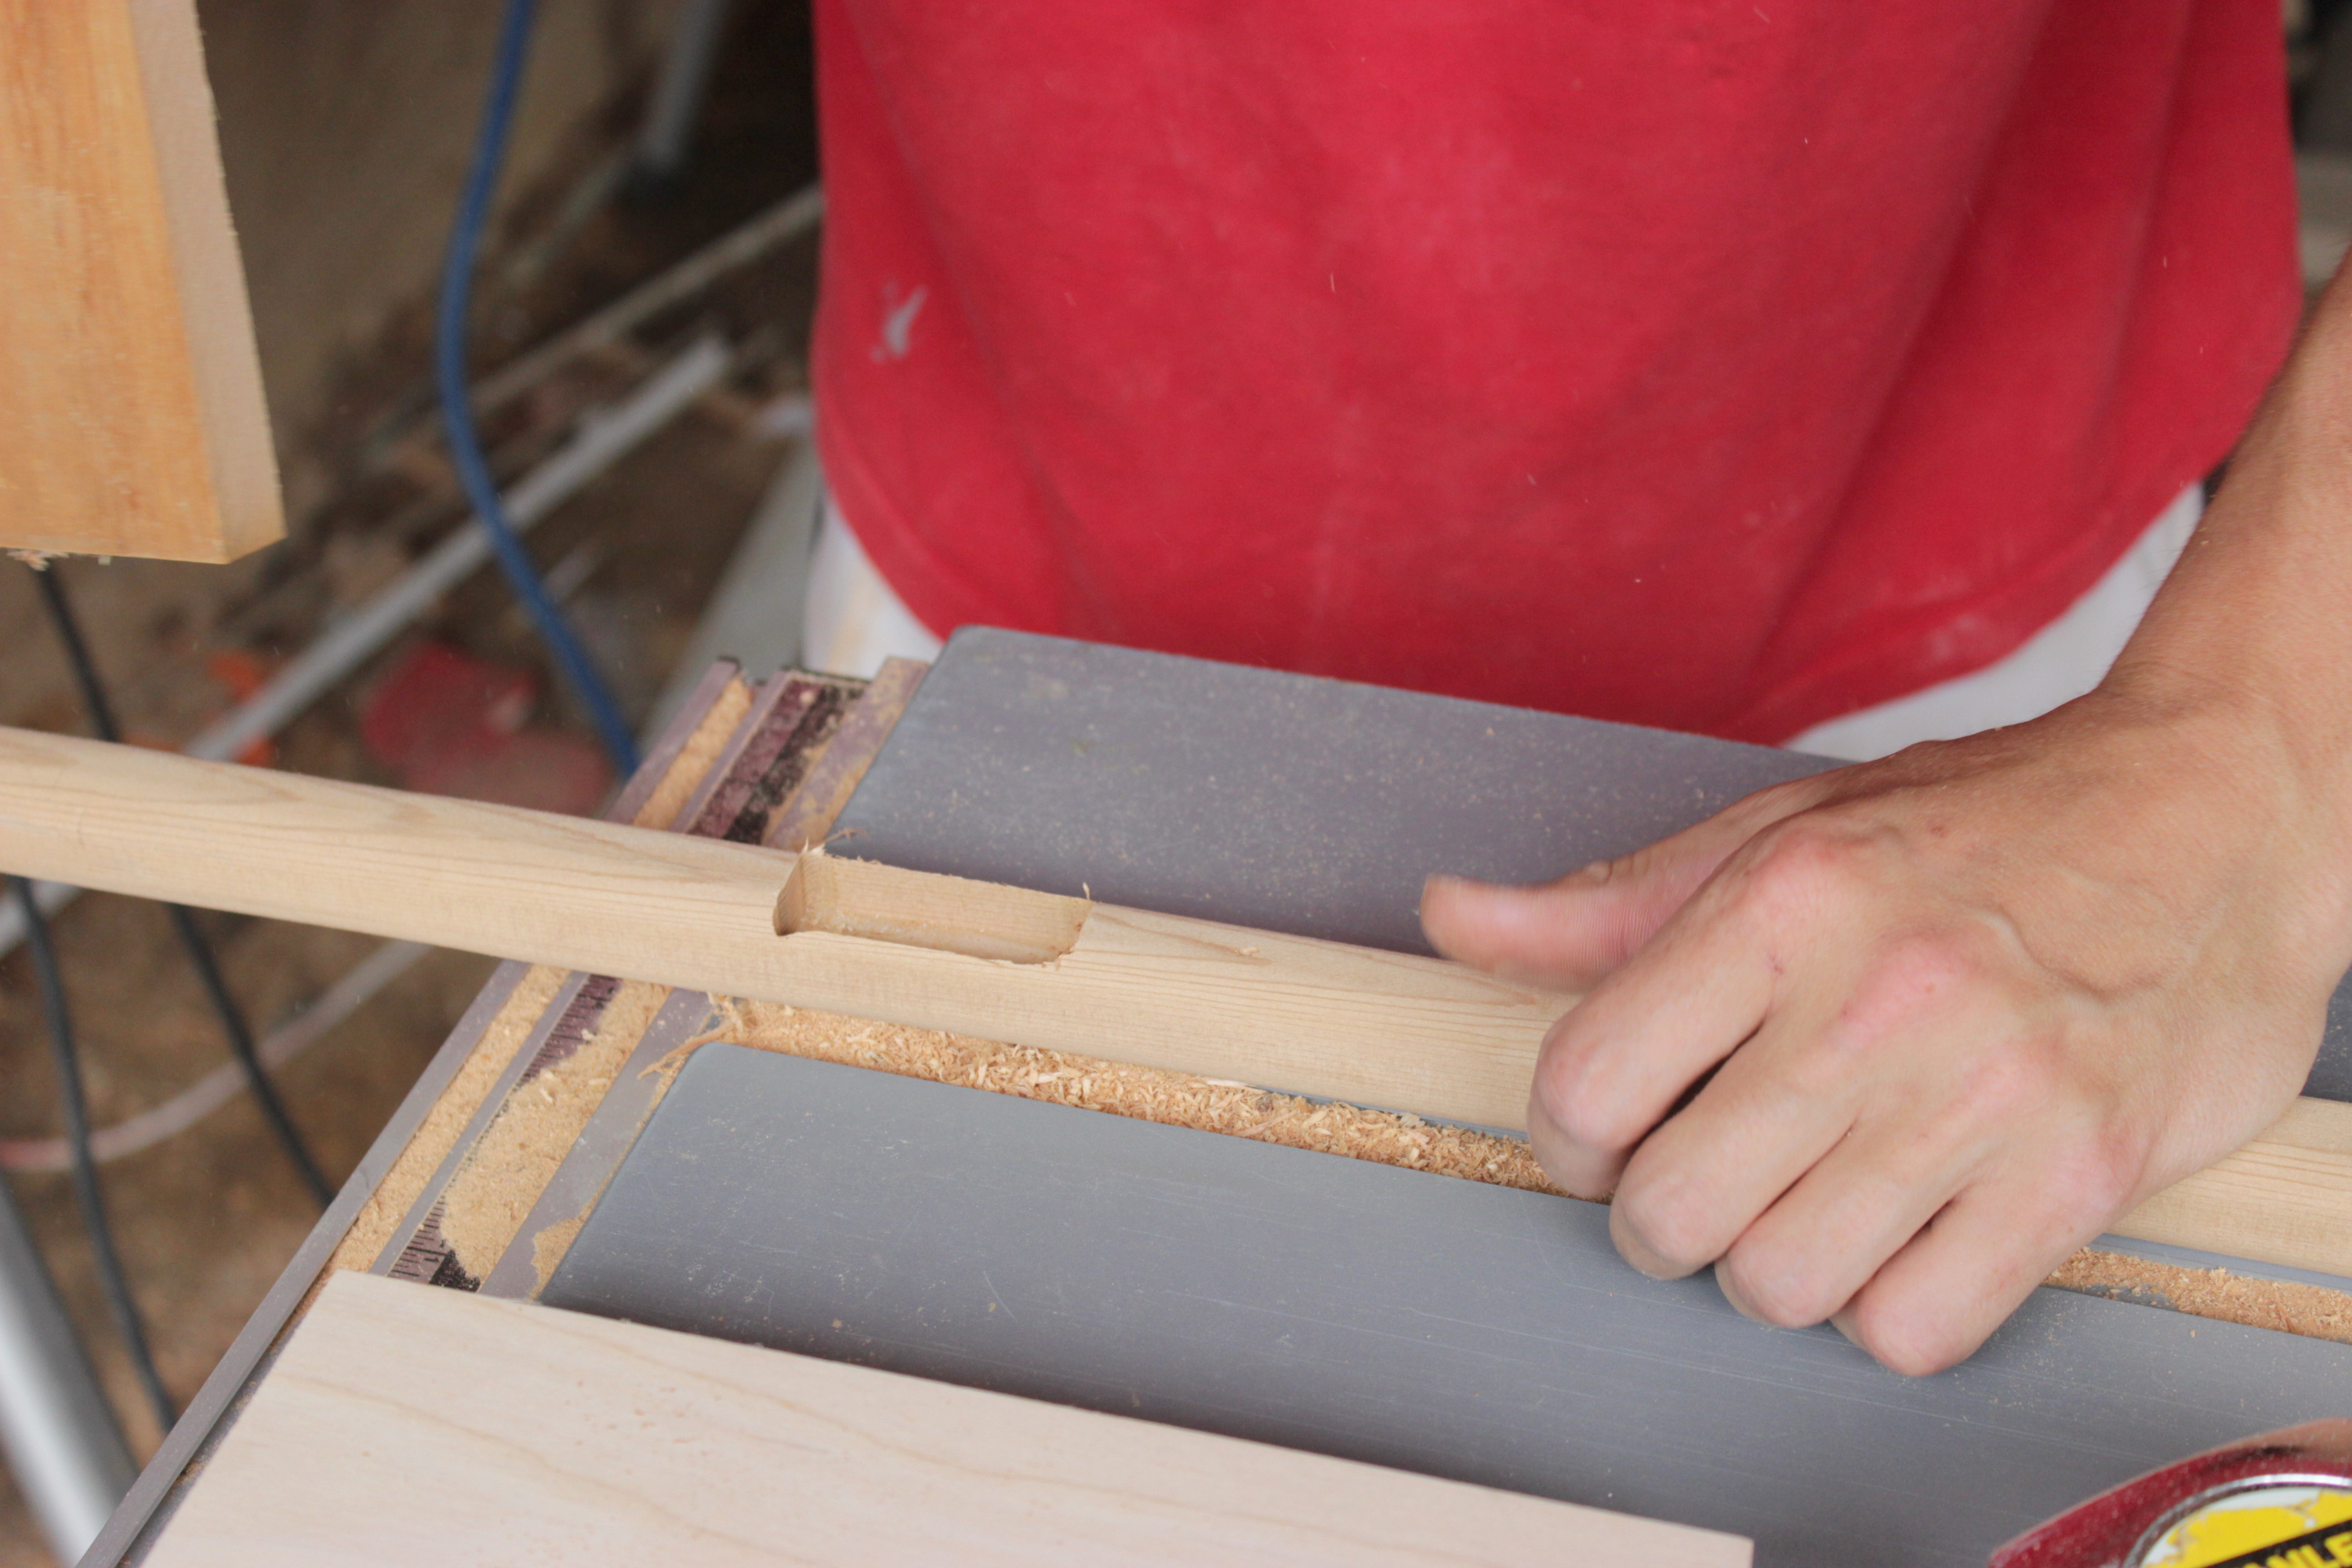
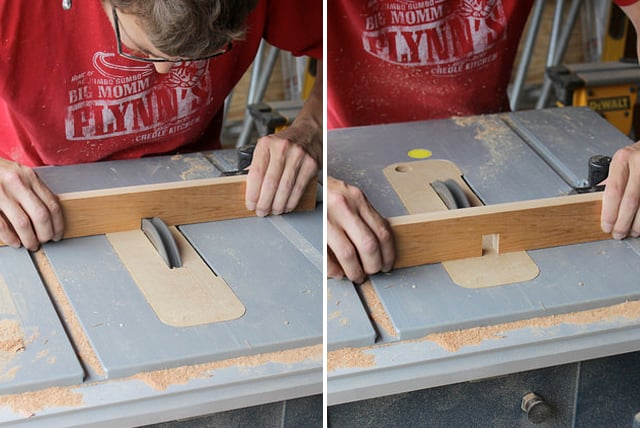
Step 3: Mortising for the Base

Using a router with a 1/4″ straight router bit, cut the mortise (aka, that square hole) into one side of the leg. Justin built his own little jig/template to help cut this rectangular mortise to exactly match the base pieces that will slide into place.
Here’s what the mortise looks like:
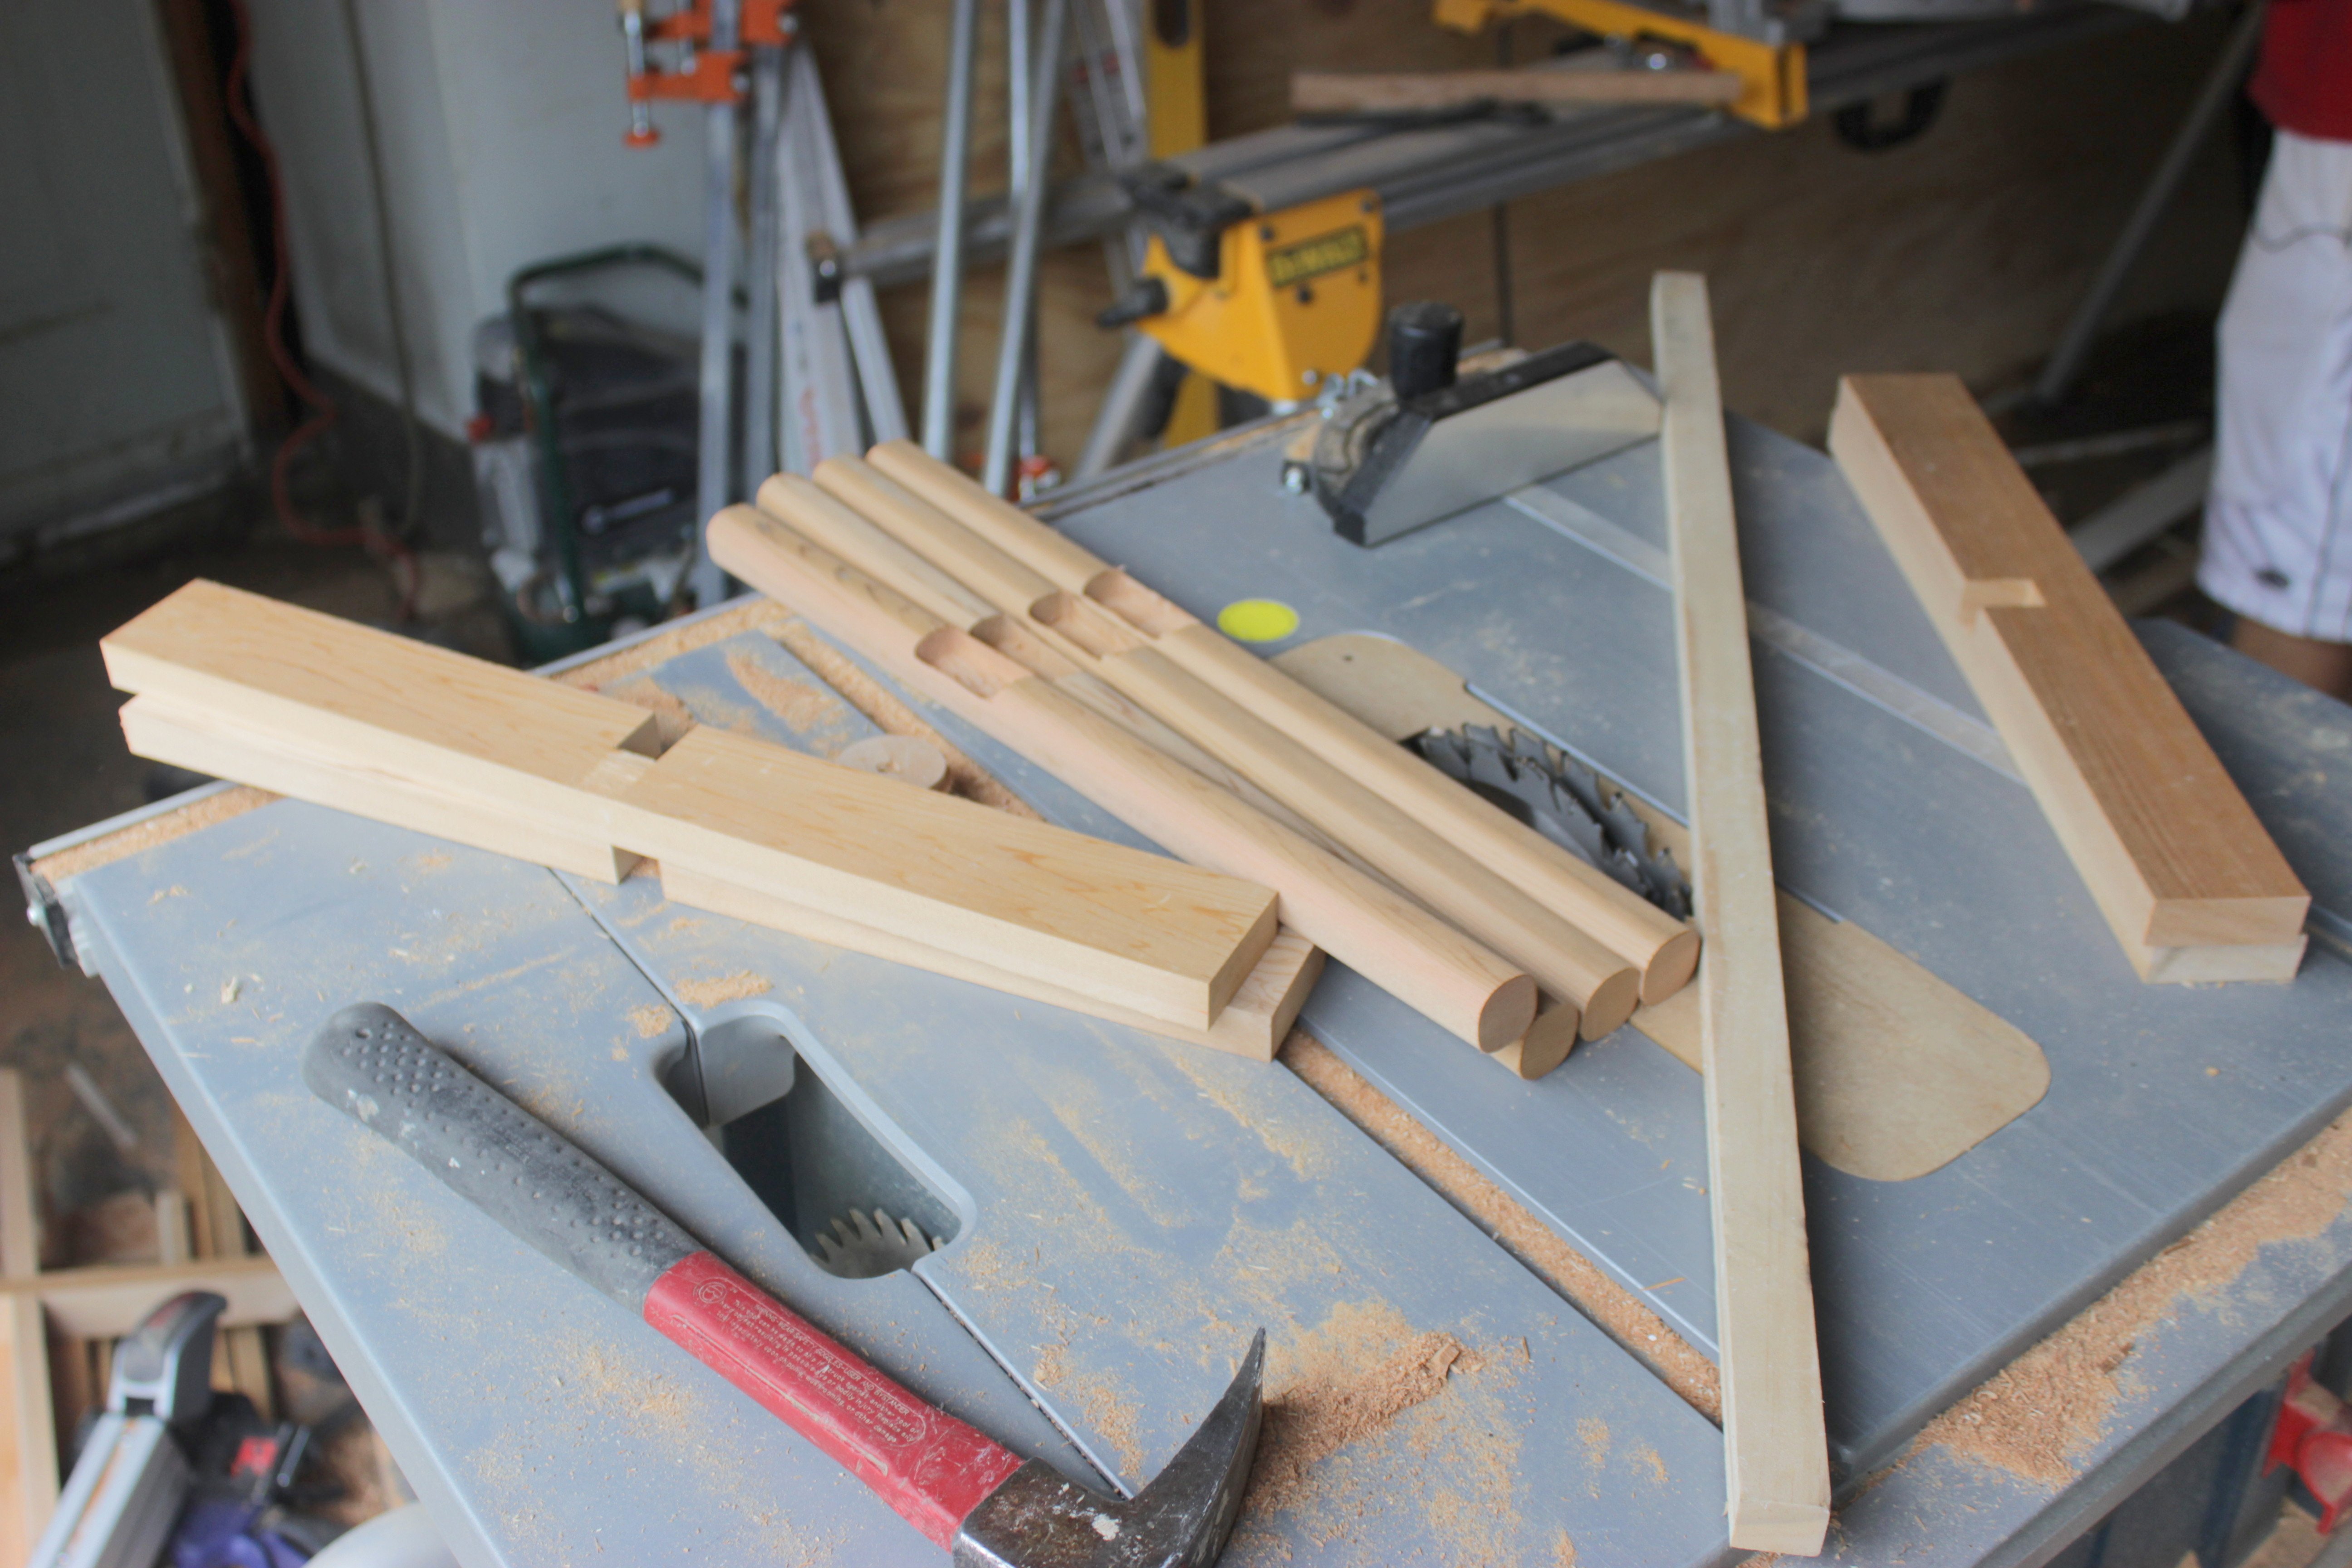
Step 4: Cutting out the notches in the base
Measure the center of base pieces, making the notch 3/4″ x 1″ so the two base pieces will slide together flush. Cut these notches using your table saw with dado blades and the sliding table saw guide.
Here’s what all of the pieces look like once they’ve been cut. Two notched base pieces & four mortised legs.
Step 5: Glue and assemble
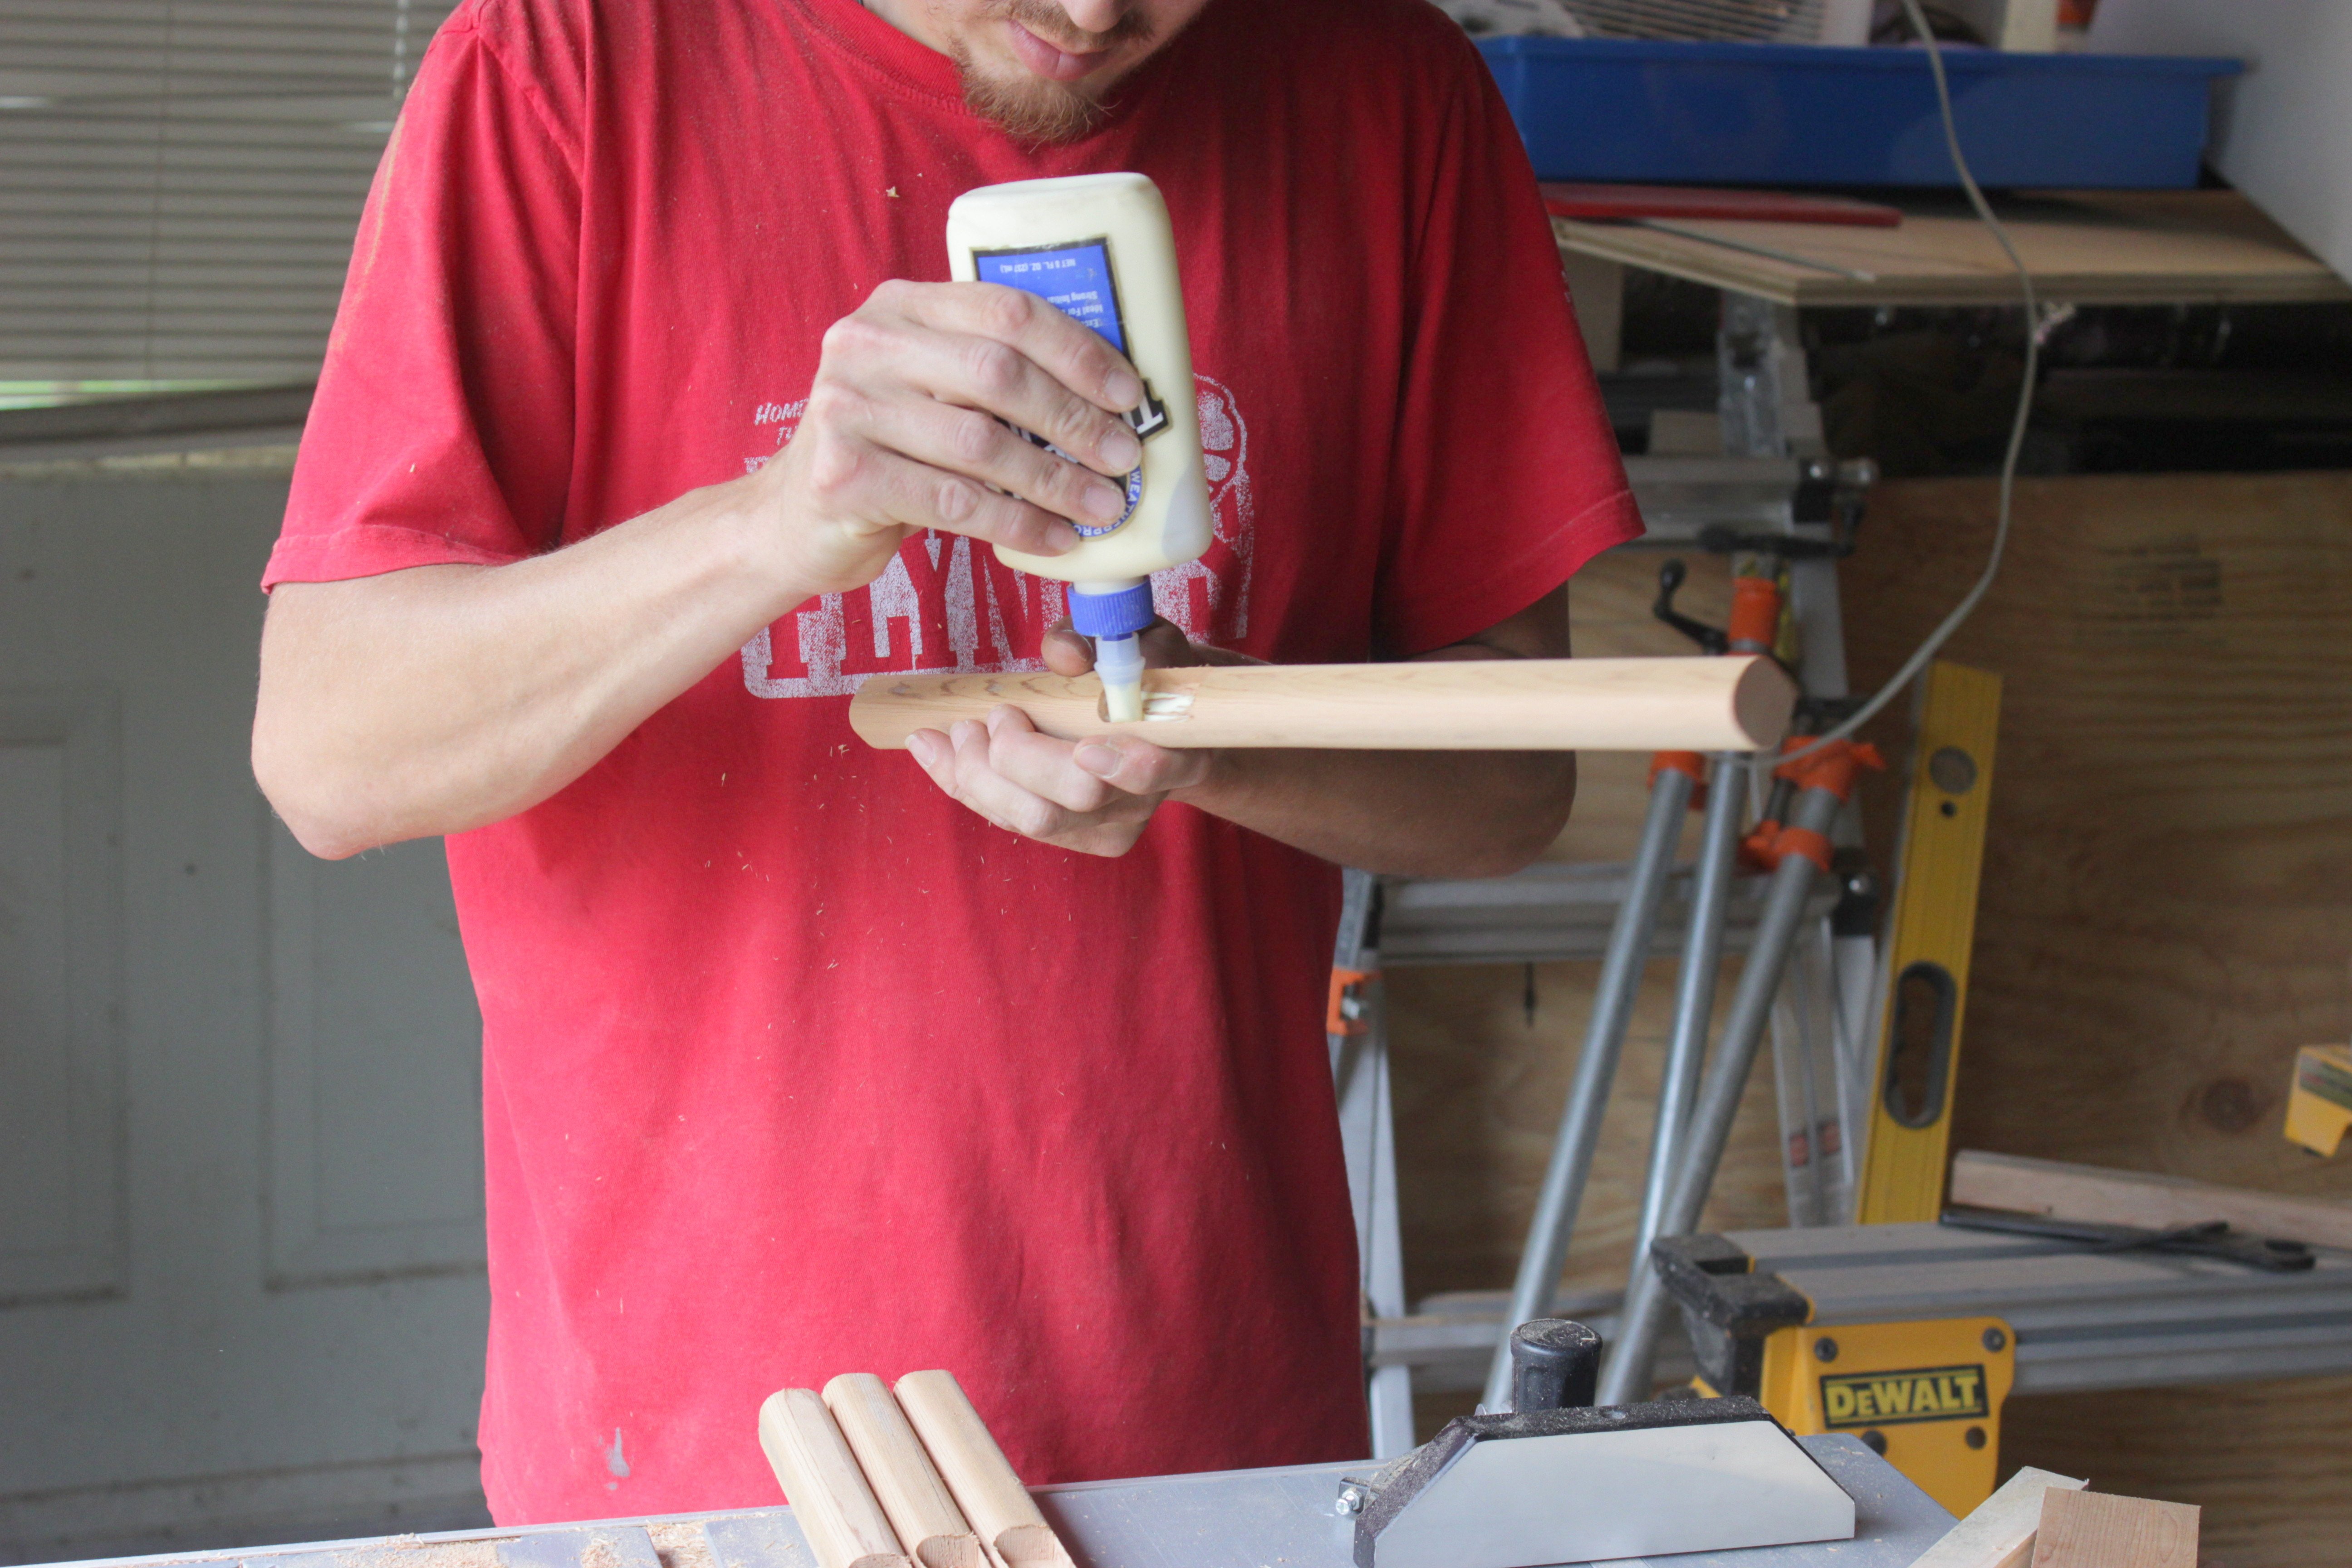
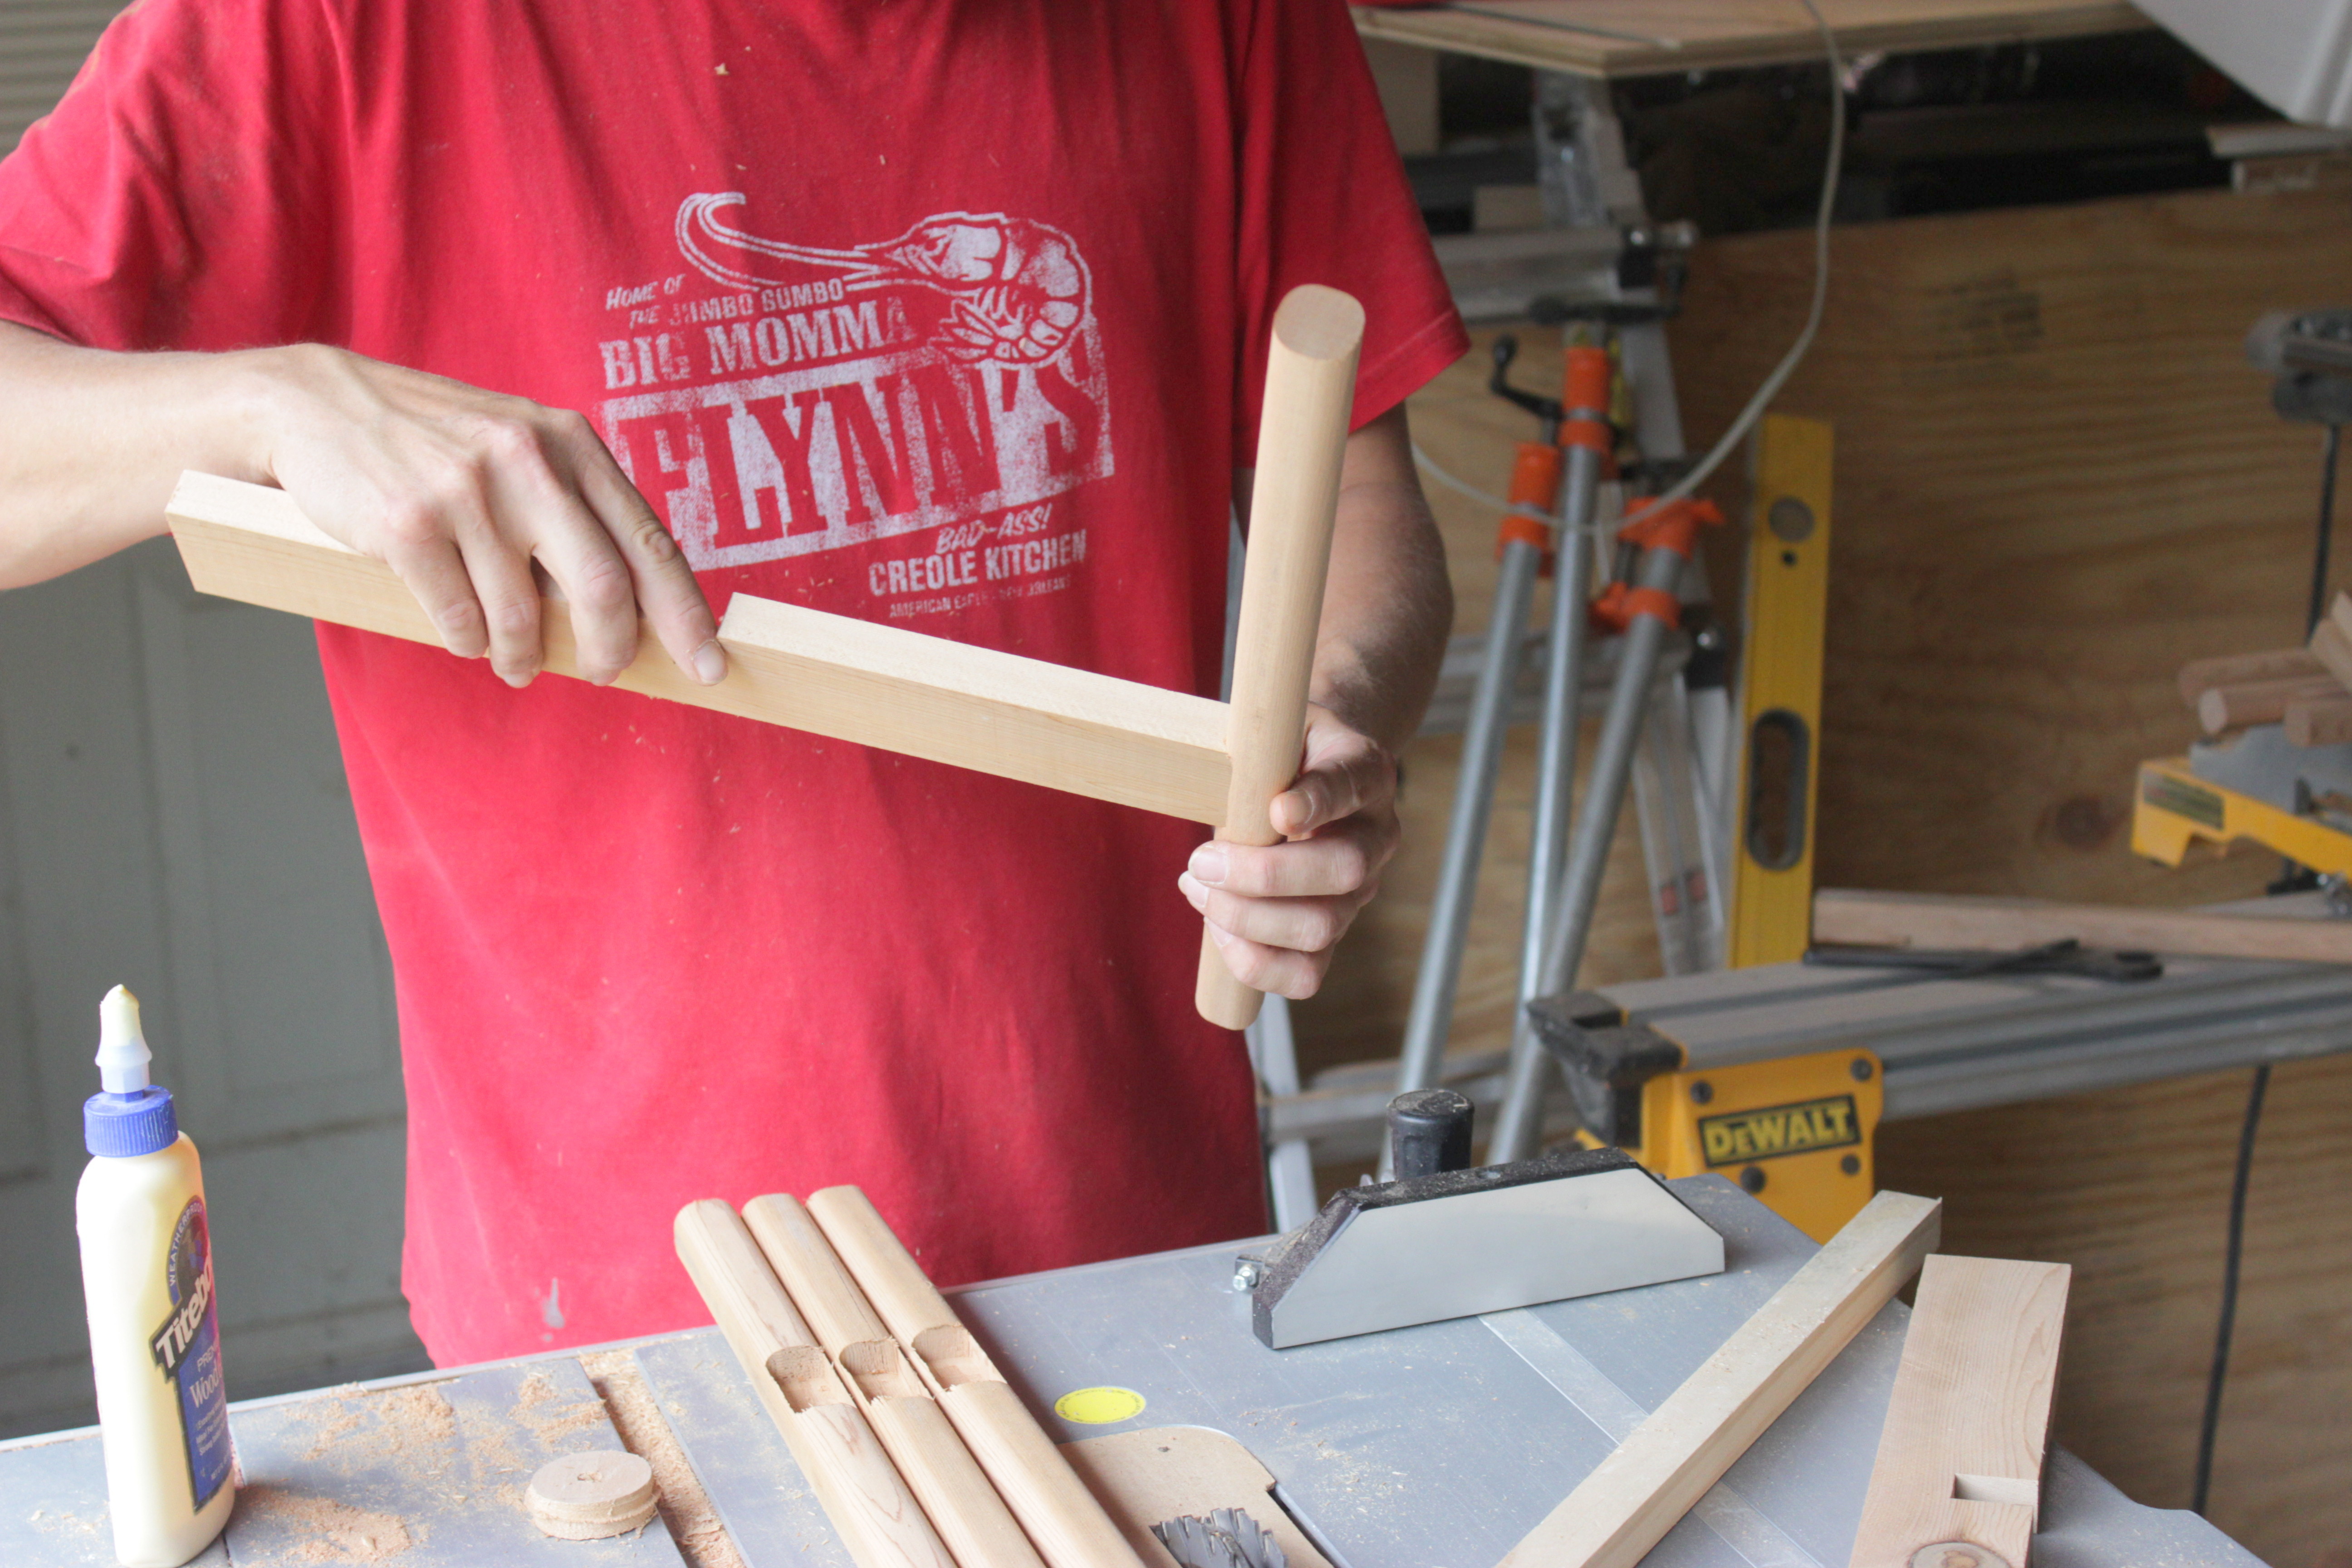
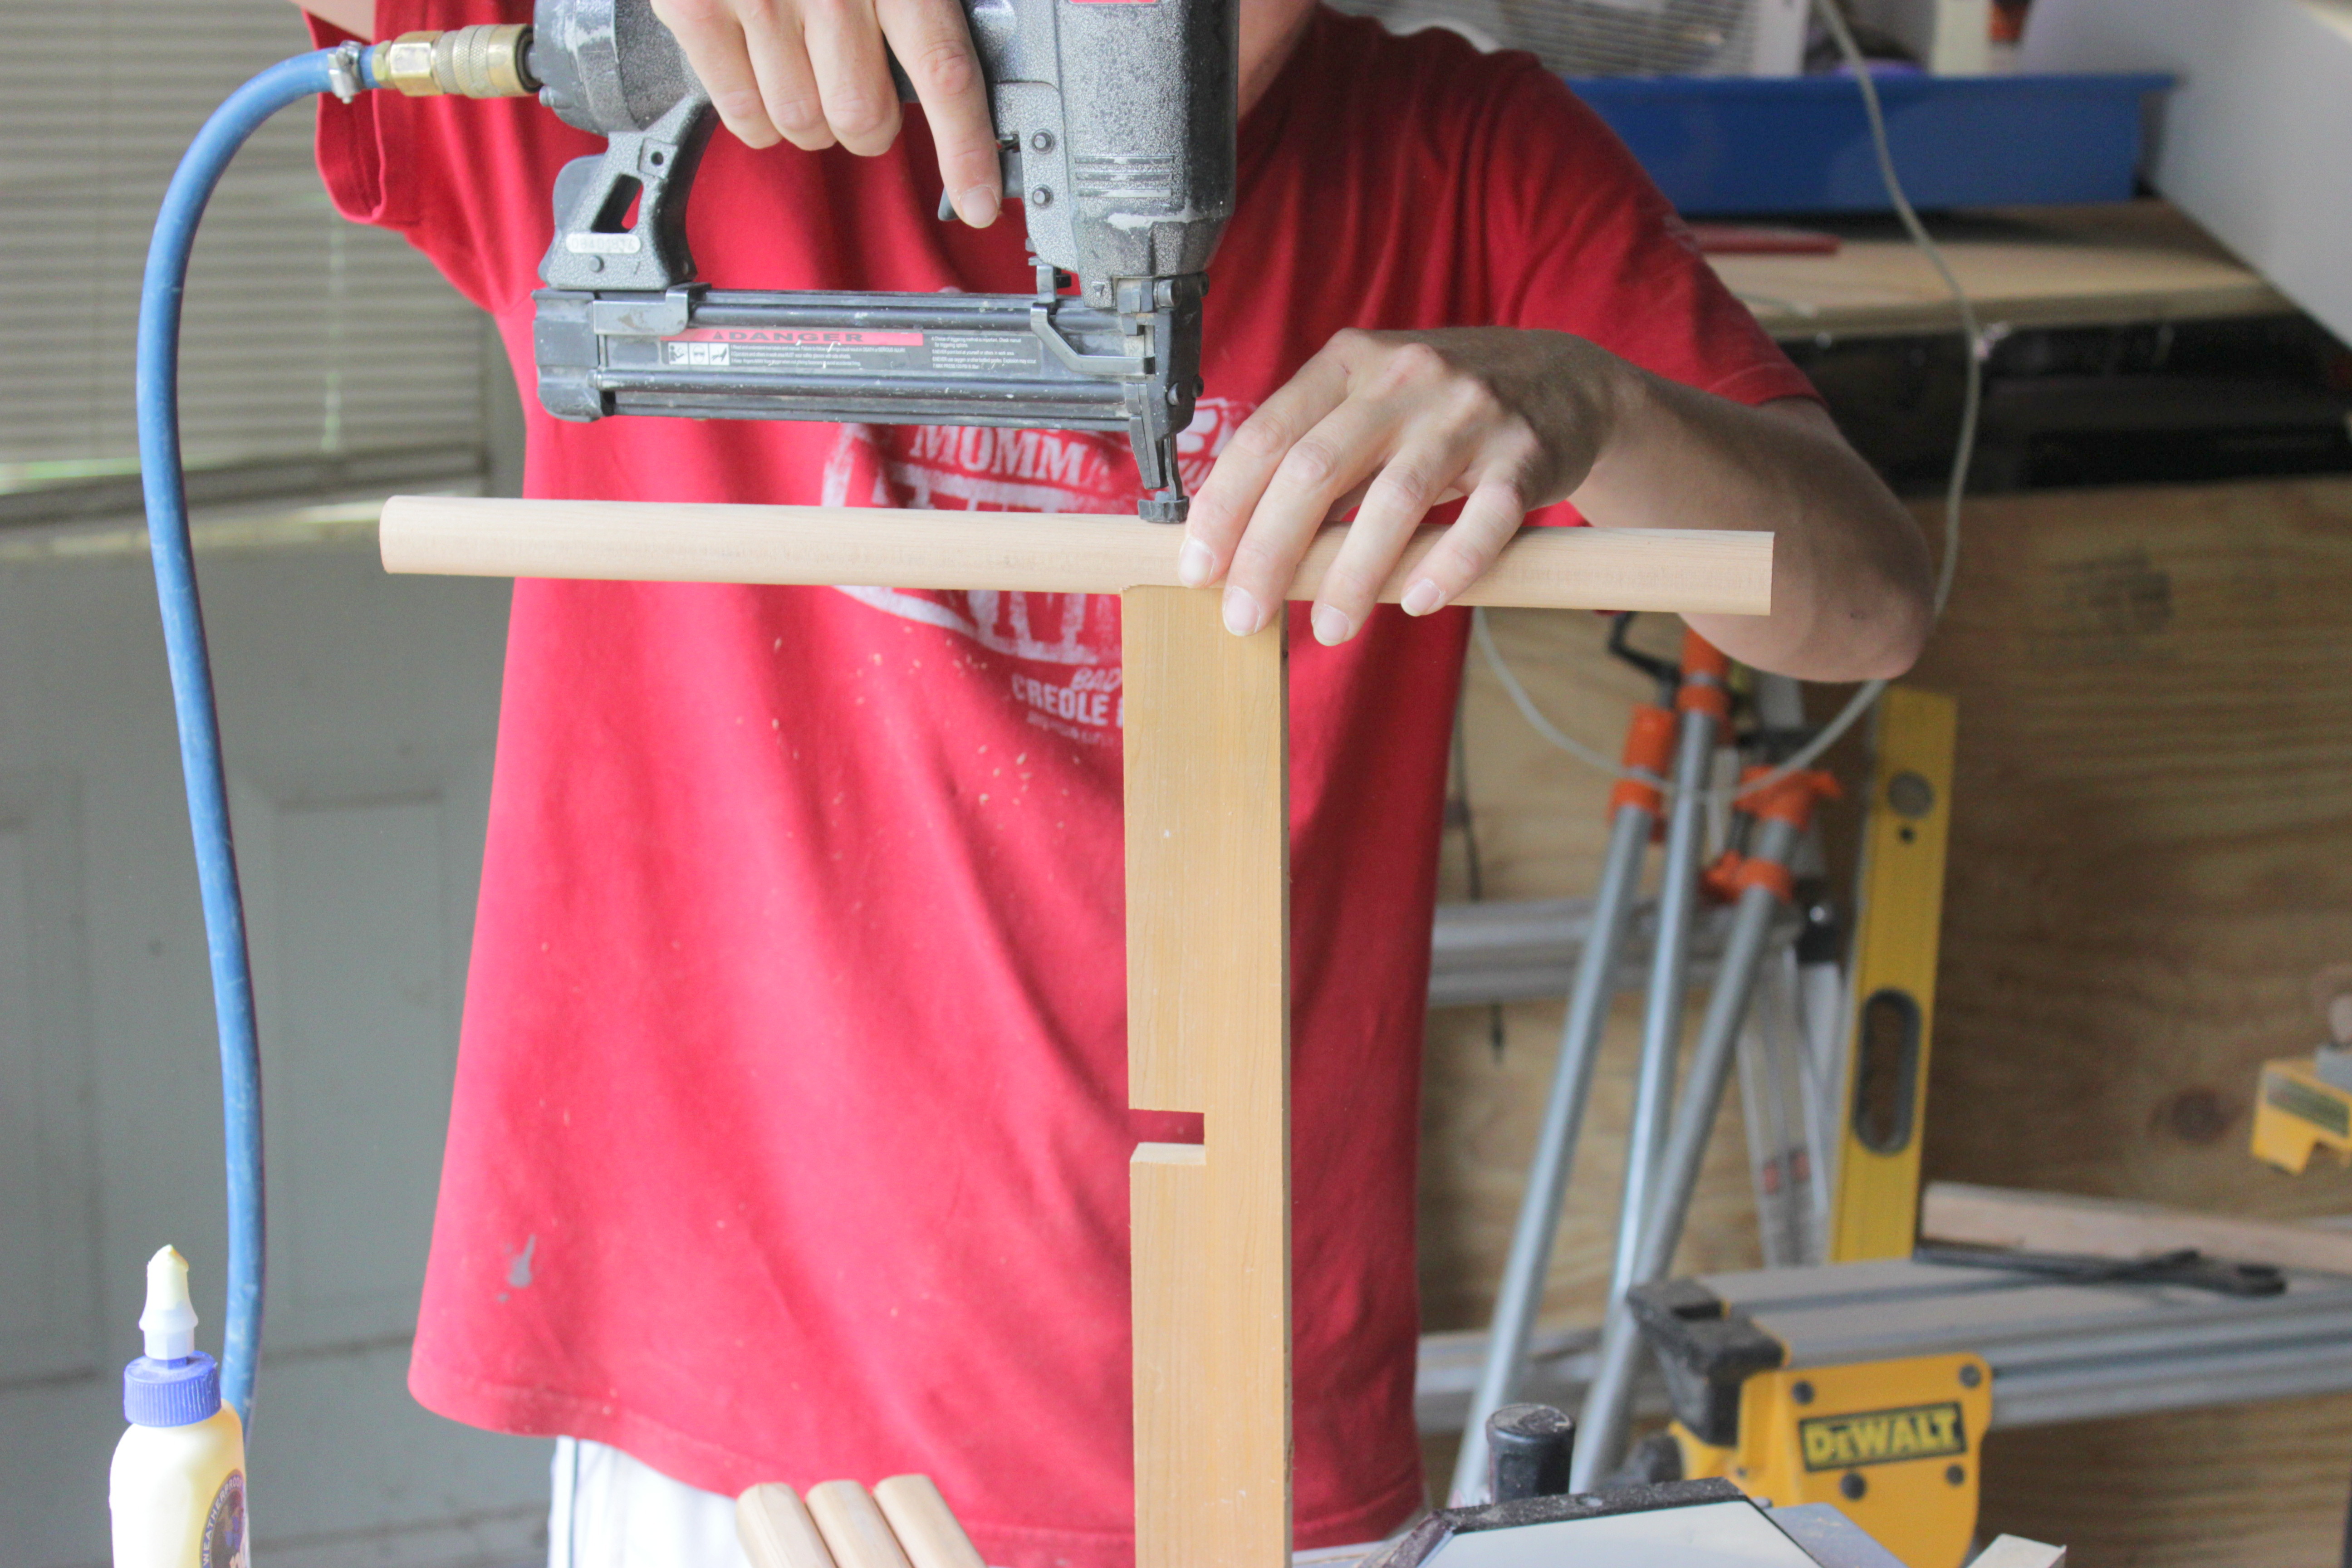
Put a good amount of wood glue in the mortise of the legs, then slide the base piece into the mortise and nail with a brad nailer and 1-1/4″ brand nails.
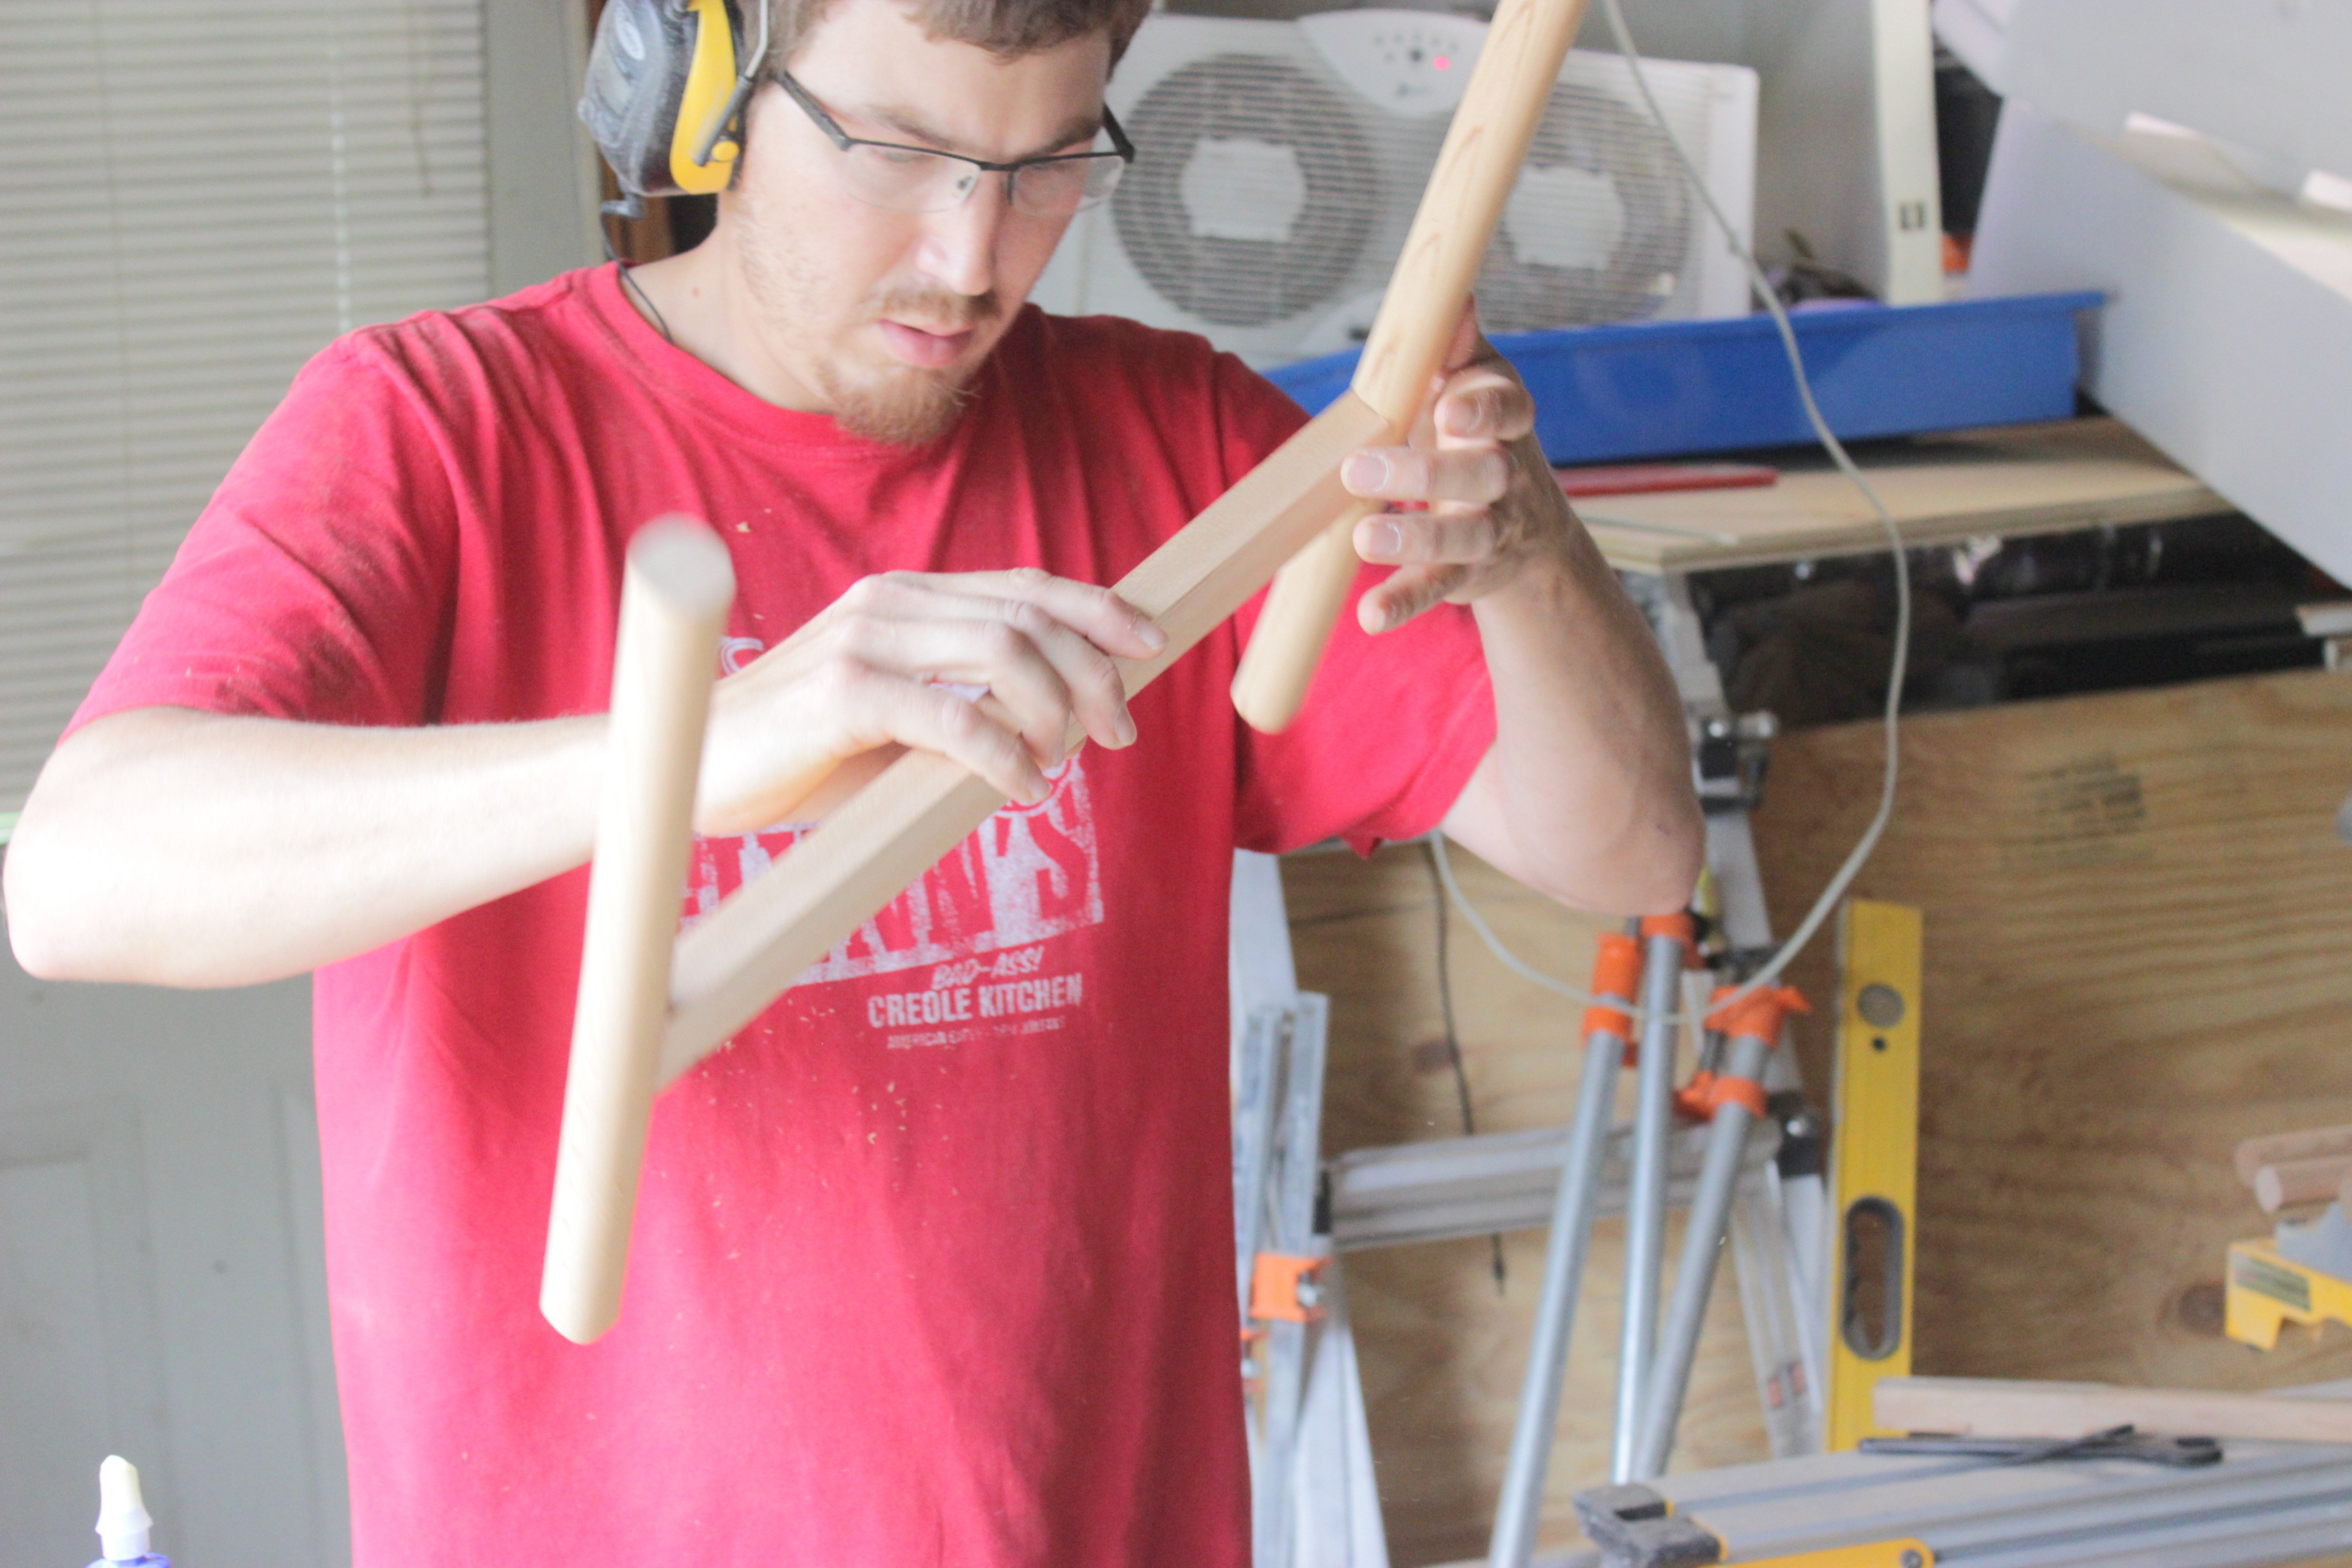
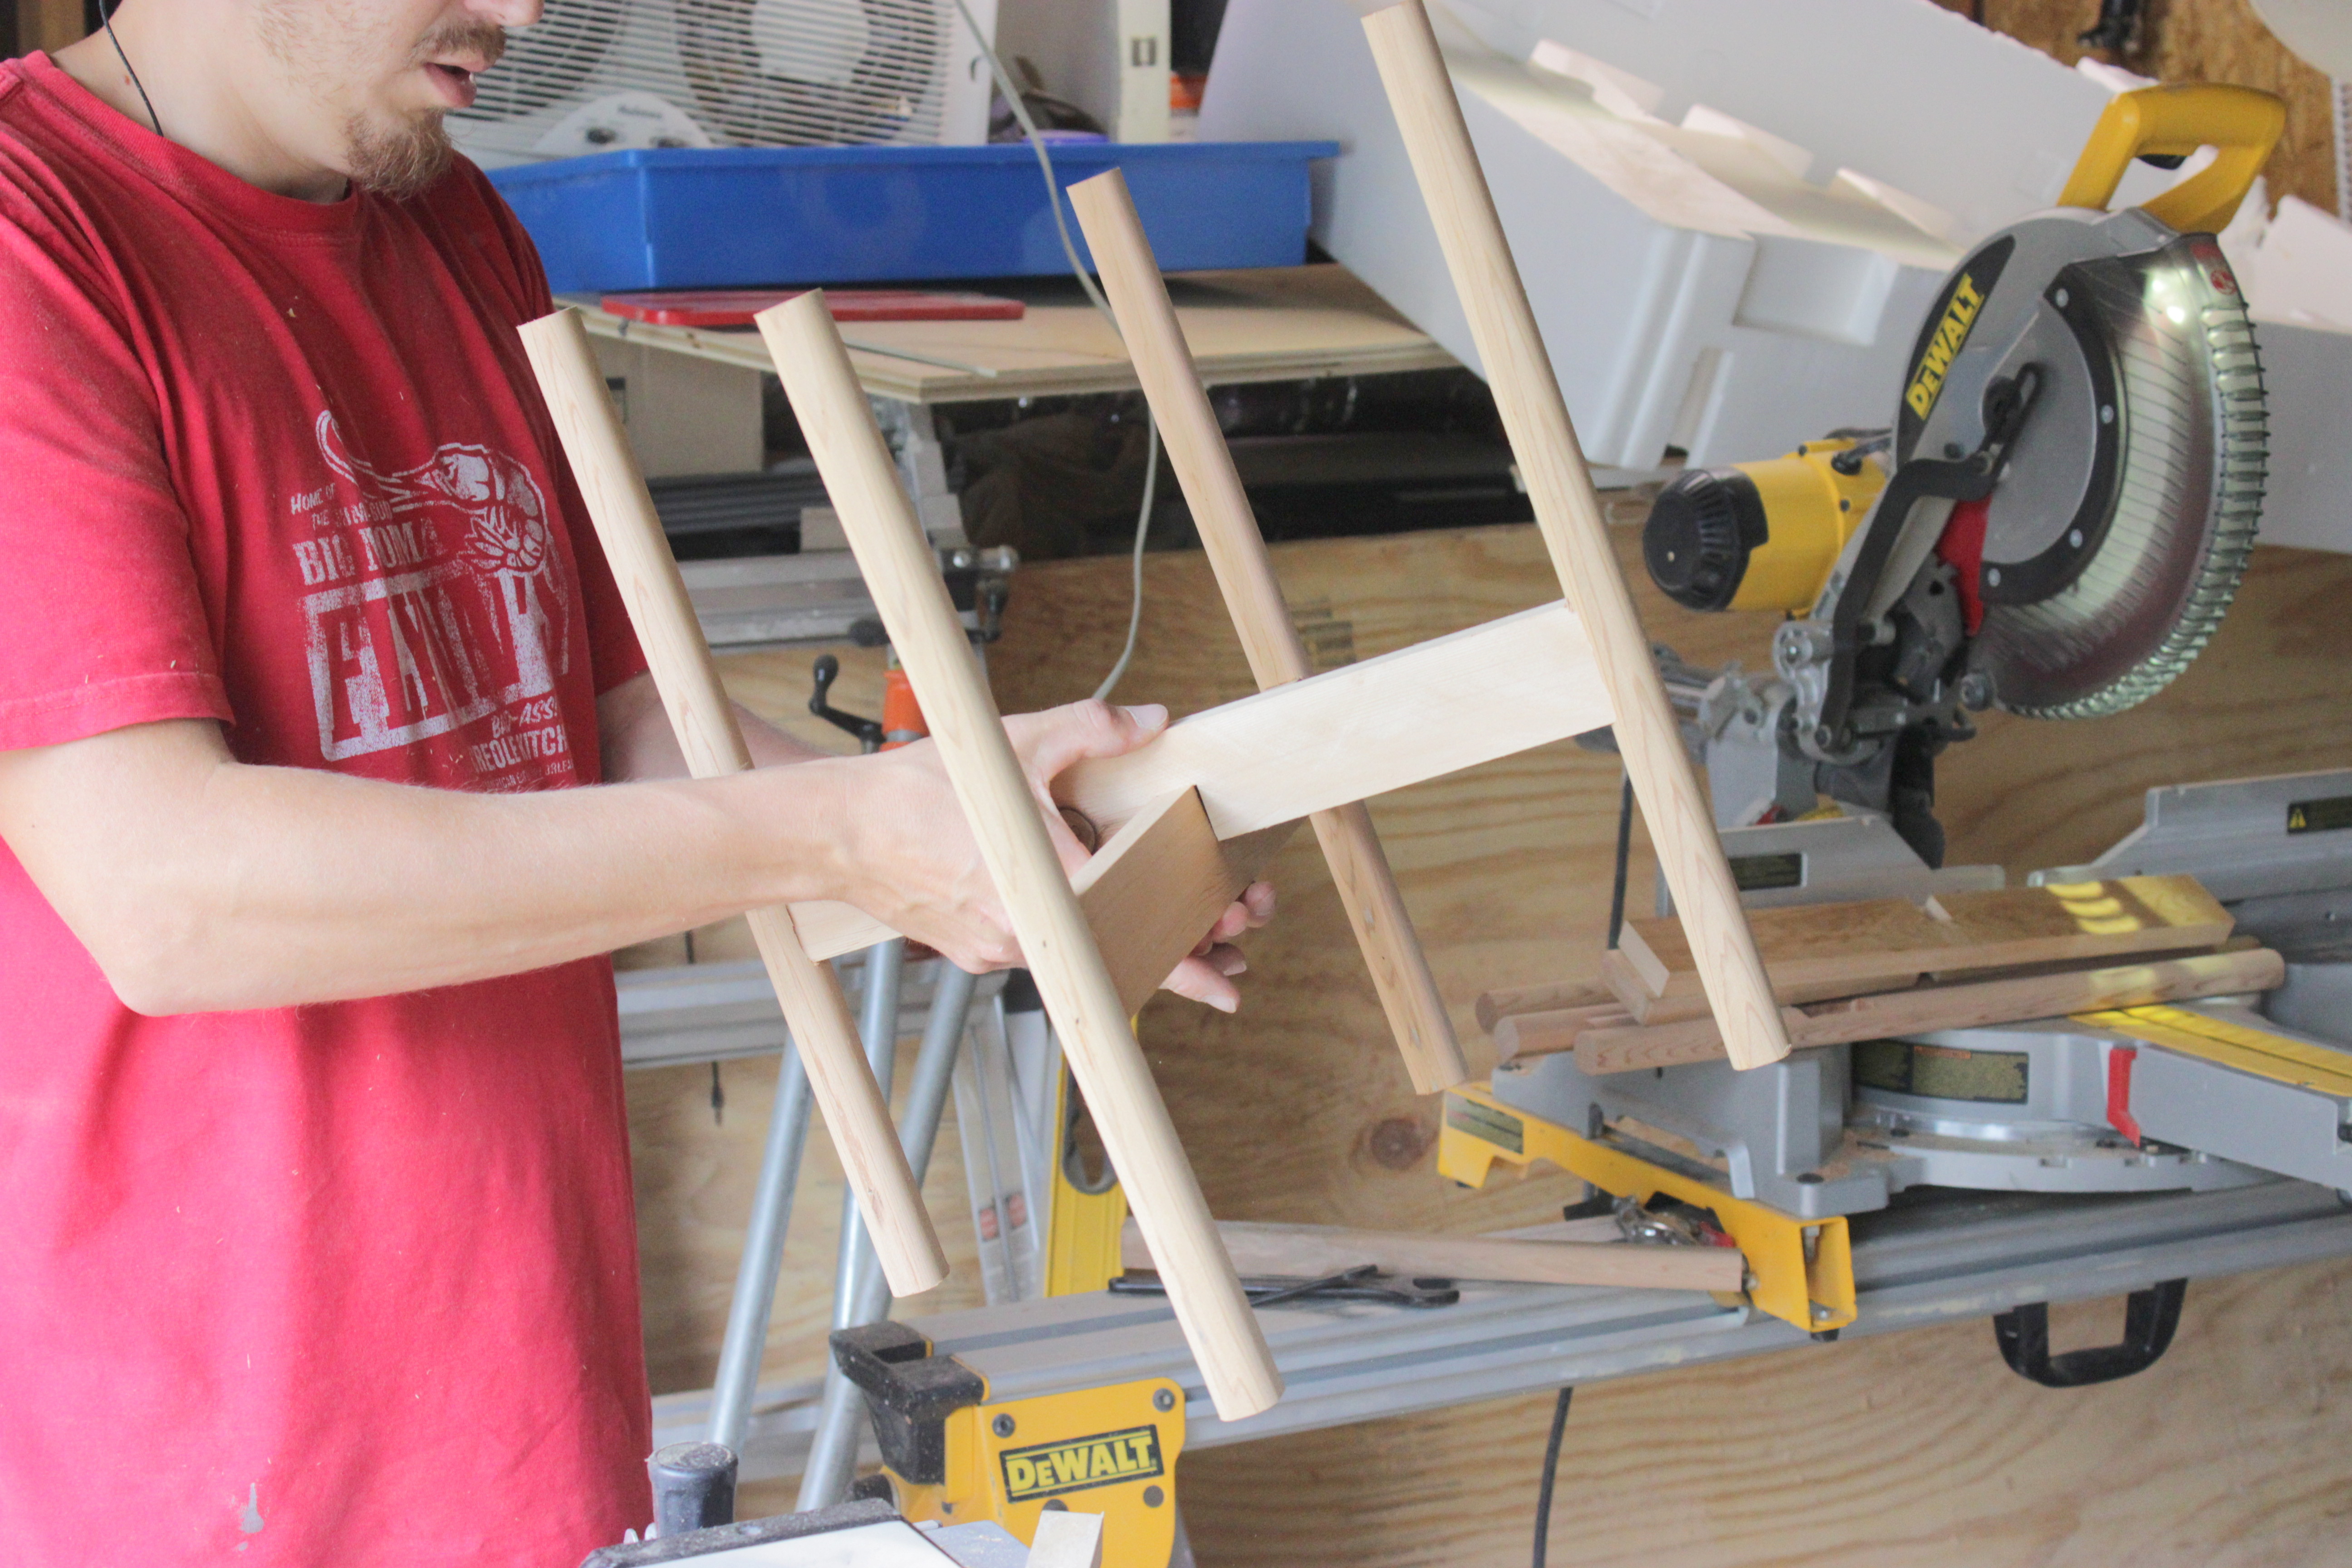
Step 6: Slide the two notches together to finish assembly
Step 7: Stain & Poly
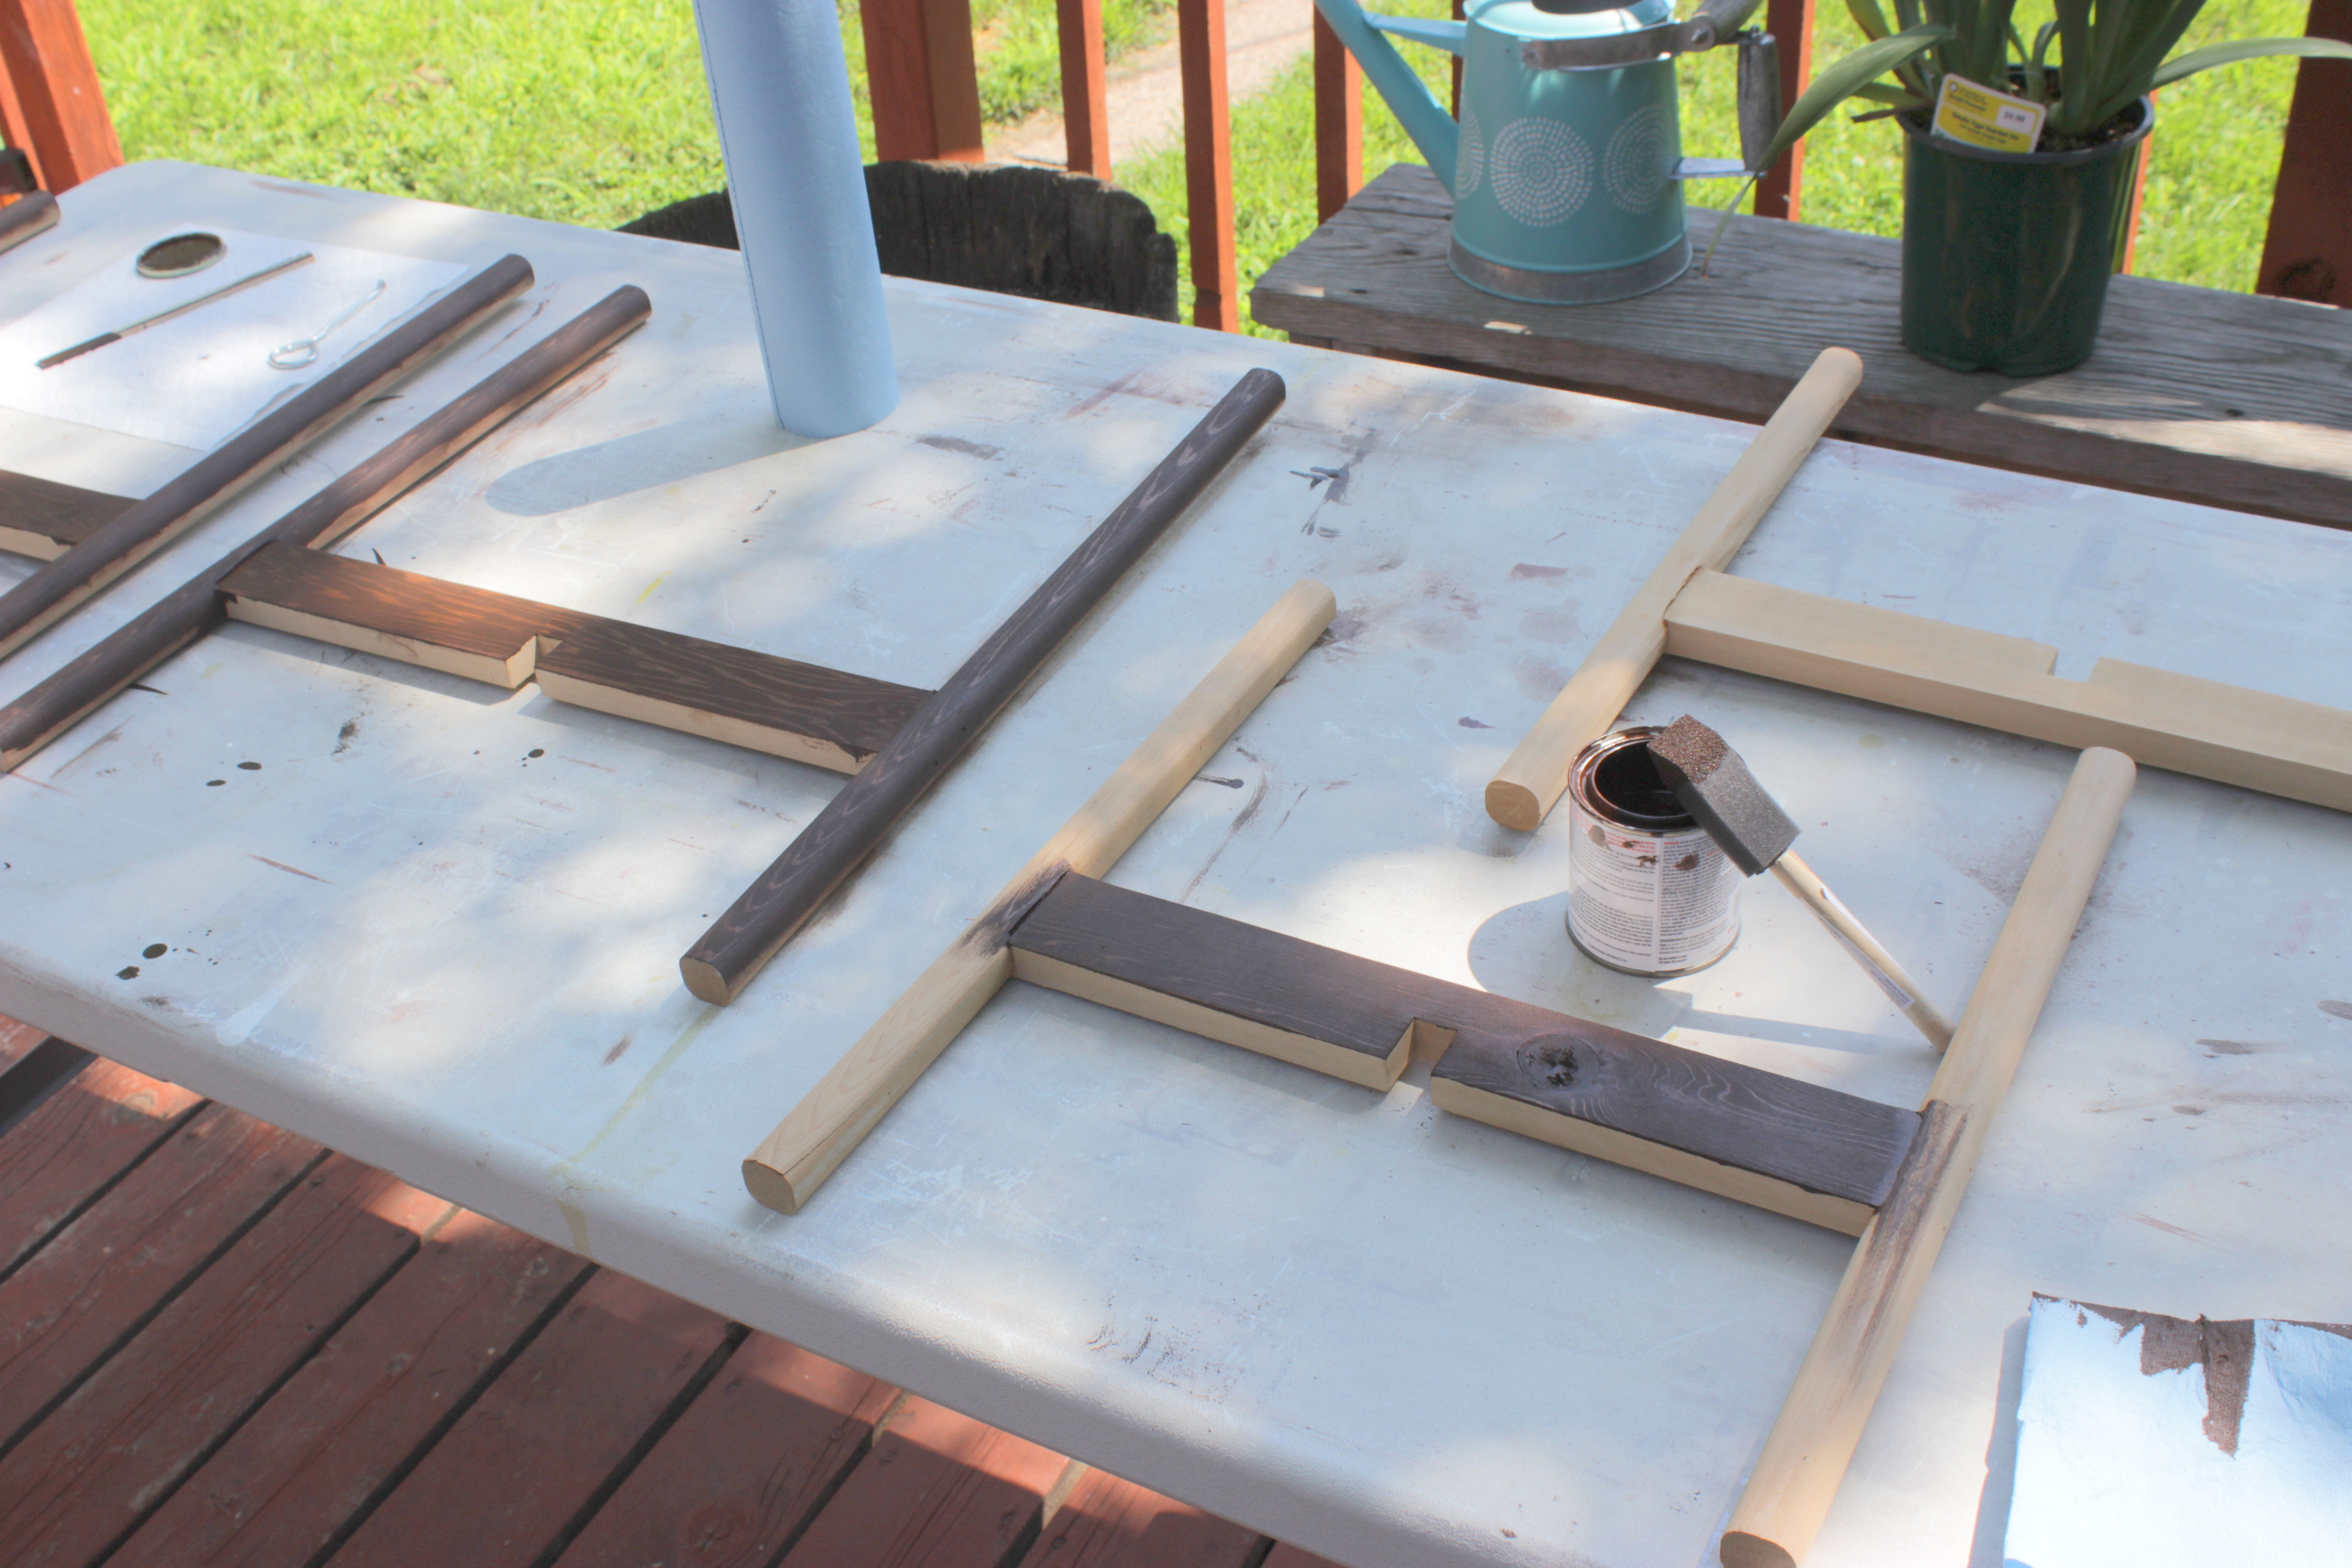
To stain and poly these pieces, we took the two pieces apart to make it simpler. After one coat of stain, three coats of poly and ample dry time, re-assemble the planter stand.
And then place your plants & planters in place. You’re done!
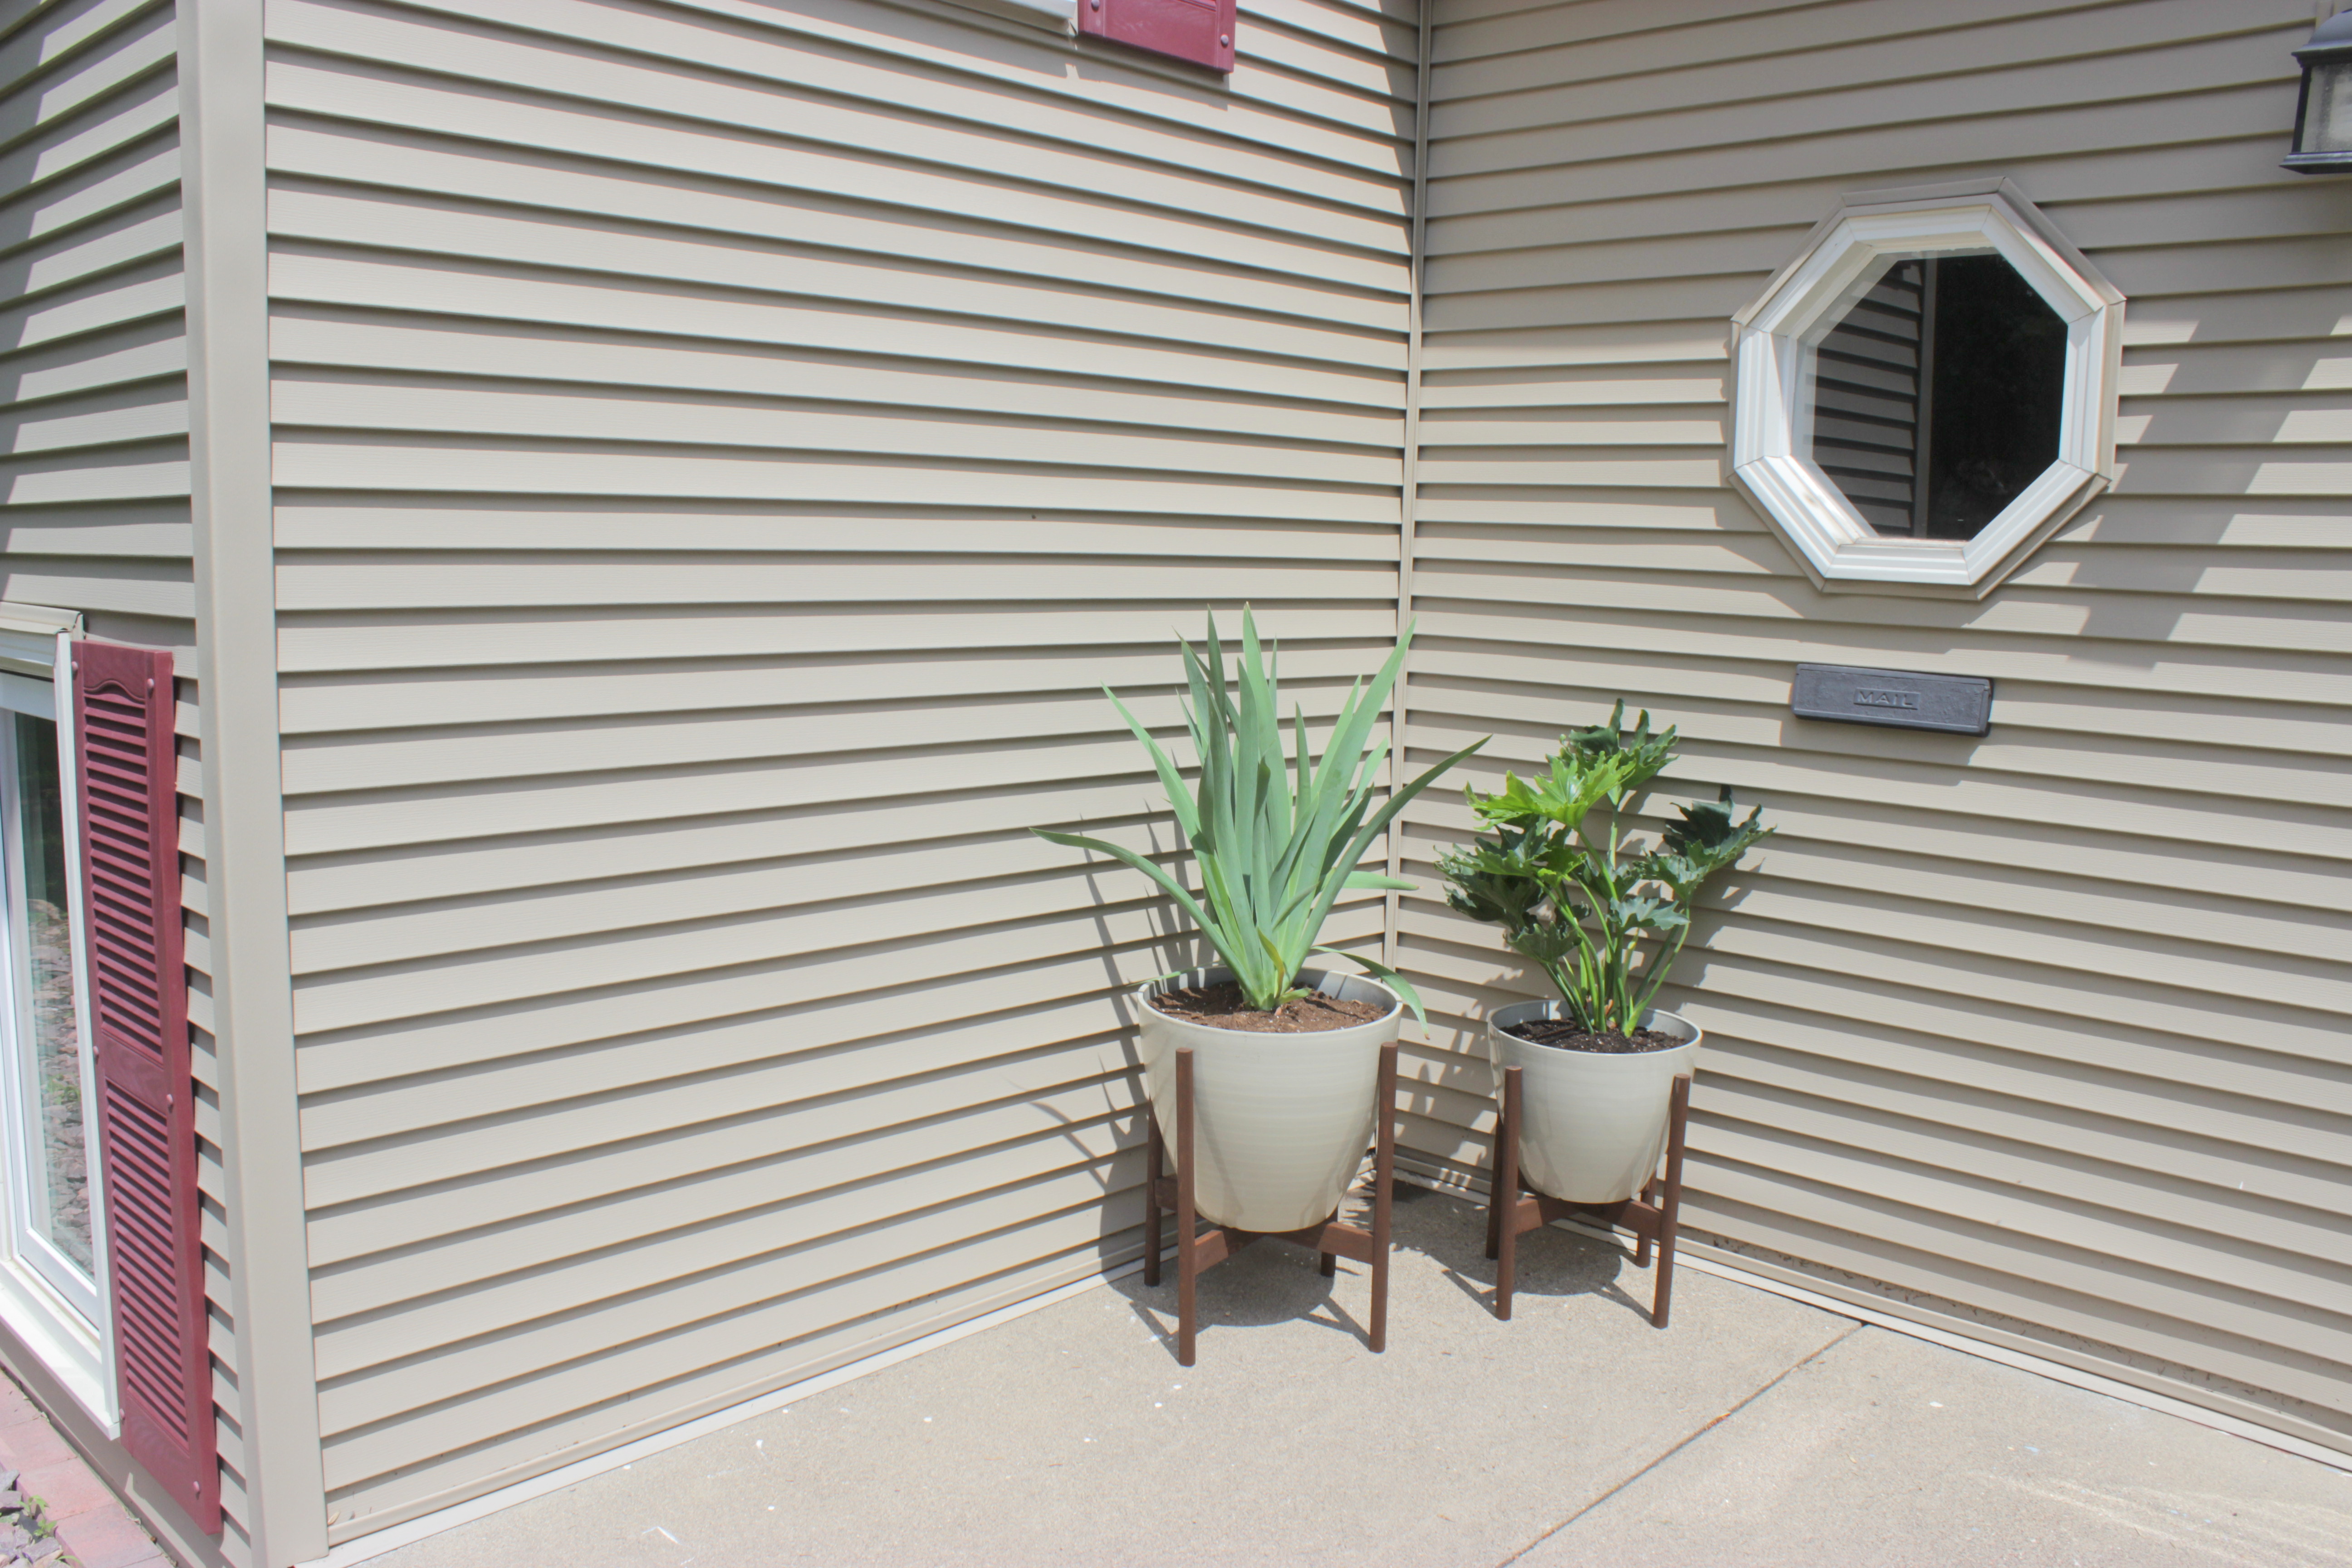
These two are the perfect first step in our budget friendly patio makeover, which we’ll be working on over the next couple of months. So what do you think?
Don’t want to take the time to build this, but want a wooden planter stand for yourself? Justin & I are launching our furniture business, Northern Timber, later this month. Follow Home Coming on Facebook for word on our official launch and some great friend discounts!
Want to follow along with our other tutorials and DIYs? Follow us on Home Coming!
——————————-
Liven up an indoor or outdoor space with more planter DIYs!


i love these! They turned out so well! I really want one for my house but I am not very DIY savvy…
I just purchased several Gainey Cylinder pots from the original company in La Verne, California and want to make these stands for them. The instructions you give are very good. Thank you for the pictures they are very helpful.
That will be a great combination! Send us pictures!
hi! Are you taking orders on the planter? I would love to order one, but I don’t see anything on your FB page.
Thanks,
Sharon
Hi Sharon,
This is DIY tutorial only, sorry!
for the supporting cross-brace pieces, the dimensions don’t match up with the size of the notch that is mentioned. if each piece is 4″ deep, the notch on each piece would need to be close to 2″ deep to make the cross-braces line up correctly so that the pot will sit evenly.
also, if the legs are 1″x1″ as mentioned, the notch in them to hold the cross-brace must then be less than 1″ wide. but the wood mentioned in the parts list is listed as being 1″ wide. so this dimension wouldn’t work either.
so either there are a ton of steps missing that involve reducing the size of the wood purchased, or these dimensions are just wrong.
I don’t see a final dimension for the pieces that make up the cross-braces, so I’m assuming they are still 1″x4″x unknown length.
bummer, it looks like a cool project, but these instructions are missing crucial details to be able to pull this off.
I know it’s been months and months since Dan left his comment, but hopefully this can help someone else!
The “official” measurements of wood boards are actually the measurements of the wood before it was planed down into the board you buy, so they are almost never accurate (and not necessarily even consistent between stores–a 1×3 from Home Depot can be a totally different size than a 1×3 from Lowes).
The plank for the legs was listed as 5/4″ x 4″, which means that the actual measurements are probably 1″ thick by 3.5″ wide. It looks like they left out the step where they ripped those boards down the length to make 1″ x 1″ square pieces.
The piece for the braces is listed as 1″ x 4″, so the actual measurements are about .75″ x 3.5″. Since the legs were ripped down to actually be 1″ wide, there’s enough room in them to make a mortise for the .75″ wide cross piece.
Regarding the notches: judging from the third picture the cross pieces are nowhere near 3.5″ wide— it looks like those boards were also ripped down, this time to about 2″ wide. So in that case, the notches would need to be 3/4″ wide by 1″ deep, as listed.
So yeah, this is confusing due to nominal vs. actual wood dimensions and due to totally leaving out the step where the planks were ripped down. Also, this is definitely not a beginner project, unless you are the kind of beginner who owns a $200 dado stack and knows how to make a router jig.
Thank you for the clarification, Eliza!