How to Build a Catalog Inspired Corner Cabinet
Hey there, I’m Scott, the DIYer behind Saws on Skates and I’m sooo excited to be a new contributor here at Remodelaholic! I’ve always admired all of the unique Remodelaholic projects, so to be part of this amazing, creative team is a huge honor!
I’m a life-long DIYer and I practically, eat, dream and occasionally bleed sawdust! Most weekends you’ll find me and my rescued pup Coco scouring the aisles of Home Depot for DIY project supplies! It’s so great that more businesses are allowing our furry friends to join us in the stores!
At Saws on Skates I share creative DIY furniture plans and decor plans while providing useful advice about setting up and working in small shop.The name, Saws on Skates, is a wink and a nod to my tiny, mobile workshop where all of my tools are on wheels to maximize floor space. Enough about me, let me tell you about the project we’re going to tackle today… a DIY Catalog Inspired Corner Cabinet!

Today’s project was inspired by the Ballard Designs Miranda Corner Cabinet.

The DIY corner cabinet is nearly identical in size to the original. It features similar moulding detail on the corners and on the door. It also features cove moulding at the top and bottom just like the original.

All of the plywood I used for the corner cabinet was recycled from another project, so the only wood I had to buy was for the face frame. Woo hoo – I love recycling! Oh, the corners look tricky, but they are fairly easy to make. I’ll walk you through it – let’s get started!

How to Build a DIY Catalog Inspired Corner Cabinet
Click here to visit Saws on Skates for the step by step photo tutorial
Click Here to get a printable PDF of these building plans

Supplies
1/2″ plywood – 24″ x 24″
3/4″ plywood – 24″ x 48″ and 24″ x 24″ or (1) 4′ x 8′
(1) 1x2x6
(1) 1x3x6
1×4 – about 36″
Cove moulding – about 6′
Window screen moulding – about 16′
Wood glue
1″ pocket screws
1-1/4″ pocket screws
1-1/4″ wood screws
3/4″ pin nails
1-1/4″ finish nails
2 non-mortise hinges
Door pull
Magnetic latch
Tools
Circular saw
Jig saw
Miter saw
Table saw
Kreg jig
Drill
Speed square
hammer or nail gun
Countersink drill bit
Crosscut jig
1/2″ Forstener bit
Step 1
Cut the Shelves. The easiest way to make the shelves is to rip a piece of 3/4″ plywood to 11-3/8″, then cut 3 pieces to 11-3/8″ to form a square. Measure in 1-3/4″ on each side. Connect the marks with a line and cut with a circular saw. Drill pocket holes on the 1-3/4″ edge. Repeat for the remaining shelves.

Step 2
Cut the Wide Corner. Cut 2 pieces of 1×3 to 29-1/4″. Set your table saw for a 45 degree angle. Cut an angle on one side of each piece.

Step 3
Cut the Narrow Corner. Cut 2 pieces of 1×2 to 29-1/4″. Set your table saw for a 45 degree angle. Cut an angle on one side of each piece.

Step 4
Assemble the Corners. Apply glue to the Wide Corner, position the Narrow Corner making sure the top, bottom and angles are flush and attach using 1-1/4″ finish nails.

Step 5
Cut the Top Rail. Cut 1 piece of 1×2 to 12-3/4″ and drill a pocket hole in each end.

Step 6
Cut the Bottom Rail. Cut 1 piece of 1×3 to 12-3/4″ and drill pocket holes in each end.

Step 7
Assemble the Front. I cut a scrap piece of 1×3 to 12-3/4″. The scrap will help position the bottom rail. Attach the scrap piece to the bottom rail with painter’s tape. Apply glue to the edges of the top and bottom rail.

I also cut several pieces of scrap wood with a 45 degree angle to help align the corners with the rails. Clamp and attach using 1-1/4″ pocket screws.

Step 8
Install the Bottom Shelf. I cut 2 pieces of scrap wood to 4-1/4″. The scrap will help position the bottom shelf. Clamp the scrap to the corners, apply glue to the front edges of the bottom shelf and attach using 1-1/4″ pocket screws.

Step 9
Install the Middle and Top Shelf. I cut 2 pieces of scrap wood to 7-1/16″. The scrap will help position the shelves. Clamp the scrap to the corners, apply glue to the 1-3/4″ edges of the shelf and attach using 1-1/4″ pocket screws. Repeat for the top shelf.

Step 10
Cut and Install the Left Back. Cut a piece of 3/4″ plywood to 29-1/4″ x 11-3/8″. Drill several pocket holes along the right edge to attach the back to the corner. Also drill pocket holes on the top edge to attach the back to the top. Drill several countersink holes at 4-5/8″, 12-7/16″ and 20-1/4″ to attach the back to the shelves. Apply glue to the edges of the shelves and the front edge of the back. Clamp the back in position and attach the back to the corner using 1-1/4″ pocket screws. Attach the back to the shelves using 1-1/4″ wood screws. Note: The back sets in about 1/4″ from the edge of the corner.

Step 11
Cut and Install the Right Back. Cut a piece of 3/4″ plywood to 29-1/4″ x 12-1/16. Drill several pocket holes along the left edge to attach the back to the corner. Also drill pocket holes on the top edge to attach the back to the top. Drill several countersink holes at 4-5/8″, 12-7/16″ and 20-1/4″ to attach the back to the shelves. Also drill several countersink holes along the right edge to attach the left back to the right back. Apply glue to the edges of the shelves and the front edge of the back. Clamp the back in position and attach the back to the corner using 1-1/4″ pocket screws. Attach the back to the shelves and the left back using 1-1/4″ wood screws. Note: The back sets in about 1/4″ from the edge of the corner.

Step 12
Install the Corner Moulding. Window screen moulding is used for the corner moulding. The moulding is even with the top and bottom of the door opening. On the bottom of the corner measure up 5″ and draw a line. On the top of the corner measure down 1-1/2″ and draw a line. The moulding sets in 3/16″ from each edge of the corner. Draw a line 3/16″ on each edge to connect with the lines on the top and bottom. Repeat the layout for the other corner. Use the layout lines to measure for the moudling. Apply glue to moulding and attach using 3/4″ pin nails. Repeat for the other corner.

Step 13
Cut and Install the Top. Cut a piece of 1/2″ plywood to 13-1/16″ x 13-1/16″. Measure in 2-7/8″ on each side. Connect the marks with a line and cut with a circular saw. Place the top on the cabinet making sure the front edge and corner edges of the top are flush with the cabinet. Note: The top overhangs the back about 1/4″. Clamp the top to the cabinet and attach using 1-1/4″ pocket screws. On the underside of the top rail, drill 2 countersink holes and attach using 1-1/4″ wood screws.

Step 14
Install the Skirt. The skirt pieces are 1×4’s ripped to 3″ and have 22-1/2 degree angles. For the cutout in the front skirt, measure in 3″ from each edge and up from the bottom 1-1/2″. At each mark, drill a hole using a 1/2″ forstner bit. Draw a line on the outside edge of each hole and use a jig saw to cut out the center area of the skirt. Attach the skirt pieces using glue and 1-1/4″ finish nails.

Step 15
Install the Top and Bottom Cove Moulding. The cove moulding is installed just like the skirt. It’s cut with 22-1/2 degree angles. Apply glue and attach using 3/4″ pin nails.

Step 16
Make the Door. The door is cut from a 3/4″ piece of plywood. Measure the door opening and deduct a 1/4″ from the height and a 1/4″ from the width, then cut the door to this dimension. This will allow clearance, so the door can swing properly. (My door measured 22-1/2″ x 12-1/2″). Measure in an 1/8″ all the way around the edge of the door and draw a line. Install the moulding using these marks. Apply glue and attach using 3/4″ pin nails.

Step 17
Install the Door, Door Pull and Magnetic Latch. Install the hinges and door making sure there is an equal gap between the door and the door opening. Install the door pull. Install the magnetic latch. Remove the hinges, pull and magnetic latch to prepare for painting.
Step 18
Finish the Cabinet. Fill nail holes and any gaps with wood filler. Sand with 120 grit sandpaper. I painted mine with chalk paint like the original. Once it was dry, I sanded with 400 grit sandpaper and applied a paste wax to protect the finish.

This corner cabinet would be perfect in an entryway to catch keys or in a bathroom for a little extra storage.


For more build plans check out Saws on Skates:


Add a bit of corner storage with these other space-savvy building plans:
Create a corner mini mudroom with this DIY corner shelf and corner bench with storage

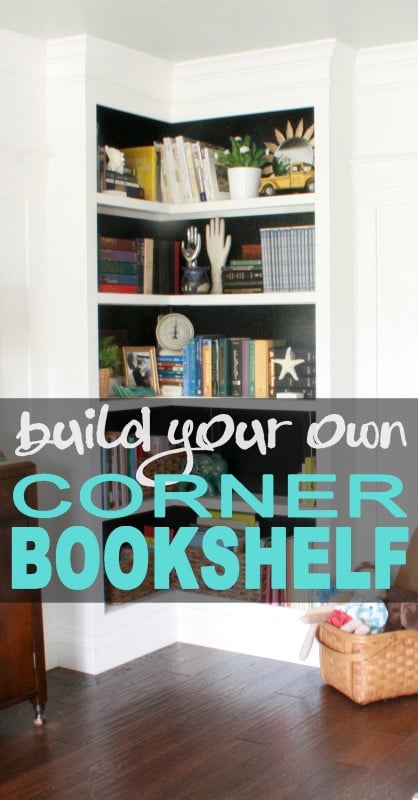
Add a built-in corner bookshelf for storage in any corner
Scott eats, dreams and practically has sawdust running through his veins! He's a woodworker, furniture designer, furniture builder and DIYer. His workshop is tiny and all of his tools are on wheels to maximize space. The name of his blog, Saws on Skates, is a wink and a nod to his small, mobile workshop!


i love that corner cabinet, it’s almost exactly like the one i got from decor steals.
b
Thank you – I’m glad you like it!