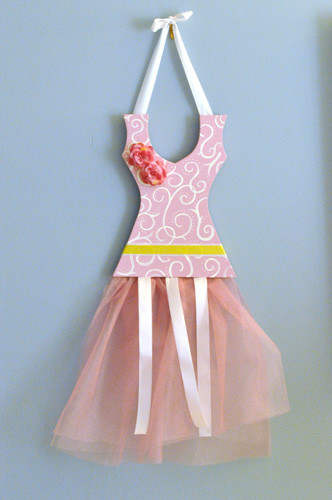
Cute Ballerina Girl’s Hair Clip Holder
Even though I’m writing today’s post, it’s really my wife, Jocie who gets all the credit. She can be a very crafty person- not in the scheming sort of way but in the making something from scratch sort of way. It’s the same craftiness that she tapped into for our new zebra print dining room chairs, and when she mentioned making some fun hair clip holder, I immediately grabbed my camera.
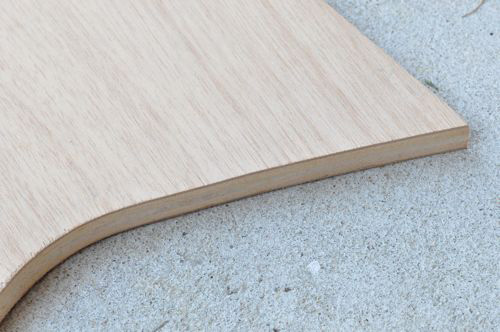
Jocie started by drawing the cutout for the bodice on some paper. After a couple tries, she had an outline she was happy with, and she traced it on some 1/2″ plywood. I grabbed my jigsaw and minutes later we had two (mostly) identical bodices.
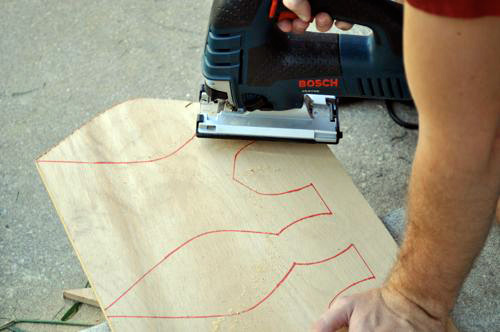
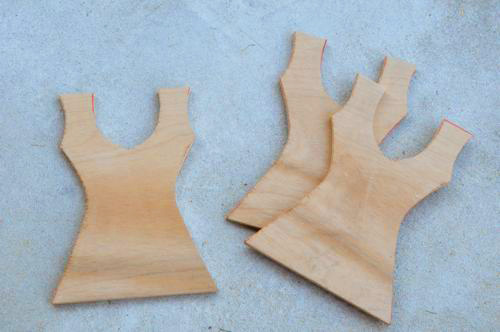
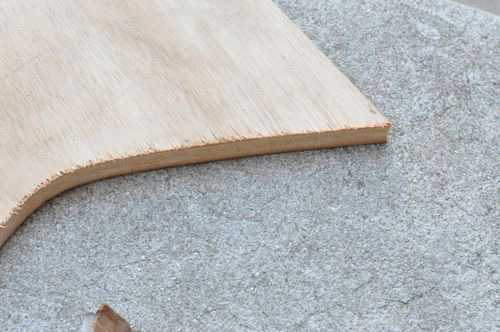
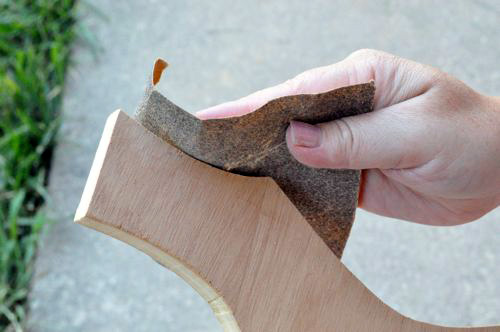
The jigsaw left some rough edges and the plywood needed sanding anyway. We used a course grit sandpaper to help remove any leftover marker and a fine sandpaper to make everything nice and smooth.
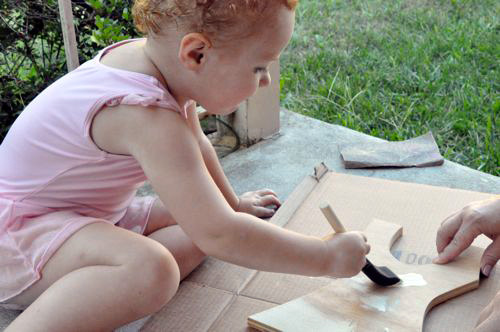
Next we applied a simple base coat of paint, and even had some help from my two year old daughter (the ballerina). She used some extra craft acrylic paint left over from a previous project, but you could also use primer.
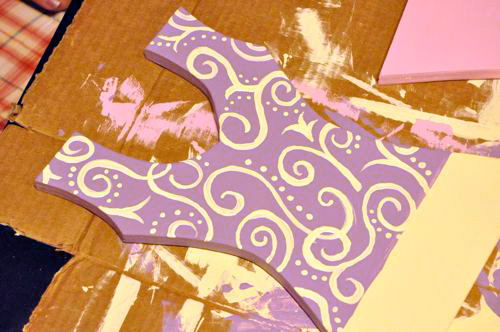
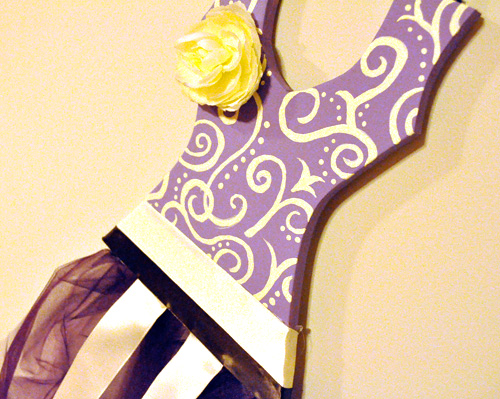
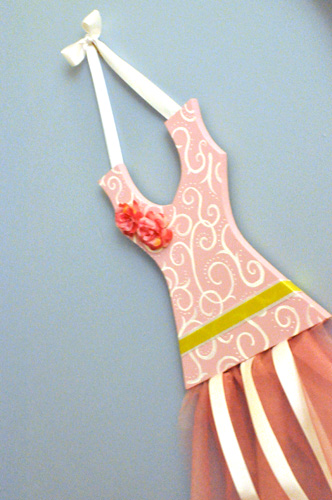
After they dried, Jocie painted one pink and one purple,
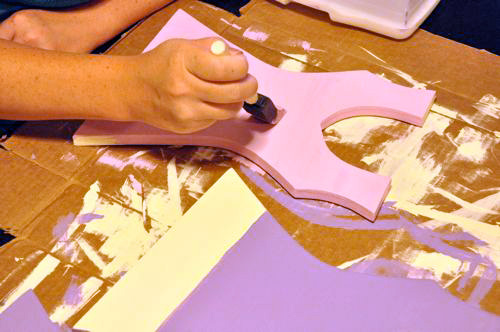
and she added some artistic swirls- all free hand. A good, easy alternative would be flowers, polka dots, or stripes.

No project is complete until you’ve used a staple gun. We used our heavy-duty staple gun to attach some tulle along the bottom edge of the cutout so it would not be seen.

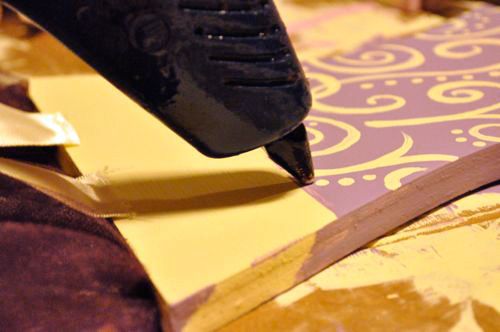
The vertical ribbons are where you can clip barrettes, and Jocie used her second favorite tool, the glue gun, to hold them in place.

And more ribbon across the body for decoration.

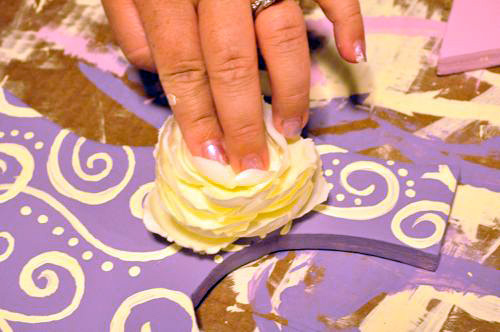
We had some silk flowers handy, and she decided to glue them on the upper portion of the bodice.
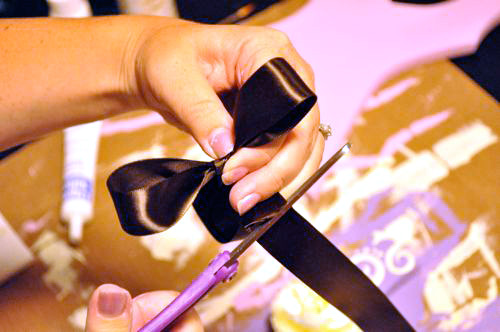
Lastly, Jocie tied some ribbon in a bow for hanging the barrette holder.
Ta da!
So far, Jocie has made three of these and plans on making several more for friends. They make for great, low-cost gifts and room decor. Most the materials are easy to find at craft stores, and things like 1/4″ heavy-duty staples and plywood are available at home improvement centers. Be sure to use a Lowes coupon or Home Depot coupon before you buy. All together each cost about $10 to make.
A big thanks to Cassity and Justin for letting me share our story. Hopefully you feel inspired and can follow these steps to make your own barrette holder!
 This project was contributed by one of our fabulous readers! We love to share your projects with this great blogging community. So, if you have projects from kitchen renovation ideas to small bathroom remodels, overhauled and repurposed furniture, spray paint updates you name it please send it in! Thanks for reading Remodelaholic!
Cassity Kmetzsch started Remodelaholic after graduating from Utah State University with a degree in Interior Design. Remodelaholic is the place to share her love for knocking out walls, and building everything back up again to not only add function but beauty to her home. Together with her husband Justin, they have remodeled 6 homes and are working on a seventh. She is a mother of four amazing girls. Making a house a home is her favorite hobby.


I love the tutu bow holder!!!! Is there any way you can email a pattern of the bodice?