Built in Headboard! Only $4.00 dollars!!
Hi! I’m Natalie from A Turtle’s Life for Me and am shaking in my boots to be guest posting for Cassity today! She’s incredible and the first person to ever approach me about a guest post! How cool is that??! And incredibly sweet to boot!
I just started blogging at the end of January, basically because I was so inspired by all of you talented women out there and thought it would be cool to have a place to chronicle my successes and failures! I’ve been having a blast at A Turtle’s Life for Me getting to know so many of you and decorating my house at the same time! I may possibly be the cheapest person you’ll ever meet, so you won’t find anything too extravagant over at my blog. Just lots of easy, quick, low-cost projects (decorating and recipes!), so come over and see if you find anything that’s your style!
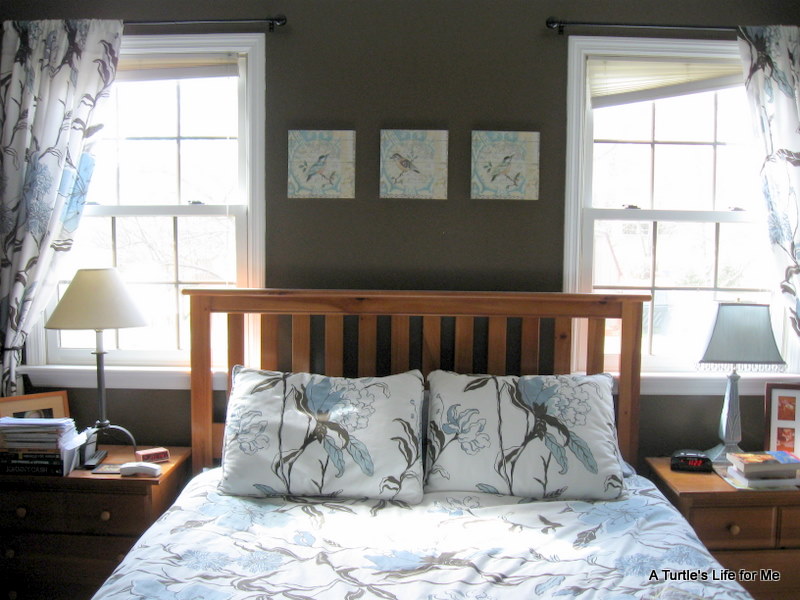
Today I’m going to show you my headboard project for our master bedroom. This project was the epitome of cheap and easy! Woot!! Woot!!
About a year ago, we moved our bed to the other side of our bedroom and while I love the location of the bed, it drove me bonkers that the headboard overlapped the windows! Especially with the slat style headboard that we had going on! Plus we lost about an inch of floor space (in our already tight bedroom!), since we couldn’t push our bed back the whole way! Here’s the before (and take notice to the metal blinds that wouldn’t go up the whole way! Oy vey! Why did we live with them for 3.5 years??)
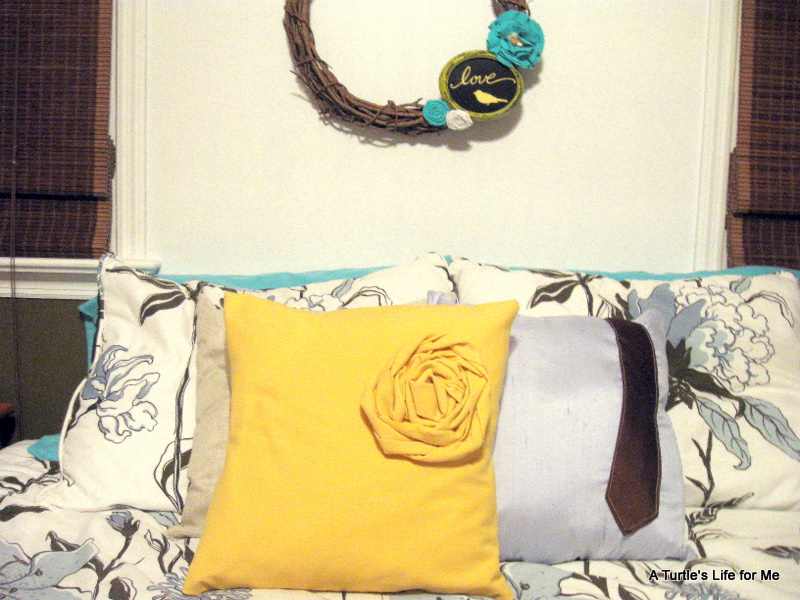
And our after!!
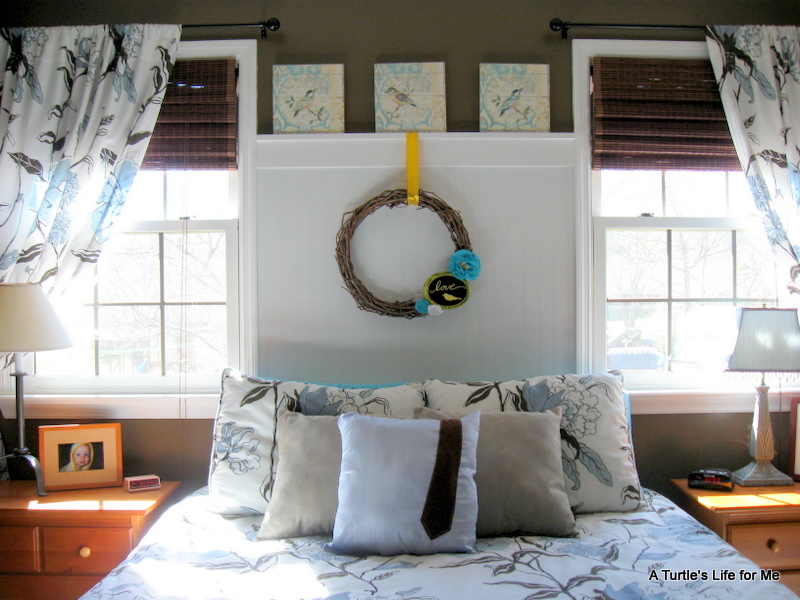
What did we do?? Just nailed a piece of beadboard to the wall! We got the beadboard free from a friend (I’m a huge fan of bartering!), and then spent about $3 on the trim pieces. On my blog, I give the full breakdown of all the costs. After we had it nailed to the wall, I put some wood putty in all the nail holes and caulked around all the seams before painting it white.
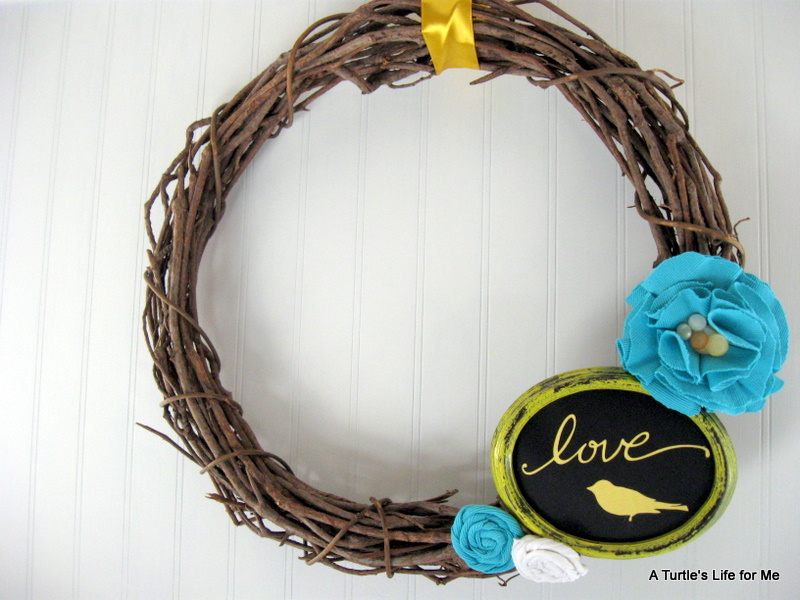
After it was painted, I had the wreaththat I made (for a quarter!! Seriously, you’ve gotta try this bartering thing), and all I did was slip some ribbon through it and then use a staple gun to attach it to the top trim piece.


Cassity Kmetzsch started Remodelaholic after graduating from Utah State University with a degree in Interior Design. Remodelaholic is the place to share her love for knocking out walls, and building everything back up again to not only add function but beauty to her home. Together with her husband Justin, they have remodeled 6 homes and are working on a seventh. She is a mother of four amazing girls. Making a house a home is her favorite hobby.


beautiful! smart ideas!! 🙂