Build An Indoor Tree House With Slide and Rock Climbing Wall
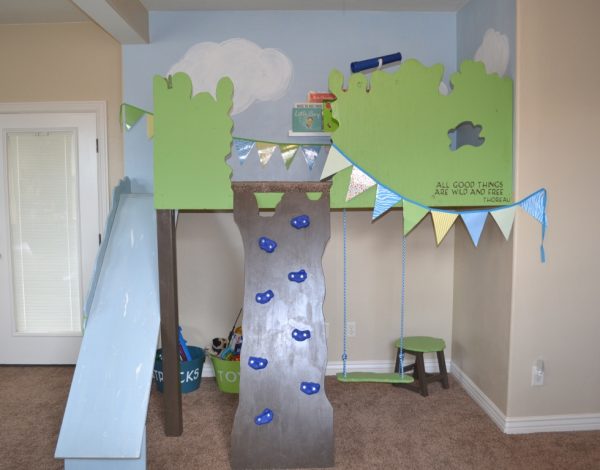
Whether it’s during the blizzarding winter or the scalding hot summer, an indoor play area for kiddos is a must. Unless you live in a place that gets neither blizzards nor scalding heat. Then the indoor play area is less necessary but equally good for one’s sanity! Our guest today built an amazing indoor treehouse with a slide, rock climbing wall, and swing (plus a bookshelf and a telescope!) —
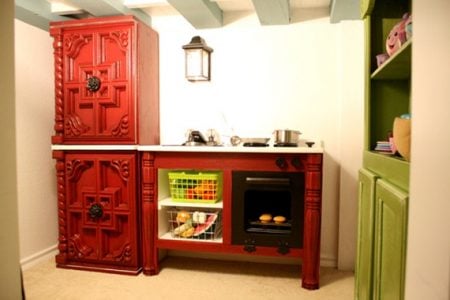
We rounded up ten of our favorite indoor play areas here, and in our last home, we built a cottage kitchen for my girls — such a great play area! You can read all about that here.
And now, learn all about how Sarah (or, I should say, Hardware) built this awesome indoor loft treehouse for her kiddos:
Indoor Treehouse with Slide and Rock Climbing Wall
by Sarah of I Am Hardware
Please, call me Hardware. My driver’s license says Sarah, but friends call me Hardware. A sister dubbed the name when I was 12 and fixed a bunch of stuff around the house. Fast forward 15 years and while going through a really rough time I built a Pottery Barn inspired tv armoire (still use it). Call me crazy, but power tools got me through tough days. So not kidding. Projects are part of the ebb and flow of my everyday life.
I love a bargain and I love projects. There is just something about the feel of freshly cut wood, the smell of paint, and the satisfaction of finishing a project that warms my happy girl heart. My blog iamhardware is my Candyland, and I’d love for you to roll the dice with me. I can’t promise perfection but we could have some seriously crazy good times.
The best projects are ones that make life easier or make it a little more fun, like the Magic Indoor Tree House:
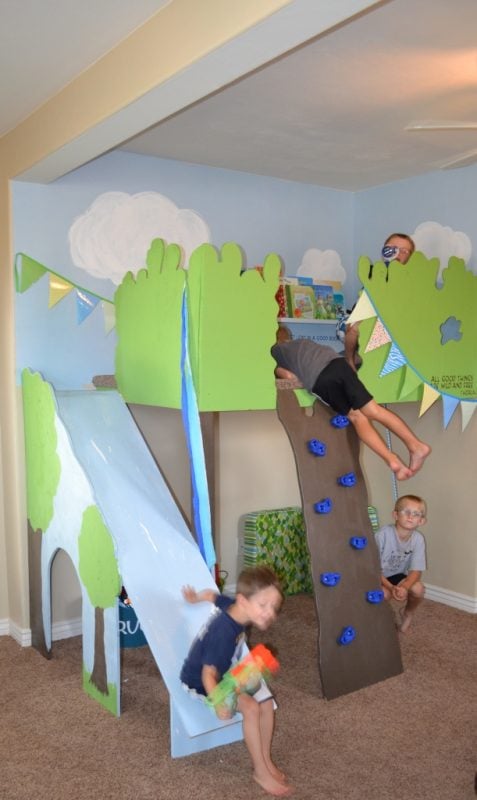
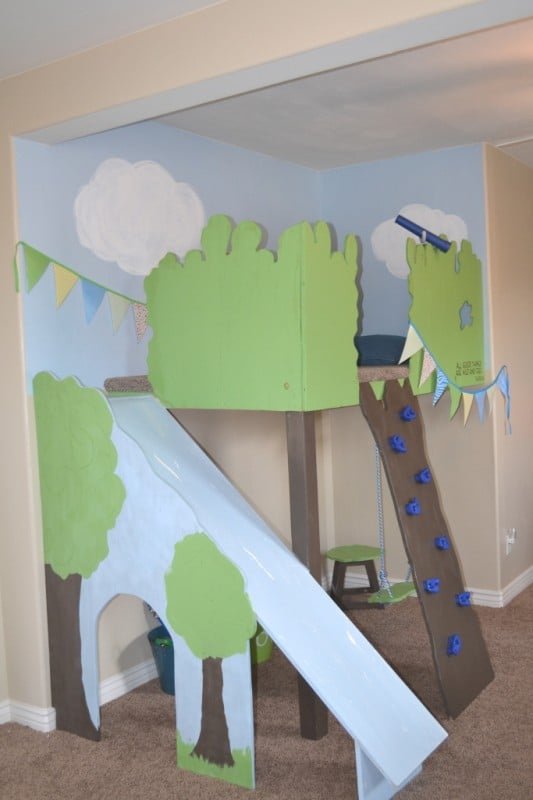
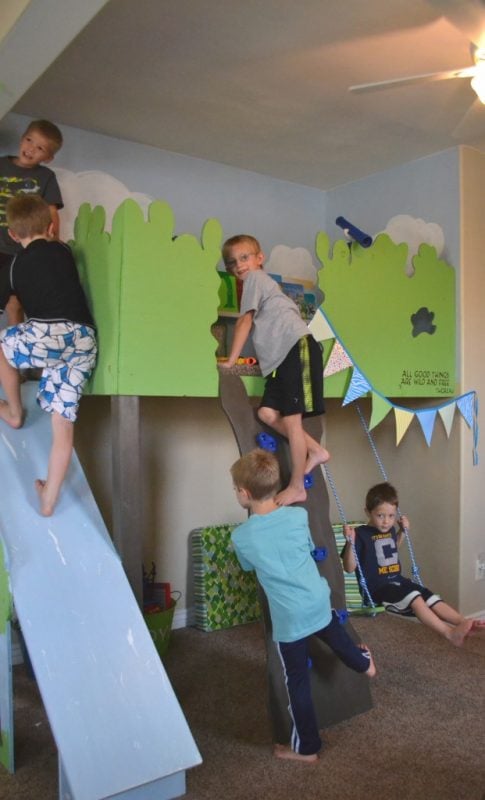
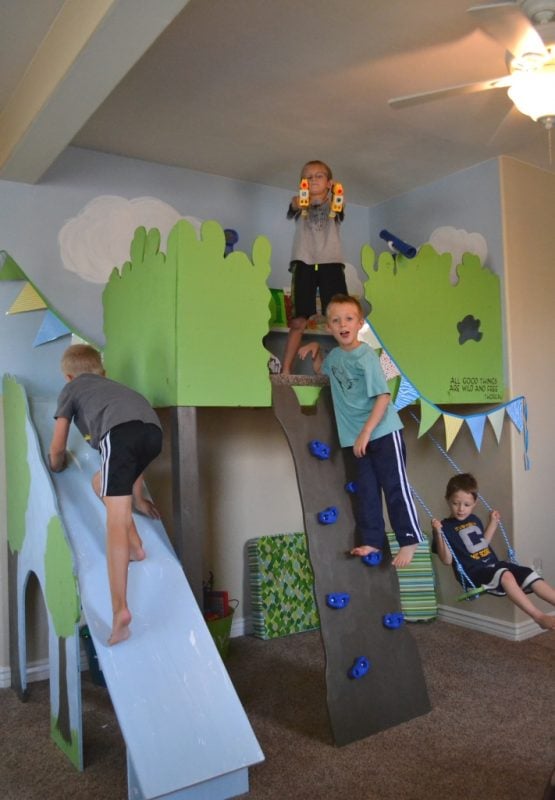
During cold winter months, or blazing hot summer ones, indoor retreats for kids are worth their weight in gold. And what kid doesn’t want a tree house!? I live in the desert and I can think of like one tree in town that could even hold a tree house. So, I built one indoors. My kids had some input and requested a slide, rock climbing wall, swing, clouds, and more (they also wanted a swimming pool and toilet incorporated but unfortunately those didn’t make the final cut).
The ideas simmered for weeks. I did tons of research and progressed with lots of trial and error.
The tree house is a home run with the kiddos…and the entire neighborhood. Upon completion I give it an exceeds expectations. It hosts sleepovers, story time, forts, hidden treasures, race car derbies: it is well used and well loved. If you have ever thought of building a loft or play corner I hope this tutorial will help. The best day to start is today so RUN to the hardware store for supplies. You will make lots of memories and earn cool mom points too. It’s a win-win!
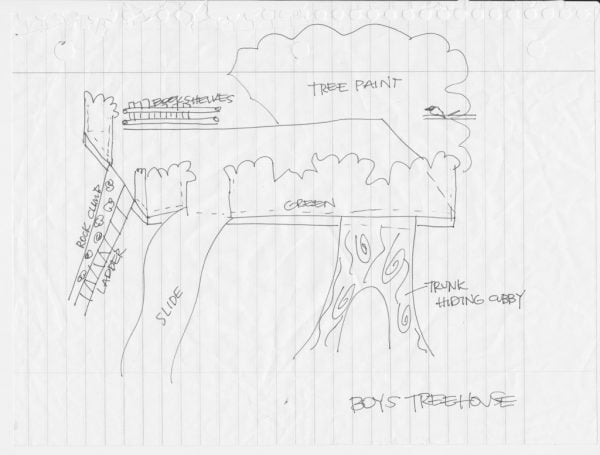
This is the original sketch I made while at a little league baseball game:
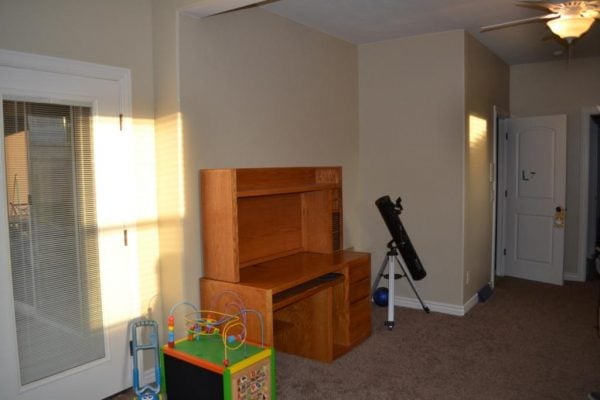
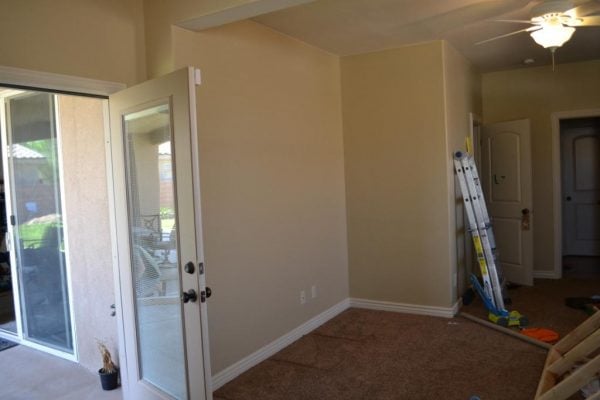
And here is the before and after:
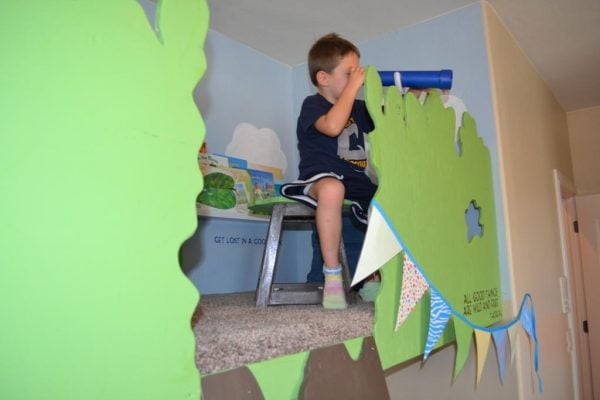
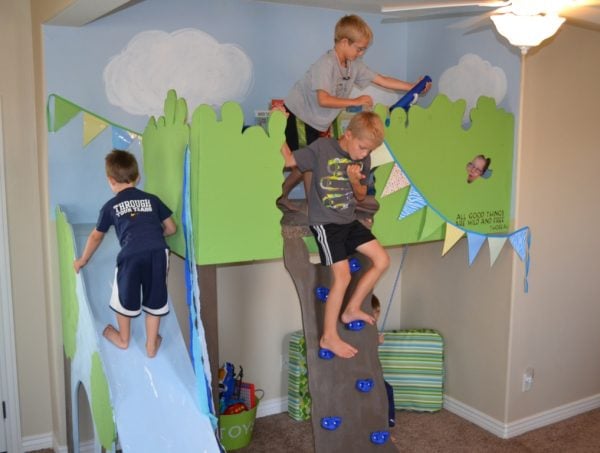
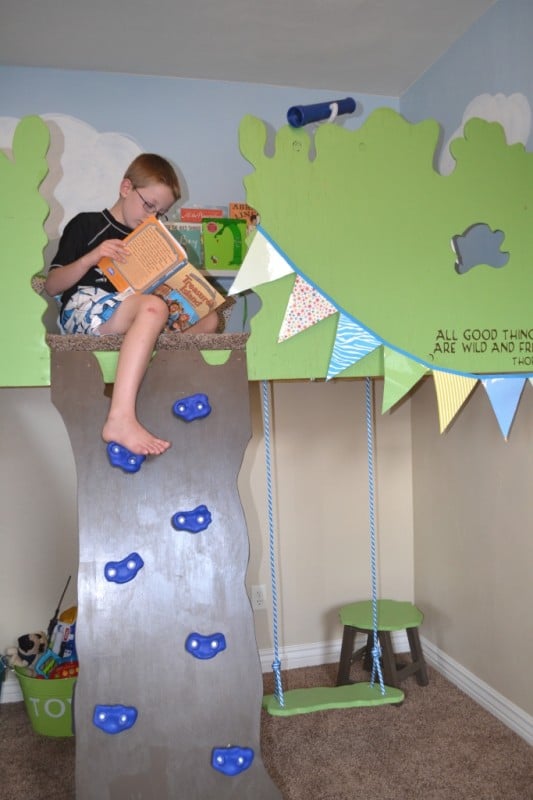
Here are some after pics of the tree house:
Materials and tools used with cost break down:
- 2×4 wood (4 8 foot boards), $2.75/each
- 4×8 flooring board, $27
- 4×4 wood beam, $8
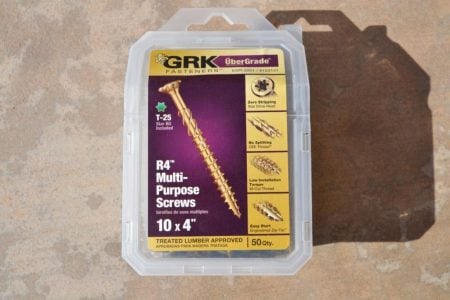
- 4″ wood screws, $6.50/box
- 3″ wood screws, $4/pack of 12
- L- brackets, straight brackets, $8
- carpet remnant, free!
- measuring tape
- level
- stud finder
- drill
- staple gun
- mitre saw
If you have the tools (or can borrow them) the materials will cost approximately $65.
In order to build your loft, raised bed, tree house, or whatever genius your mind creates, you gotta start with a loft platform.
First, there are three must-haves to building a loft platform: 1. safely supporting the structure and weight, 2. sizing it correctly, and 3. making it level. I sometimes question my ability on those things and call my builder brother-in-law to ask, “Seriously am I going to die on this thing?” and he helps me advert disaster. So before the tutorial, let’s go over a a few basic things you need to know about supporting weight:
- A 2×4 is much stronger when the weight rests on the smaller 2″ side, not the wider 4″ side, so position the support beams should be assembled like this:
- Flooring. Floor boards are made to withstand some serious weight, an OSB board is probably sufficient, but I used flooring (check your local hardware store). Flooring is a little more expensive and heavier than the other boards (I wish I would have filmed me hoisting up the flooring, it was hilarious), but it is strong enough for real house weight, so for sure it will hold a tree house or a loft. Standard flooring boards measure 4×8 , available at any hardware store. If you don’t use flooring, make sure your board is sturdy and strong.
- When mounting, attach to the stud. There is typically a stud in your wall every 16-18 inches depending on the home builder and your city building code. Don’t try to find a stud by the sound, use a good stud finder. When it comes to safety for your kids, don’t risk it! With a pencil mark your wall where the studs are. You’ll know when you’ve hit the stud with your drill because the pressure when drilling into a stub is so much more than when just drilling through drywall.
- Use correct screws. For this project use 4″ wood screws and drill them directly into the stud. I tend to over do this step and use more screws than necessary like I did in this project, but again, I am not an engineer so I side on the safe side. Screws will often list weight limitations on the box, make sure you check those out before purchasing. Don’t use nails, screws only!
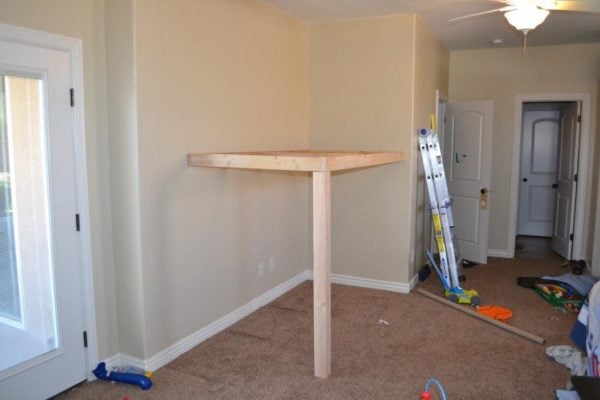
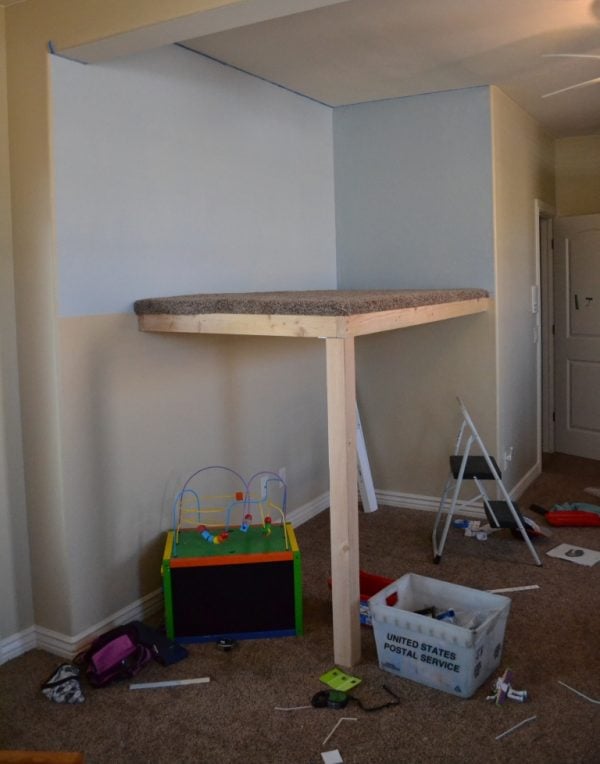
- At least two sides must be supported, and for large lofts, those sides should be opposite of each other. This tree house loft is attached on two side walls and has a 4×4 support beam on the opposite floating corner. Solid as a rock (figure of speech really).
- Most importantly, if your structure is wobbly, crooked, shaky or the screws begin to pull away from the supporting walls or beams, don’t use it! Be safe please!
Alright, enough with the pre-ramble, let’s get started.
Step by step loft platform tutorial:
Begin by carefully determining how big you want your loft/tree house. This tree house loft measures 41″ by 82″, which fit into the space below and allowed room for a slide. Customize whatever space you have and adjust measurements accordingly.
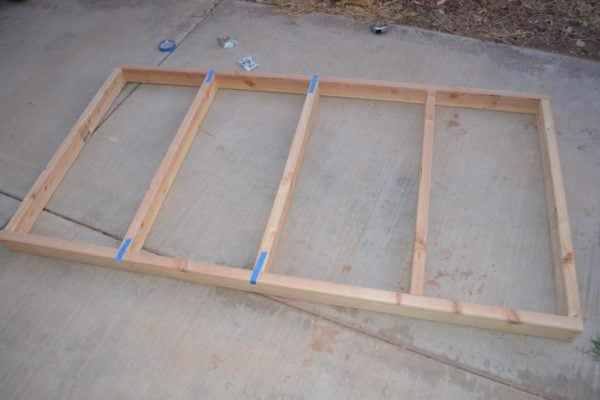
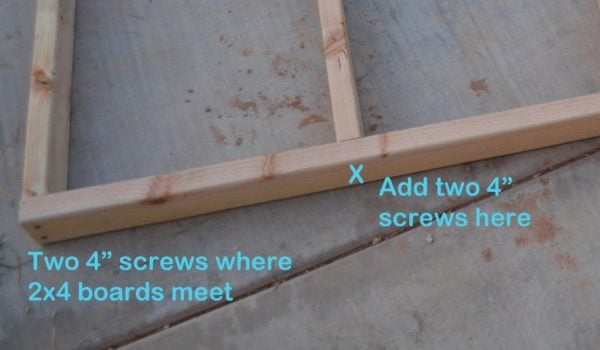
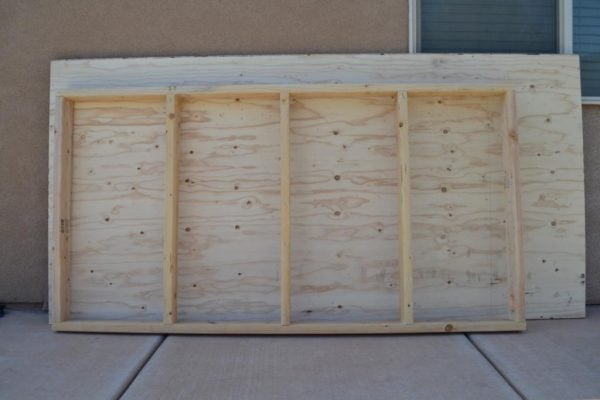
Build a frame first then attach it to the wall. Start by building a frame out of 2×4’s. Support beams within the frame should be 16″ to 18″ apart (for large structures, closer is better to hold the weight) and secured by 4″ screws at each connection.
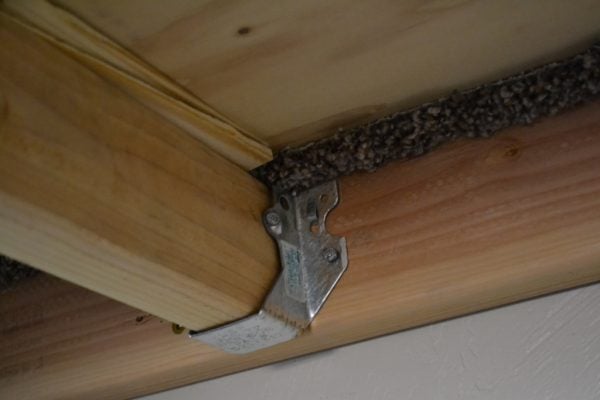
Each beam can be reinforced with metal brackets (“shear hangers”, found at any hardware store), but begin with 4″ wood screws, two on each connection beam.
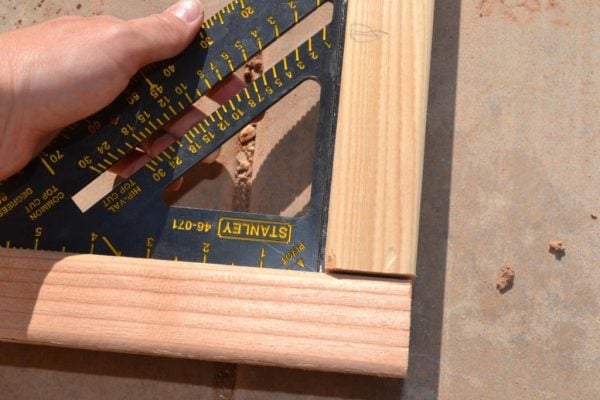
When building the frame make sure the corners are as square as possible. NOTE: if attaching to two walls in your home, corners in homes are rarely perfectly 90 degrees square! Check and adjust accordingly!
With the frame built, measure and cut the floorboard to fit on top. I planned on using carpet around the flooring, so I cut the board an inch narrower on two sides to allow for the bulge of carpet.
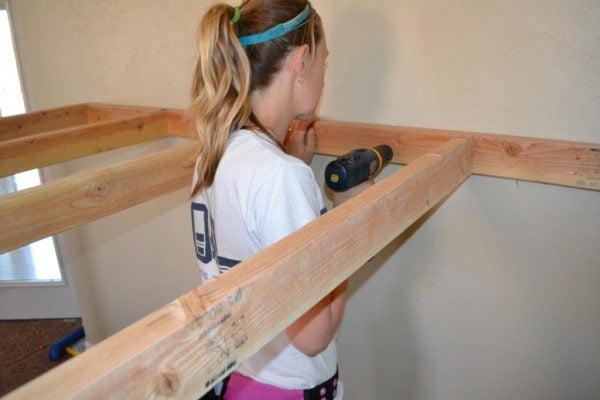
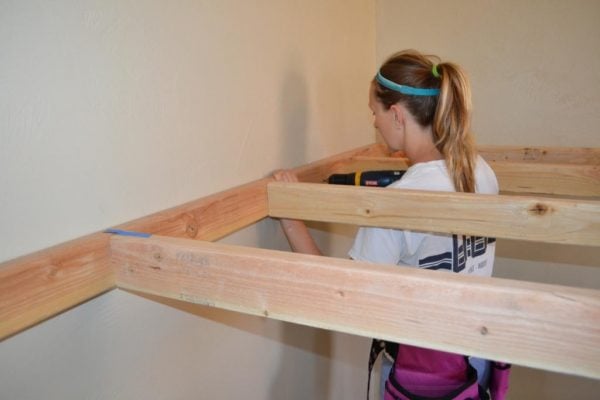
Next step is to attach the frame to the wall.This is a two person step: one person to hold and one to drill (hey we can’t always be brain and brawn). Start by cutting a 4×4 vertical support beam to the desired loft height, 53 inches for this project, and rest one corner of the frame on top. Remember to account for the height of the frame and the wood flooring when deciding how high to attach the frame.
At this point, make sure you have a level! Rest the level on the frame while drilling to ensure it stays level. Use four inch screws and sink INTO THE STUDS! If you hit drywall your loft will eventually come crashing down, possibly before you’re even done. Pre-drill with a drill bit a tad smaller in diameter than your screws, then sink two screws into each stud along your connection walls.
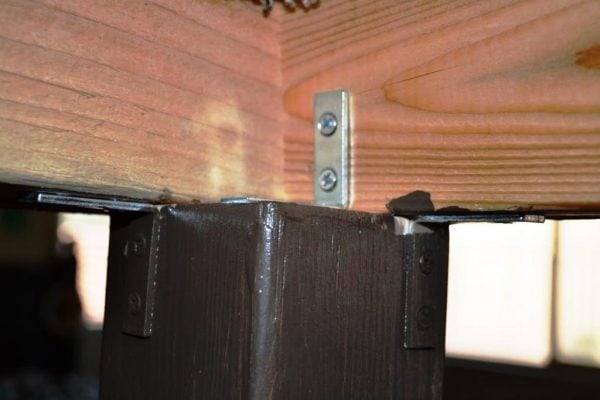
After your frame is attached to the walls secure the support beam to the frame. Use heavy support brackets to ensure it doesn’t move…don’t count on pressure to keep it in place!
Now the flooring. I wrapped the bare wood floor board with a remnant piece of carpet I scored from a carpet store. If you’re not picky, carpet stores will sell remnants for 7 to 10 dollars from job leftovers. The carpet in this project was free! I stapled the carpet to the bottom of the floorboard and slid on top of the frame (by slid I mean huffed and puffed and prayed for strength to lift it on…I recommend not doing it alone).
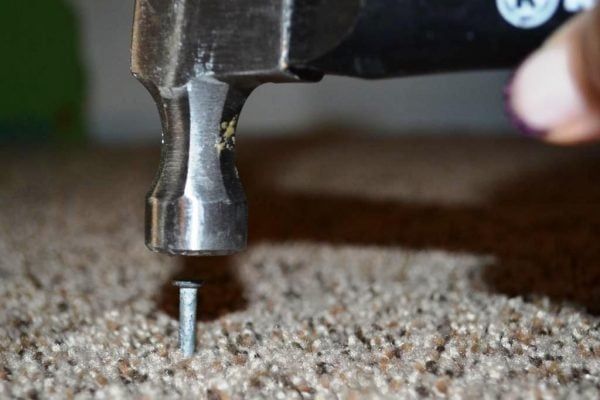
Once it was on the frame I nailed through the carpet and floorboard into the 2×4’s in the frame below to secure the board.
With the frame done, it was off to the races! The next step was the enclosure. Besides the swing, this step the most fun. It was kind of Dr. Suessish and I loved it.
It might sound crazy but the trickiest part of designing the treehouse was trying to enclose the thing. My bff hubby knows that one day we will need to sell this house and he would like it to stay absolutely vanilla until then. He gasps when I announce a new accent wall, just imagine the quizzical expressions he doled out when I was determined to build an indoor tree house, with a slide, and a swing, and paint, and…. well, perhaps you get those looks with your projects too (he’s a pretty good sport though). Anywho, I wanted minimal change to the house, but utmost safety. I also wanted the thing to look like a tree house, not a loft, so that called for a little more creativity.
I considered the following ideas that are perfectly great and you may want to use, my reasons for not using them may not be applicable to you:
- Railing. A great option. Building a railing is time consuming (think sanding, sanding, sanding) and buying railing is expensive and I am a shameless cheapskate. But most of all, it wasn’t the look I was going for.
- Full enclosure, like a box. I love tree houses that incorporate this look, they can be super cool. But full enclosure means more holes in your ceiling and structure, which gets the husband skeptical. Also, I didn’t have any access to light in that corner, which means it would be a little dim and spooky up there. The desire for a tree house was magnified by the “Magic Tree House” book series and I wanted the kiddos to read and read in there… hard to do without light!
- Bulky sailor-like rope railing. This would also be super cool, but rope is a little pricey (like pirate-y kind) and there was something about a rope fence and children that hinted strangulation to me.
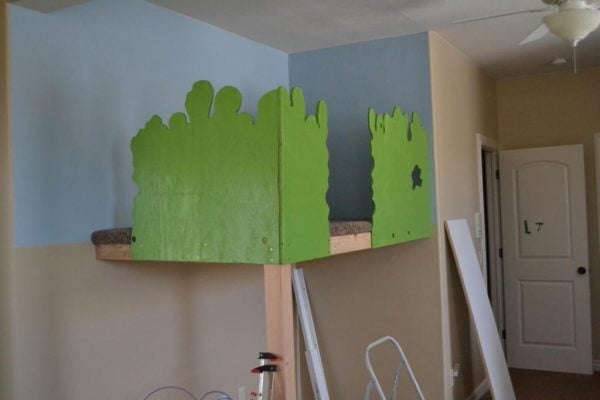
What I came up with was a use-leftover-wood-and-cut-til-it-looked-like-a-tree-and-leaves approach. I had the materials, it kept with the theme, allowed light in, didn’t drill into the walls, and was safe. Perfect. The process:
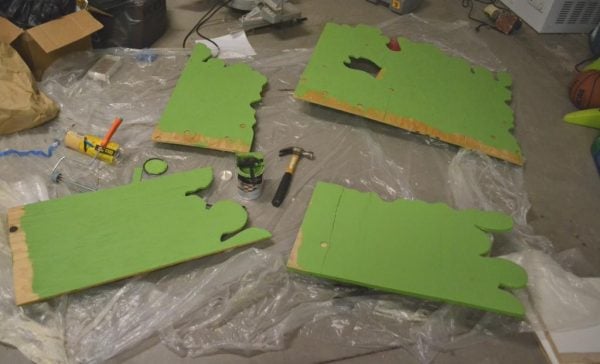
- I used leftover flooring and wood from other projects to piece together the enclosure around the tree house, allowing a 16″ opening in the front for the rock climbing trunk and 18″ opening for the slide. I sketched out leafy tree-like pattern that was 18″ at the lowest point for safety and cut along the pencil lines with my beloved jigsaw (nope, I don’t have a wood shop, just some food buckets!)
- Sand, sand, and sand some more… I knew there would be little fingers grabbing everywhere and I wanted it to be smooth on all parts.
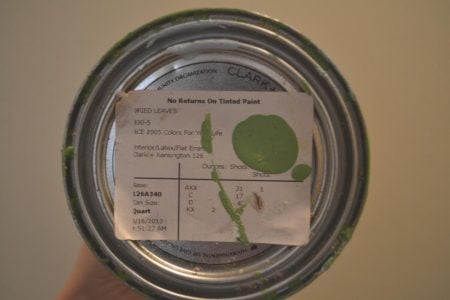
- Paint. I scored this “Dried Leaves” green paint for free during a Clark & Kensington paint weekend promotion and it is really good paint. Ahhh, the beauty of promotions.
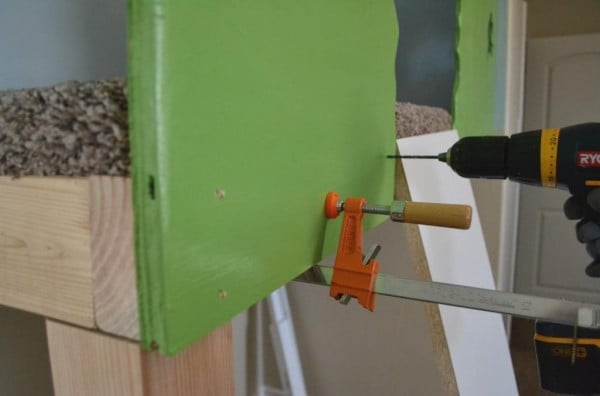
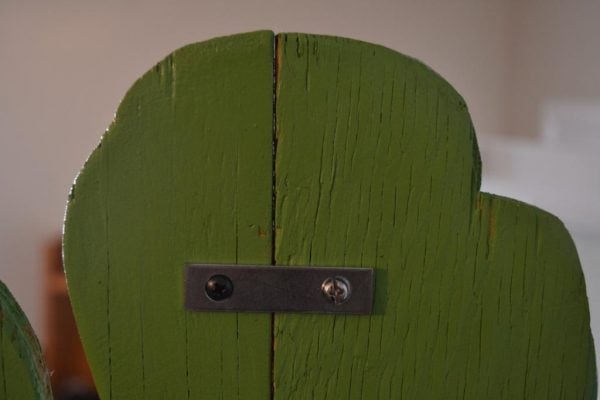
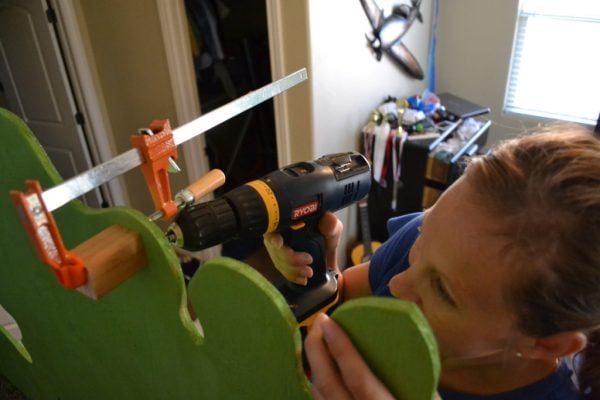
- Attach enclosure to the loft. Use wood clamps to brace the wood. Attach using two 3″ wood screws about 14 inches apart. Longer screws will poke through the opposite side… where the kids are playing. Ouch!
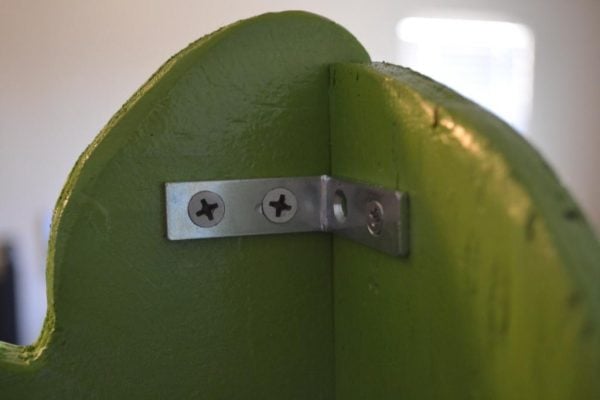
On the corners use straight and L-shaped brackets to provide more sturdiness to the enclosure (yes, I use any screws I can find!).
To make sure it was sturdy I got up in the tree house and kicked the enclosure a bunch of times, leaned against it and read a book, and just tried to move it around and made sure it could take the beating it would surely receive. After the ruckus I was satisfied. This leafy gate is strong enough to withstand all the craziness that goes on in there!
- I added some playground toys I bought on eBay, a periscope and a telescope. The kids love them. I used scrap pieces to attach them to the tree house.
Voila! Creating the leafy tree-looking enclosure was a blast and once on the platform, it actually started looking like a tree and I began thinking I might just pull off the project after all!
Thanks for checking this out. I hope it helps you tackle that future fun corner in your home. You can check out my other tutorials and details on the Magic Tree House here.
Paint colors:
- Green: Clark & Kensington “Dried Leaves”
- Blue: Sherwin Williams “Take Five” (left over from a bathroom project)
- White (clouds): Valspar “Du Jour” a small sample jar for $3 at Lowes
- Brown: Valspar paint & primer “Canoe”
Amazing, right? I’m pretty sure this one thing alone will make your house the cool house amongst the younger set, even if you serve vegetables for after school snacks 😉 Thanks for sharing, Sarah!
Be sure to swing by I Am Hardware to see how Sarah built the other parts of the treehouse, and to check out all of her other creative projects!
Lorene has been behind the scenes here at Remodelaholic for more than a decade! She believes that planning projects and actually completing them are two different hobbies, but that doesn't stop her from planning at least a dozen projects at any given time. She spends her free time creating memories with her husband and 5 kids, traveling as far as she can afford, and partaking of books in any form available.








Thanks Cassity for the post! So fun!
That’s totally cool!! My kids are older, but maybe when we have grandchildren we can do this. Then, we would be the coolest grandparents!! I love it!!
Oh my goodness! What lucky kids! This is awesome, thanks for sharing the plans. 🙂
I have been telling my husband we need to build one of these for our 3 boys!!! Thank you soo much for the tutorial!!! I know what we need to do this summer 🙂
So fun, Delina! We’d love to see pictures when you build it!
Could you describe how to attach the slide so there’s no nails in the face of the board as the boys slide down?
This is such an awesome play space. I think my boys would love this. I’m not really wanting to attach anything directly to my walls. Do you have a work around for making this a stand alone self supported project?
This is wonderful! That just there shows so much love. Great idea! Thanks for sharing!
Thanks for the comment, Ruth!
What is the slide made out of?
Thank you for this detailed post. I have something similar in mind and this is just what I needed to start! Bookmarking!
Glad we could help, Kirah! We’d love to see photos when you finish your project.