How To Apply Knockdown Ceiling Texture

Knockdown ceiling texture can be applied in 5 simple steps. It’s perfect for replacing a popcorn ceiling, finishing a basement, or completing a ceiling repair project. Learn how to apply knockdown ceiling texture.

[pinit align=”center” url=”POSTLINK” image_url=”https://www.remodelaholic.com/wp-content/uploads/2019/07/DIY-knockdown-ceiling-texture-tutorial-from-Remodelaholic.png” description=”Knockdown ceiling texture can be completed in 5 simple steps! Use this tutorial in your remodeling, basement finishing or ceiling repair project. #Remodelaholic #ceilingtextureideas #knockdownceilingtexture #tutorial”]
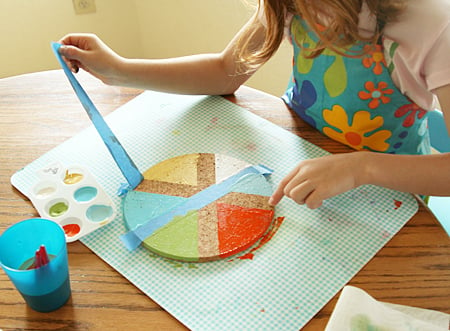
When you have finished the knockdown ceiling texture, let us help you choose an on-trend paint color, decorate with a customized farmhouse printable and add character to the ceiling.
This post contains some affiliate links for your convenience. Click here to read our full disclosure policy.
MATERIALS
- Plastic sheeting to cover walls and flooring
- Masking Tape
- Paddle Mixer
- Drill
- Pre-Mixed Joint Compound OR 5-gallon bucket & All-Purpose Drywall compound
- Hopper Gun – (ceiling sprayer)
- Air Compressor
- Knock-Down Knife
Step 1. PREP
Move or cover all the furniture in the rooms you will be working in. Use a large piece of plastic to cover the entire floor, taping the sides to the walls or trim. Then apply the sheeting to all walls, overlapping the sheet from the floor to ensure complete coverage.

Step 2. MIX YOUR DRYWALL COMPOUND (If needed)
Fill your 5-gallon bucket half full with the all-purpose drywall compound. Attach your paddle mixer to your drill and add two cups of water to the compound. Place the paddle mixer into the mixture and slowly begin mixing your drywall. Stir continuously until the mixture is thoroughly blended, adding more water as you go until the consistency resembles that of thin pancake batter.

If you prefer not to mix your own, you can find a premixed bucket of about 60lbs of “mud” at most home stores for about $10. We recommend buying two buckets to start so you don’t run out halfway through your project. (The consistency of pre-mixed compound may still need to be altered by adding water.)
Step 3. LET IT FLY
Once your drywall product reaches your desired consistency, fill your spray gun with the mixture and set it to the orange-peel or fine particle texture. (Don’t own a spray gun? Rent one from a paint store for about $25-$30 a day)
Before you begin spraying your ceiling directly, test the spray on a scrap piece of wood or plank. Start with your gun set to the highest amount of air pressure and if the mix comes out too thin when you test it, decrease the setting and test it again until your spray resembles the texture of an orange peel.
When you get the right texture, you are ready to start spraying your ceiling. Hold the gun about three feet from the ceiling and begin spraying side-to-side with long even strokes one layer at a time, covering the whole ceiling. Allow the first coat to dry for at least 8 hours before you apply your second coat.

Once your first coat is completely dry, you will add larger chunks of the mixture to enhance the texture. Repeat the same application process as with the first coat, this time with the sprayer set to create larger texture pieces. Hold the gun about a foot further away from the ceiling for this coat. Cover the entire space with long, even strokes across. When finished, inspect the ceiling texture and apply more to fill in any gaps or uneven spaces. Let sit for fifteen minutes.

Step 4. SCRAPE
The final step in your DIY knockdown ceiling texture project is to the scrape across the textured compound with a knockdown knife. Only flatten the texture, do not completely remove it. This is controlled by the amount of pressure you place on the knife as you pull over the ceiling. The knife smoothes the textured peaks, creating a random maze design. Once all of the peaks and large mounds are smooth and flattened across the entire ceiling, allow the space to dry for at least 48 hours before you begin painting.
Step 5. PAINT
Wear old clothing and keep your floors covered. We are fans of rolling on ceiling paint — we find spraying requires more going back to fix and repaint. If you have or rent a sprayer, do several light coats and remember that, though spraying covers faster, you will need more paint. Also, a good respirator mask is a must!

To roll on the paint, use an extension pole for your paint roller and apply similarly to wall paint. One of us usually cuts in along the edges while the other comes behind and rolls. We also always buy paint with primer in it because, trust us, when you’re done with your first coat your neck is going to hate you if you have to do it all over again. haha!

We hope you enjoyed learning how to apply knockdown ceiling texture.
We can’t wait to see your projects. Show us what you’ve done by submitting here and tag us @remodelaholic and @construction2style and so we can give ya some love. Happy Renovating!

More beautiful ways to update a ceiling:
beadboard ceiling to replace basement drop ceiling
easy install diy ceiling coverup
Originally published 10.29.2016 // Updated 07.11.2019
Hey friends! Or soon to be friends! hehe. From the bottom of our hearts it is SO nice to meet you. We are Jamie and Morgan, a husband and wife home remodeling, styling, and blogging team out of MN. We blog over at construction2style all about residential remodeling, interior styling, carpentry, custom-built furniture designs...and our family (and probably a lot more TMI). hehe. We just want to help create a place for you to build your legacy within; your home. So we share as much as we can within very detail of our projects and within our own home.